

15 IKEA Kallax Makeover Ideas to Turn Basic Shelving Into Custom Furniture
An IKEA Kallax makeover turns a flat-pack cube shelf into a piece that looks built for your room. This guide gives you 15 IKEA Kallax makeover ideas, each with materials, costs, color pairings, styling swaps and a shopping list.
Picture the grain of fluted oak under your fingertips, the soft hum of a warm LED glowing across a shelf of books, and the cool, matte finish of fresh paint. A plain white grid of cubes becomes a sideboard with presence, a bench you want to sit on, or a desk that makes the whole room feel pulled together.
Here are 15 ideas worth saving, and stealing.
Why IKEA Kallax Makeover Ideas Work So Well
The Kallax launched in 2014 as the successor to the Expedit, and its square 13-inch (33 cm) cubes quickly became the most hacked shelf in the world. The frame is simple, sturdy, and cheap, which makes it a blank canvas. Because the proportions are so consistent, mods designed for one Kallax fit nearly every Kallax.
Most makeovers rely on a short list of materials: 1/4-inch fluted oak veneer, peel-and-stick wallpaper, tapered beech legs, rattan cane webbing, and adhesive-backed LED strips. The colors that work best are warm oak, sage green, off-white, matte black, and brass.
The trend is driven by renters and first-time buyers who want custom-looking furniture without custom prices. Social platforms are full of “IKEA hack” tutorials, and the fluted and cane looks borrowed from designer sideboards cost a fraction of the originals.
Beginners can do most of these. Gluing, painting and screwing on legs need only a drill and patience. The honest limit is the Kallax’s hollow honeycomb board, which can’t take heavy screws or cuts without reinforcement.
| Style at a Glance | |
| Philosophy | Keep the sturdy frame, upgrade the surfaces, add one statement detail |
| Key Materials | Fluted veneer, cane webbing, tapered legs, adhesive wallpaper, solid wood tops |
| Key Colors | Natural oak, sage green, warm white, matte black, brushed brass |
1. The $60 Fluted Wood Front That Looks Custom-Built

Fluted panels glued onto Kallax door inserts give a flat-pack shelf the vertical ridges of a high-end sideboard. Up close, the grooves catch light and shadow, which is what makes it read as solid wood.
Material note: Cut flexible oak-veneer fluted panels to 12.5 x 12.5 inches, then glue them onto the 13-inch door inserts and clamp for 24 hours. Budget about 60–90 for a 2×4 with four doors. Beginner mistake: cutting with a coarse blade, which chips the veneer, so use a fine-tooth saw with painter’s tape on the cut line.
Color note: Warm oak against the white frame keeps the contrast soft, so the ridges do the visual work.
Styling swap: Replace plastic feet with a 2-inch oak plinth strip for about $12. This suits a modern living room or a stylish entryway.
💡 Quick Win: Buy fluted panels on a flexible mesh backing and cut them with a sharp utility knife in one pass.
Shop The Look
- Flexible oak veneer fluted wall panels, 4-pack
- White door inserts sized for 13-inch Kallax cubes
- Construction adhesive for wood panels
- Fine-tooth Japanese pull saw
- Iron-on oak edge banding strips
2. Two-Tone Sage and Oak Sideboard Under $75

Sage paint across the frame, with oak-toned fronts on every other cube, gives the Kallax a deliberate checkerboard rhythm. The matte finish feels soft to the touch and hides fingerprints.
Material note: Scuff with 220-grit sand paper, apply one coat of bonding primer, then two thin coats of satin cabinet paint with a 4-inch foam roller. Allow 4 hours between coats and 72 hours before loading shelves. Cost is about 35–50 in supplies. Beginner mistake: thick coats on laminate, which drip and peel.
Color note: Sage reads as a neutral, so it flatters oak and cream without competing.
Styling swap: Line two open cubes with a woven seagrass basket (about $15 each). This works for a family room or a nursery.
Shop The Look
- Sage green satin cabinet and furniture paint, quart
- Adhesion bonding primer for laminate
- 4-inch mini foam roller set
- 220-grit sanding sponge pack
- Delicate-surface painter’s tape
3. Mid-Century Sideboard Legs for About $40

Laying a Kallax on its side and adding tapered legs instantly produces a mid-century credenza. Lifting it 8 inches off the floor adds visual lightness, and the slender legs finish the silhouette.
Material note: Use four 8-inch tapered wood legs with angled mounting plates and 3/4-inch pan-head screws, so they don’t pierce the board. Total cost is about 35–45, and the build takes 30 minutes. Beginner mistake: screwing into the thin outer panel instead of a reinforced corner block, so glue in wood blocks first.
Color note: Walnut legs warm up the white frame, while brass plates add a quiet metallic accent.
Styling swap: Add felt furniture pads (about $6) under each leg. Suits a dining room or a hallway.
💡 Quick Win: Choose legs sold with a pre-drilled top plate so there is no measuring.
Shop The Look
- Set of 4 tapered walnut furniture legs, 8-inch
- Angled brass mounting plates with screws
- Pre-cut 1×1 pine corner blocks
- Felt furniture pads, large round
- Brass screw covers, 8mm
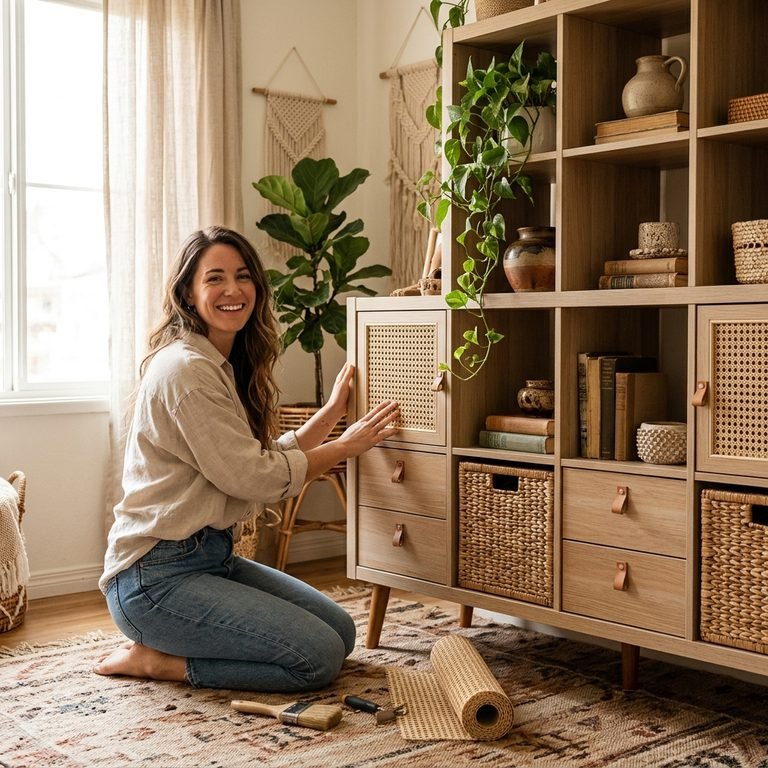
4. Cane Webbing Doors for Under $50
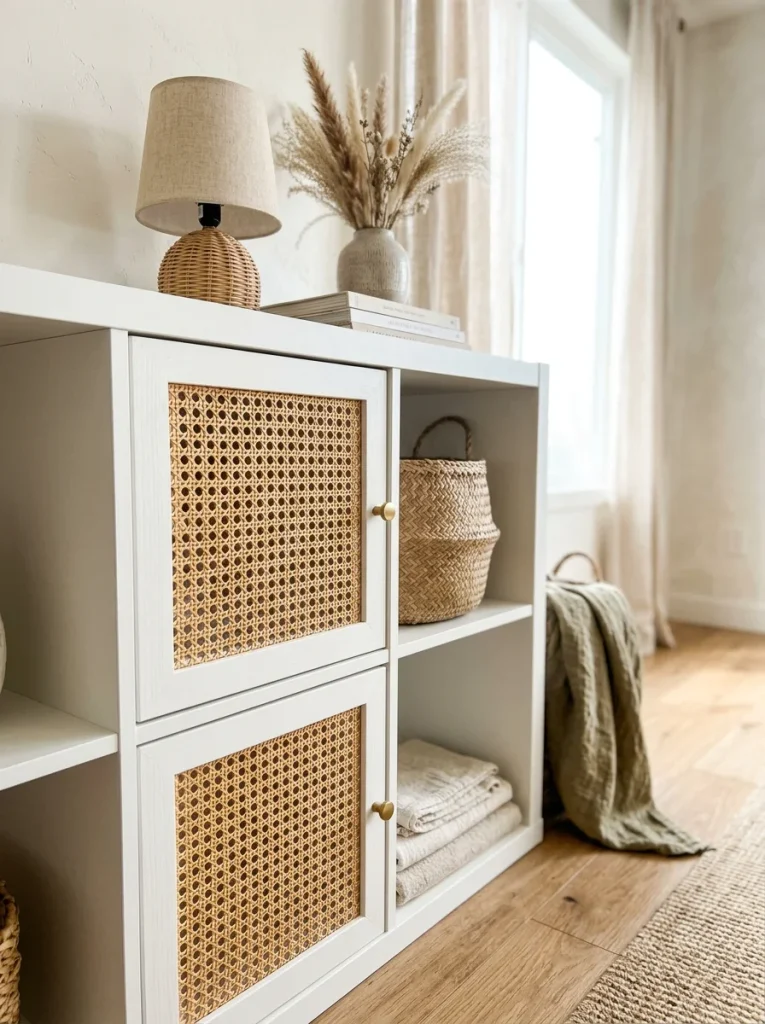
Open-weave cane over a Kallax door gives a breezy, textured front with a slightly translucent look. It reads as a rattan cabinet at a fraction of the price.
Material note: Soak cane webbing in water for 20 minutes until flexible, staple it to a 13-inch frame, trim the excess, and let it dry for 24 hours so it tightens. Webbing costs about 15–25 for a roll, so a 2×2 costs about 40–50. Beginner mistake: stapling it dry, which sags once humidity changes.
Color note: The warm gold of cane plus white laminate keeps the whole piece feeling light.
Styling swap: Tuck a linen-colored fabric panel behind the cane for privacy (about $8). It suits a bedroom or media wall.
Shop The Look
- Natural rattan cane webbing roll, 18-inch width
- Cabinet door frames sized for 13-inch Kallax cubes
- Heavy-duty staple gun with 1/4-inch staples
- Water-based clear matte wood finish
- Neutral linen fabric remnants, one yard
5. A Window-Seat Bench With Cushion in One Afternoon

A low Kallax topped with a cushion becomes a window bench that stores books, shoes or toys in each cube. Sit down and you get a firm, supportive seat.
Material note: Cut a 3/4-inch birch plywood top to overhang 1 inch, glue it down, and add a 2-inch high-density foam cushion with a zippered cover. Total cost is about 90–120. Beginner mistake: skipping the plywood top, because the foam will sink between cubes.
Color note: Olive velvet over a white frame feels rich but not heavy.
Styling swap: Add a continuous roll-top shoe mat inside one cube (about $10). Great for a mudroom or a kid’s room.
💡 Quick Win: Order a pre-cut bench cushion in the exact length you need.
Shop The Look
- 3/4-inch birch plywood panel, pre-cut
- High-density upholstery foam, 2-inch thick
- Olive velvet bench cushion cover with zipper
- Spray adhesive for foam
- Fabric storage bins sized for 13-inch cubes
6. Peel-and-Stick Wallpaper Backs for $20

Wallpapering just the back of each cube adds depth and a pattern reveal without covering the frame. Objects sit in front of it like art in a gallery.
Material note: Cut each square to 13 x 13 inches, clean the surface with isopropyl alcohol, then smooth from center outward with a plastic squeegee. A single roll is about 20–30. Beginner mistake: not cutting pieces slightly under size, so they bubble at the edges.
Color note: Navy and gold on white creates a classic, high-contrast pairing.
Styling swap: Match one cube’s pattern to a pillow (about $14). It suits a living room or an office.
Shop The Look
- Navy botanical peel-and-stick wallpaper roll
- Plastic smoothing squeegee tool
- Self-healing cutting mat, 12 x 18
- Rotary cutter with sharp blades
- Brass candlestick holders, set of 3
7. Glowing LED Display Cubes for Under $30
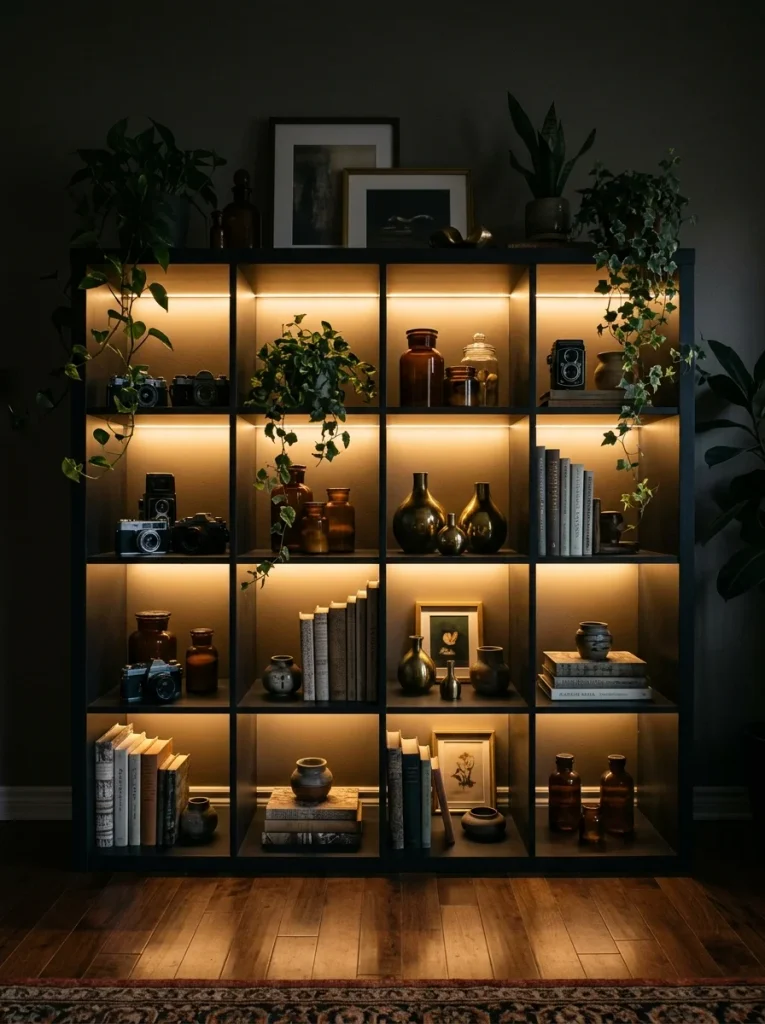
Warm LED strips along the top of each cube make a collection glow like a boutique display. The light washes down the back panel and softens the entire room.
Material note: Use warm-white (2700K) USB LED strips, cut at marked points to 12 inches per cube, and press them into place. A 16-foot roll is about 15–25 and runs off a small adapter. Beginner mistake: choosing cool white, which makes objects look clinical.
Color note: Charcoal paint plus amber light gives you glow without glare.
Styling swap: Plug everything into a $9 smart plug for a sunset timer. It suits a collector or a gamer.
💡 Quick Win: Choose strips with an adhesive back and built-in remote so no soldering is needed.
Shop The Look
- Warm white 2700K LED strip lights, USB-powered, 16 ft
- Adhesive cable clips, small, clear
- Smart plug with scheduling
- Aluminum LED channel with diffuser covers
- Charcoal chalk-style furniture paint
8. Leather Tab Pulls That Make Doors Feel Expensive

Door inserts need a handle, and soft leather tabs add warmth the cold laminate lacks. The leather loop feels supple and develops a gentle patina.
Material note: Each tab is a 1 x 6-inch strip of 3mm vegetable-tanned leather, folded and fixed with two brass screws and washers. Budget about 15–25 for eight tabs. Beginner mistake: overtightening screws, which crushes the leather edge.
Color note: Tan and brass echo each other, so the white door looks intentional.
Styling swap: Stamp a tiny initial into each pull with a $12 leather stamp set. Suits a gift-worthy room, like a home office.
Shop The Look
- Pre-cut leather drawer pull tabs with hardware
- Brass Chicago screws, 1/4-inch
- Leather hole punch set
- Edge dressing for leather
- Small stamped metal letter punches
9. The Entryway Shoe Bench With Baskets, Built for $100
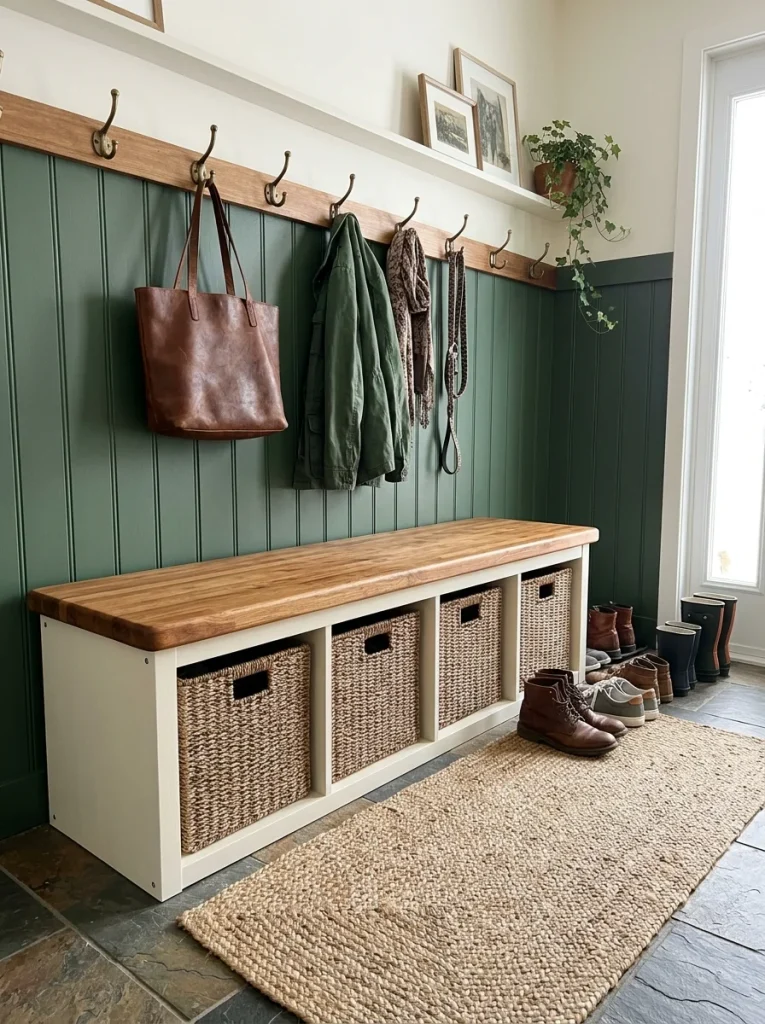
A butcher-block seat turns a Kallax into an entryway bench with six or eight hidden storage cubes. Baskets keep scarves and shoes out of sight and make the corner feel organized.
Material note: Cut a 1.5-inch-thick birch butcher block to 30 x 15 inches, seal with one coat of food-safe oil, and glue it to the frame. Cost is about 100–130. Beginner mistake: forgetting to anchor the unit, so use the anti-tip strap into a stud.
Color note: Natural wood on white feels clean, and green accents add life.
Styling swap: Label each basket with a $5 brass tag holder. Suits a busy family household.
💡 Quick Win: Use pre-finished butcher-block countertop pieces so you skip sanding.
Shop The Look
- Pre-finished birch butcher-block countertop, 30-inch
- Woven seagrass storage baskets for 13-inch cubes
- Anti-tip furniture wall strap kit
- Brass wall hook rail, 5 hooks
- Food-safe butcher block oil
10. A Floating Kallax Console on the Wall
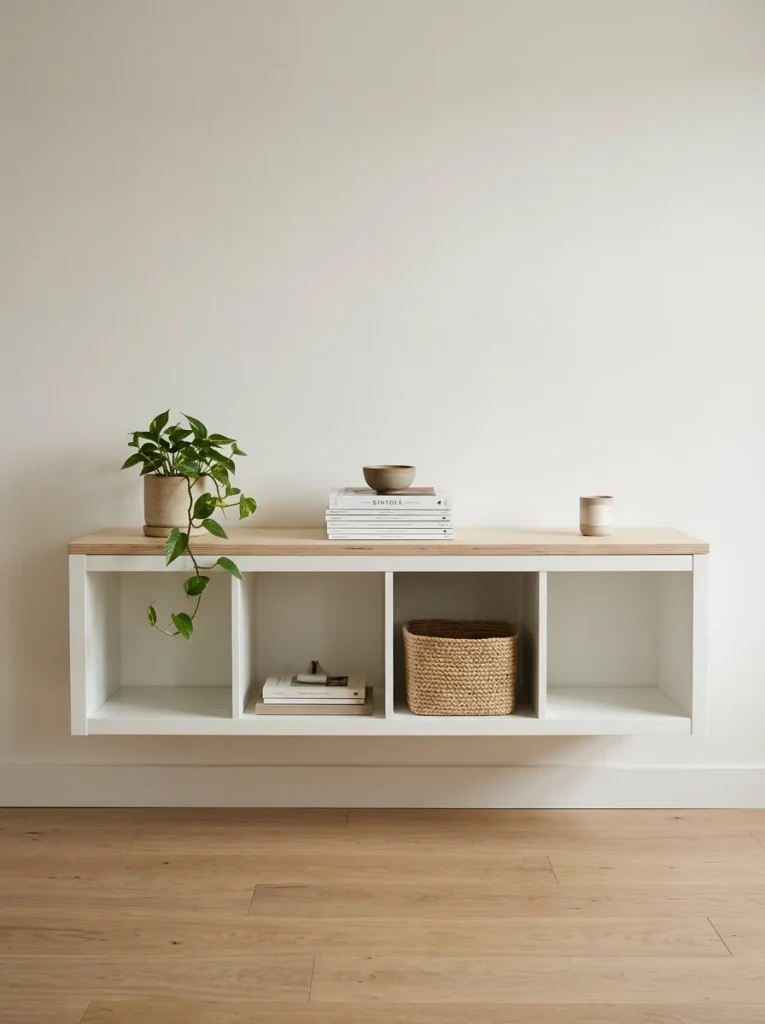
Mounted off the floor, a Kallax looks like a built-in and frees up floor space. The shadow beneath makes the room feel larger.
Material note: Locate studs, attach a 1×3 hardwood cleat to the wall with 3-inch screws, and hang the unit using the Kallax’s included rail plus metal brackets. A 2×2 holds about 25 lb per cube. Cost is about $30 beyond the shelf. Beginner mistake: mounting into drywall alone.
Color note: Light ash trim against white keeps it floating visually.
Styling swap: Add a plywood cap with a 1/2-inch overhang (about $20) for a built-in look. Suits a narrow hallway or small apartment.
Shop The Look
- Heavy-duty hardwood French cleat set
- Stud finder with AC detection
- Metal L-brackets, 3-inch, 4-pack
- Birch plywood shelf cap, 1/2-inch
- Cabinet-grade wood filler, white
11. Faux-Marble Top for $25

Marble-look vinyl across the top upgrades the surface in minutes. The veining mimics stone and catches light on a plain white shelf.
Material note: Wipe the top with rubbing alcohol, then apply marble-look vinyl in one pass with a squeegee, trimming 1/16 inch from the edge. A 6-foot roll costs about 15–25. Beginner mistake: pulling the vinyl tight, which warps the pattern, so lay it down loosely.
Color note: Gray veins add depth, while white keeps the unit light.
Styling swap: Add a $10 marble-look coaster set. Suits a bar corner or a vanity.
💡 Quick Win: Use a hair dryer on low to ease the vinyl around corners.
Shop The Look
- Carrara marble peel-and-stick contact paper, 6 ft
- Plastic felt-edge squeegee
- Precision craft knife with spare blades
- Brass decorative tray, small
- Marble-look coaster set with holder
12. A Kallax Dog Bed With Washable Cushion
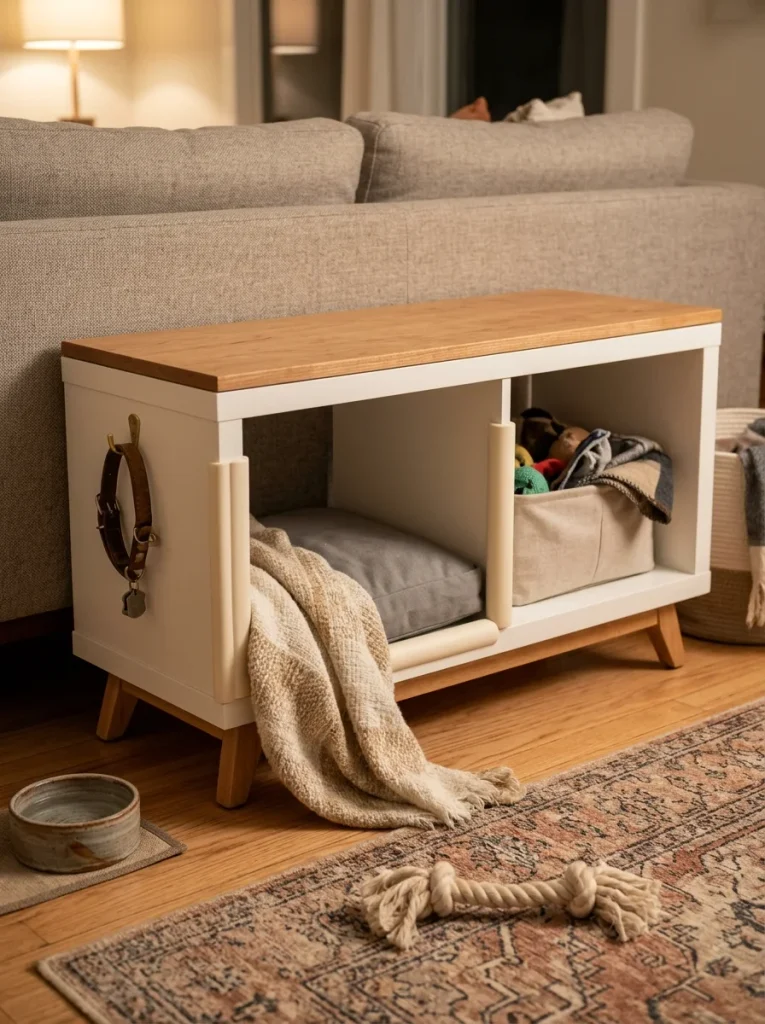
One open cube with a snug cushion makes a den, and the cubes above hold leashes and treats. The bed feels as cozy as a built-in nook.
Material note: Use a cushion cut to 12 x 12 x 3 inches, wrap the sharp inner edges with 1/2-inch foam tape, and keep the bed on the lowest row. Cost is about 25–40 with a shelf you already own. Beginner mistake: placing it where the dog can pull the unit over, so anchor it.
Color note: Charcoal hides fur and pairs with cream.
Styling swap: Add a hook for a leash (about $7). Suits a small dog or cat.
Shop The Look
Washable pet cushion, 12 x 12 inch
Self-adhesive foam edge protector tape
Stainless-steel pet bowl with silicone mat
Wall hook for leashes, brass
Woven rope toy basket
- A Wine and Glass Bar Cabinet From a Basic Shelf
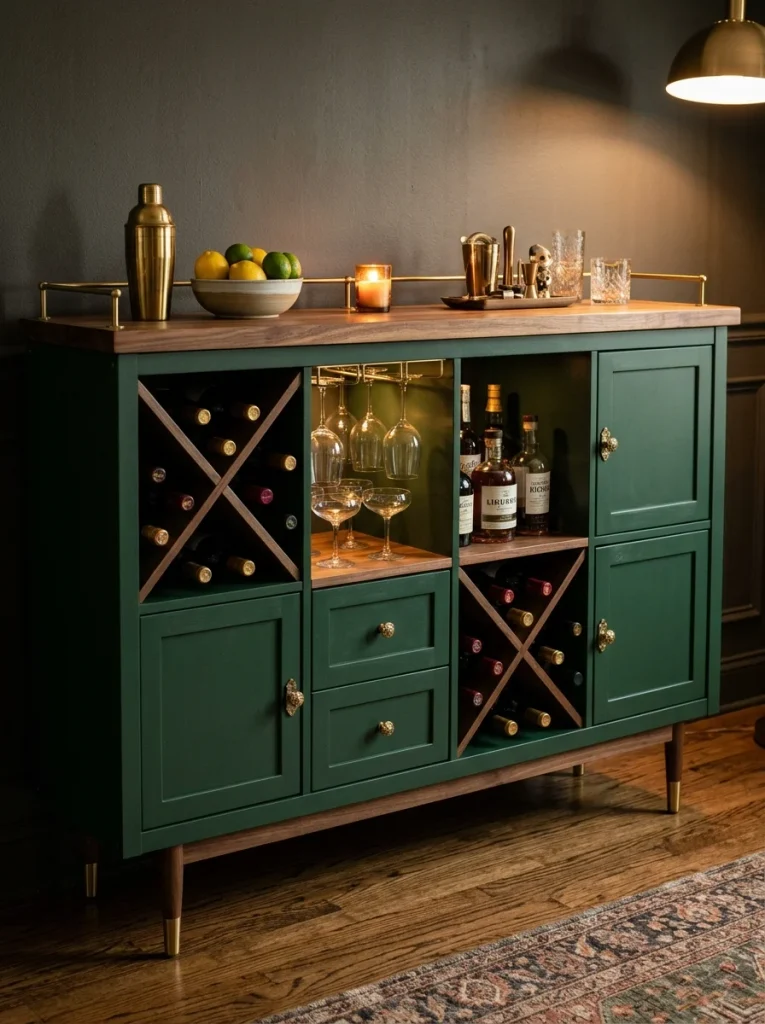
Paint a 2×4 deep green, add a few inserts, and you have a compact bar. Bottles lie flat in the cubes and stemware hangs upside down above.
Material note: Slot 13-inch diamond wine racks into four cubes, screw a stemware rack under a plywood cap, and add a 3/4-inch top. Cost is about 85–120 including paint. Beginner mistake: overloading one cube, since each should carry no more than 25 lb.
Color note: Deep green and brass create a speakeasy mood.
Styling swap: Hang a $10 chalkboard menu tag from the top. Suits a host or an entertainer.
💡 Quick Win: Buy wine rack inserts sized to Kallax cubes for tool-free installation.
Shop The Look
- Diamond wine bottle rack insert for cube shelves
- Under-shelf hanging stemware rack
- Forest green cabinet paint, satin
- Brass rail trim, 36-inch
- Mini chalkboard hanging tags
14. A Record Console That Hides Every Cable
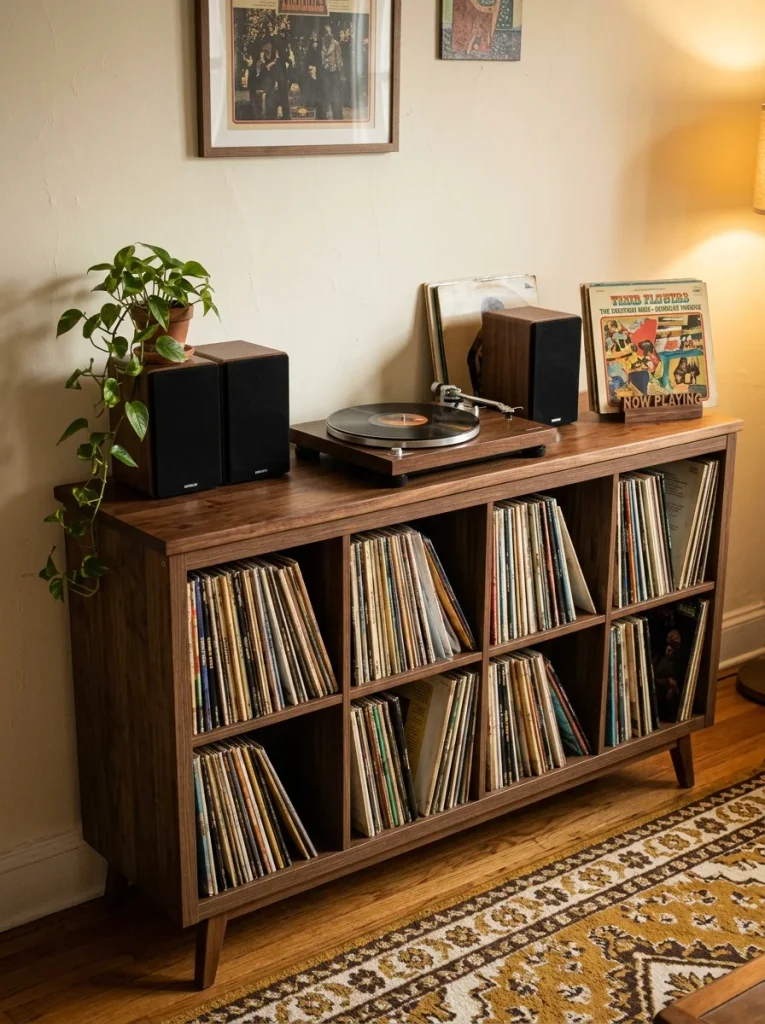
Kallax cubes happen to fit 12-inch records, so the shelf is a natural vinyl console. A wood top supports the turntable and speakers.
Material note: Cut a 3/4-inch walnut plywood top, drill a 1.5-inch cable hole, and stain with two coats of walnut gel stain, drying 6 hours between. Cost is about 60–90. Beginner mistake: applying stain to raw MDF, which blotches.
Color note: Walnut and black mimic hi-fi cabinetry.
Styling swap: Add felt record dividers (about $9). Suits collectors.
Shop The Look
- Walnut gel stain, quart
- Walnut-veneer plywood panel, 3/4-inch
- Cable grommet, 2-inch, black
- Record dividers for cube storage
- Turntable isolation feet
15. A Butcher-Block Desk With Built-In Storage for $150
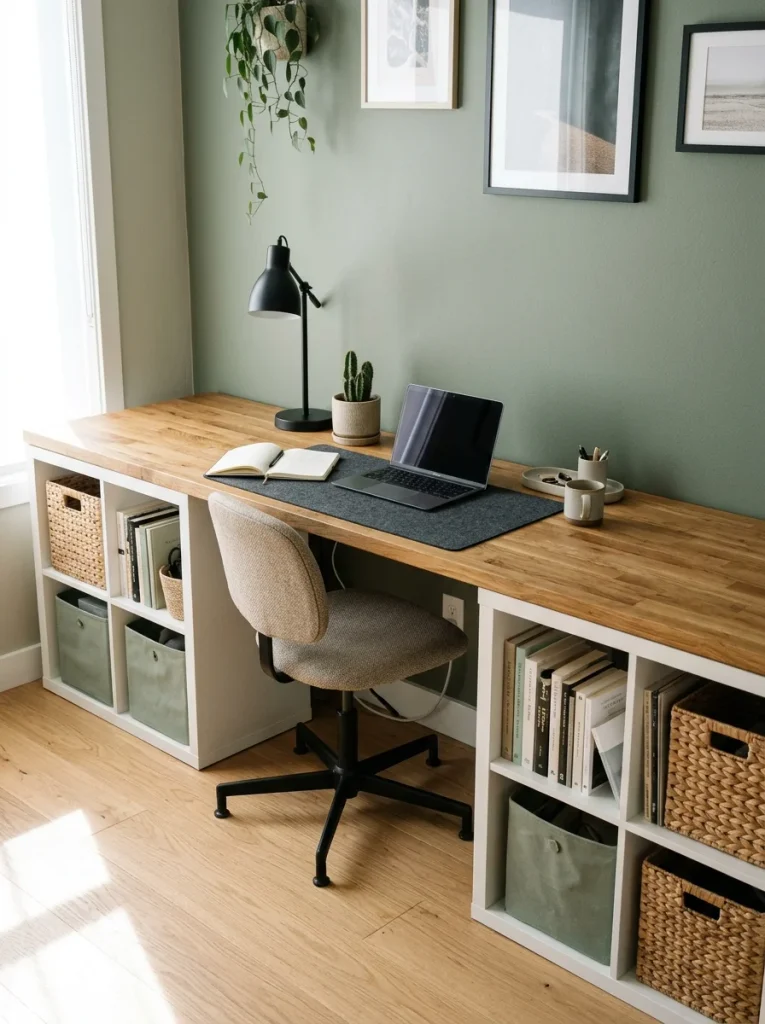
Two Kallax units with a long wood top make a desk with storage on both sides. The thick top feels solid under your wrists.
Material note: Span a 60 x 25-inch butcher-block top across the units, screw into reinforced blocks, and seal with oil. Cost is about 150–200 for two units plus a top. Beginner mistake: leaving the legs wobbly, so add a 1×2 rear stretcher.
Color note: Oak against white keeps the room calm and bright.
Styling swap: Add a $12 cable tray under the top. Suits a remote worker or a student.
💡 Quick Win: Choose a desktop slab sold pre-sanded with rounded edges.
Shop The Look
- Oak butcher-block desktop slab, 60 x 25 inch
- Under-desk cable management tray
- 1×2 pine stretcher boards
- Corner brackets for desk assembly
- Matte black desk grommet
How to Start Your IKEA Kallax Makeover Project
Start with a small shelf and one surface change. Painting a 2×2 Kallax in sage green is the best first move, because it teaches you how to prep laminate, apply thin coats, and let finishes cure, and every later idea uses those same skills.
The most common mistake is skipping primer. Laminate is slick, so unprimed paint scratches off within weeks. Fix it by sanding lightly, wiping with alcohol, and applying one coat of bonding primer first.
You can begin with three items under $50: a quart of satin cabinet paint (about $25), a roll of marble-look contact paper (about $15), and a set of four tapered legs (about $30, so choose one or two of these at a time).
Expect a weekend for paint, legs, wallpaper and LED strips, with the actual work taking a few hours and the cure time doing the rest. Wood fronts and stain need a full week for glue and finish to harden. A starter project costs about 60–100 and a full custom piece reaches 150–250, which is still a fraction of a designer sideboard.
Frequently Asked Questions About IKEA Kallax Makeover Ideas
What is the difference between a Kallax makeover and a Kallax hack?
The words are used interchangeably. A hack usually means a structural change, like adding legs or turning the unit on its side, while a makeover leans toward surface changes like paint or wallpaper. Most projects combine both. For example, a sideboard might use legs, fluted fronts and a new top.
What colors look best for a Kallax makeover?
Sage green, warm oak, matte black and cream are the safest choices because they pair with most rooms. Deep green with brass hardware suits a moody bar, while sage and oak feel light for living rooms. Pick a single accent color and repeat it once elsewhere in the room.
How much does a Kallax makeover cost?
Most makeovers cost 25–100 on top of the shelf, which itself is roughly 70–110 depending on size. Paint or wallpaper projects stay near 25–50. Wood tops and cane fronts reach 90–150. Each is typically a third of the price of a similar designer piece.
Can beginners do a Kallax makeover?
Yes, as long as you start with surface projects. Painting, contact paper and LED strips need only a roller, a squeegee and patience. Save cutting plywood or mounting the unit to a wall until you have done one easy project, and always anchor tall units.
Can you paint an IKEA Kallax?
You can, but you need to prep. Lightly sand the laminate with 220-grit paper, wipe it clean, apply a bonding primer, and finish with two thin coats of satin cabinet paint. Wait 72 hours before loading shelves so the paint hardens and doesn’t peel.
Ready to Start Your IKEA Kallax Makeover?
From fluted oak and sage paint to cane doors and glowing LED cubes, these IKEA Kallax makeover ideas show how far one humble shelf can go. Starting small is the smartest approach, so pick one surface, one color and one weekend. Today, measure your wall, choose one idea, and order a single quart of primer or a roll of contact paper. When you finish, your room will feel like it was designed on purpose, and every time you walk past, the piece will look better than the price tag suggests. Save your favorites, especially those deep green bar cubes and the glowing display shelf, so they are ready when you start.

5 Comments