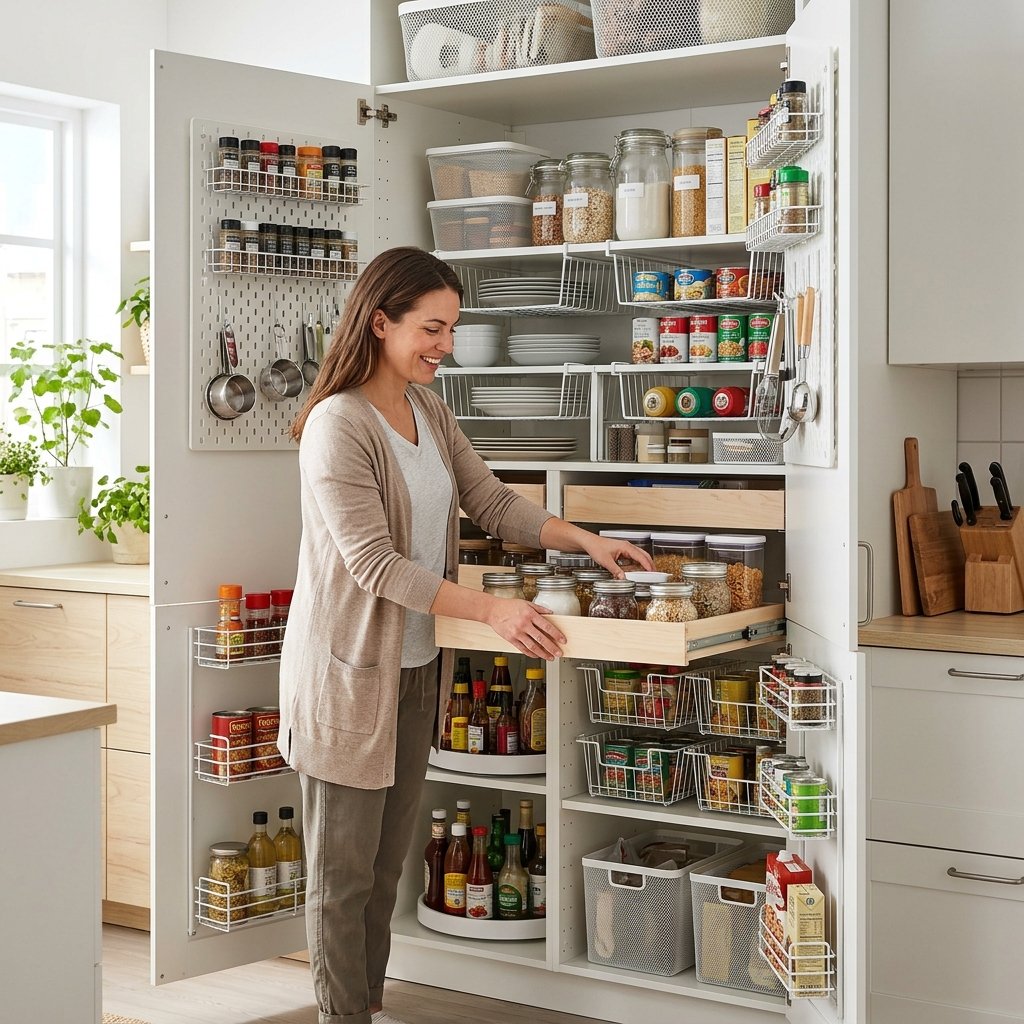
13 IKEA Kitchen Hacks for Maximizing Kitchen Cabinet Storage
IKEA kitchen hacks for maximizing kitchen cabinet storage are small, low-cost modifications that use IKEA organizers, fittings, and rails to turn wasted cabinet air into usable space. This guide gives you 13 specific hacks, each with materials, costs, and shopping lists. Picture a cabinet door that glides shut on a silent hinge, a shelf of matte white boxes that line up like a gallery wall, and a pull-out drawer that rolls forward with a soft rumble to show everything at once. Warm LED light spills across stacked bowls, and the faint scent of cedar and dried herbs drifts from a spice drawer. Here are 13 ideas worth saving — and stealing.
Why IKEA Kitchen Hacks for Maximizing Kitchen Cabinet Storage Work So Well
IKEA hacking started as a fan tradition: people modifying flat-pack pieces to do jobs the manual never intended. In the kitchen, that means taking affordable, standardized organizers and repurposing them inside cabinets, where most homes waste 30 to 40 percent of the volume above and behind what we actually reach for.
The core materials are simple. Powder-coated steel wire (RATIONELL baskets), bamboo (DRAGAN organizers), white and gray polypropylene (VARIERA inserts), and birch-veneer or melamine shelving (UTRUSTA) do most of the work. Everything is sold in repeating widths, so the pieces combine easily and replace easily.
The timing is right too. Rents are high, kitchens are shrinking, and renters want upgrades they can unscrew and take along. Organization content keeps trending on Pinterest and TikTok, and “everything has a place” kitchens now read as a design goal, not just tidiness.
Beginners can absolutely do this. Most hacks need a screwdriver and a tape measure, and half of them cost under $15. The honest limit is that pull-outs and corner carousels need basic drilling and careful measuring, and IKEA discontinues lines often, so check current stock before you plan.
| Style at a Glance | |
| Philosophy | Use every cubic inch; make everything visible and reachable |
| Key Materials | White polypropylene, bamboo, powder-coated steel wire, birch veneer |
| Key Colors | Matte white, warm bamboo tan, charcoal gray, soft oak |
1. The $4 Lid Organizer That Frees an Entire Shelf
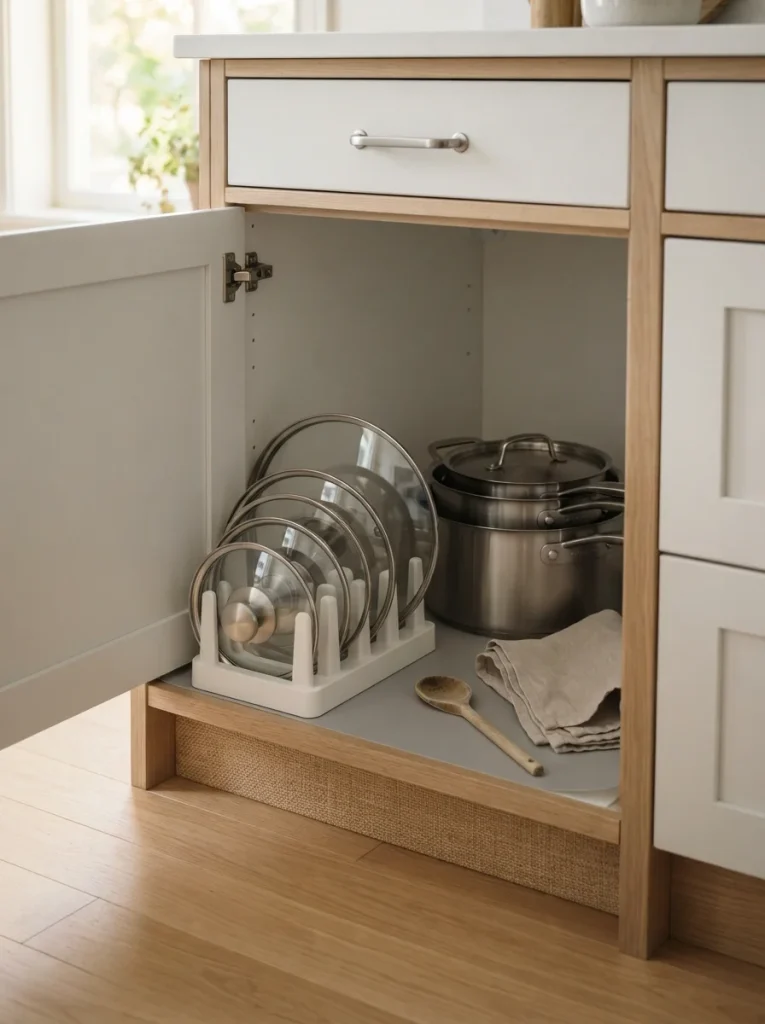
Lids are the worst shelf hogs in any kitchen, sliding around like coins. A narrow plastic lid organizer holds them upright in slots, freeing roughly a foot of horizontal shelf. It looks boutique because every lid stands at the same angle.
Material note: One lid organizer costs around $4 and takes about two minutes to place. Measure your largest lid’s diameter first, since a common beginner mistake is buying a rack too shallow to hold a 12-inch lid upright.
Color note: White against a gray liner keeps the shelf looking quiet, and the steel knobs become the only shine.
Styling swap: Line the shelf with gray non-slip liner so the organizer never shifts. Best for anyone with a deep, cluttered pots cabinet.
💡 Quick Win: Stand the organizer against the back wall so lids don’t scrape the door.
Shop The Look
- Non-slip shelf liner roll, gray
- Stainless steel tape measure
- Felt pan protector pads, 15-inch
- Silicone lid knob grips
- Mini torpedo level
2. The Cabinet Door Rail That Gives You a Free Storage Wall
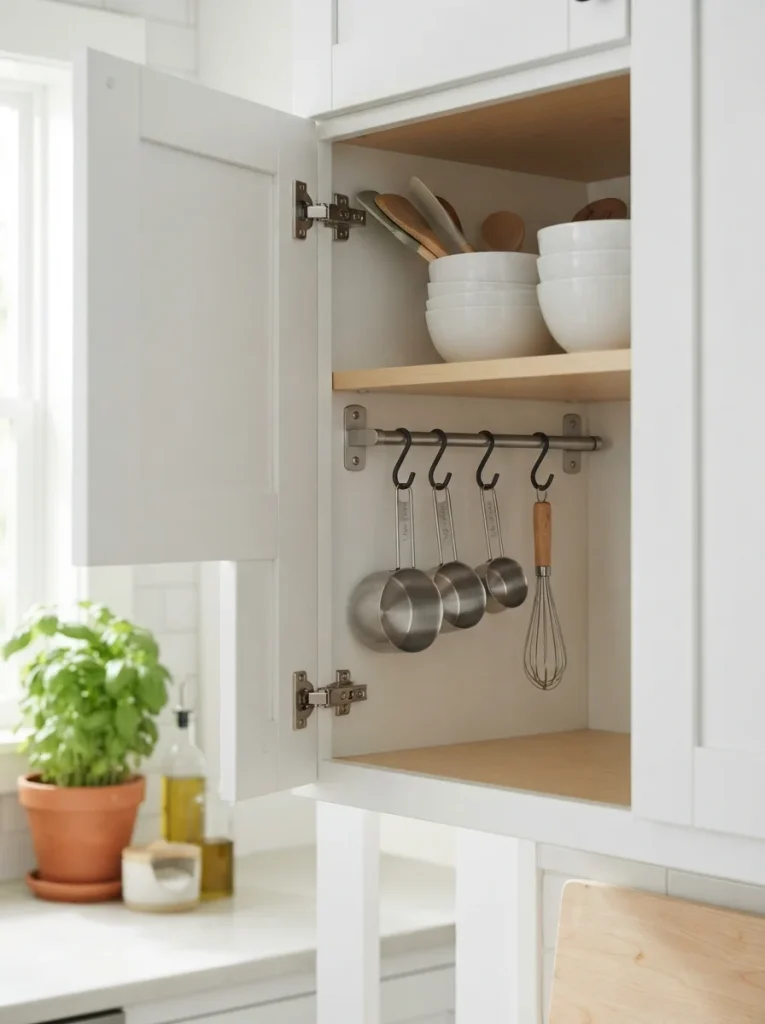
The inside of a cabinet door is almost always bare. A short steel rail screwed there takes five hooks and the small tools you reach for daily: measuring cups, whisks, a strainer. It turns dead door space into a display wall.
Material note: Use 1/2-inch pan-head screws so they don’t poke through the door front, and pre-drill each hole at 1/8 inch. The common mistake is mounting the rail too low, so nothing swings into the shelf below when you close the door.
Color note: Steel hooks on white doors stay quiet, and sage or birch accessories add a soft warm contrast.
Styling swap: Match hooks to your tools, small S hooks for measuring cups, larger ones for ladles. Best for the person who bakes on weekends.
Shop The Look
- Stainless steel S hooks, small
- Pan-head screws, 1/2-inch
- Cordless mini screwdriver
- Drill bit set with depth stop collar
- Measuring cups with hanging holes
3. Add a Second Shelf Inside Any Cabinet for About $8
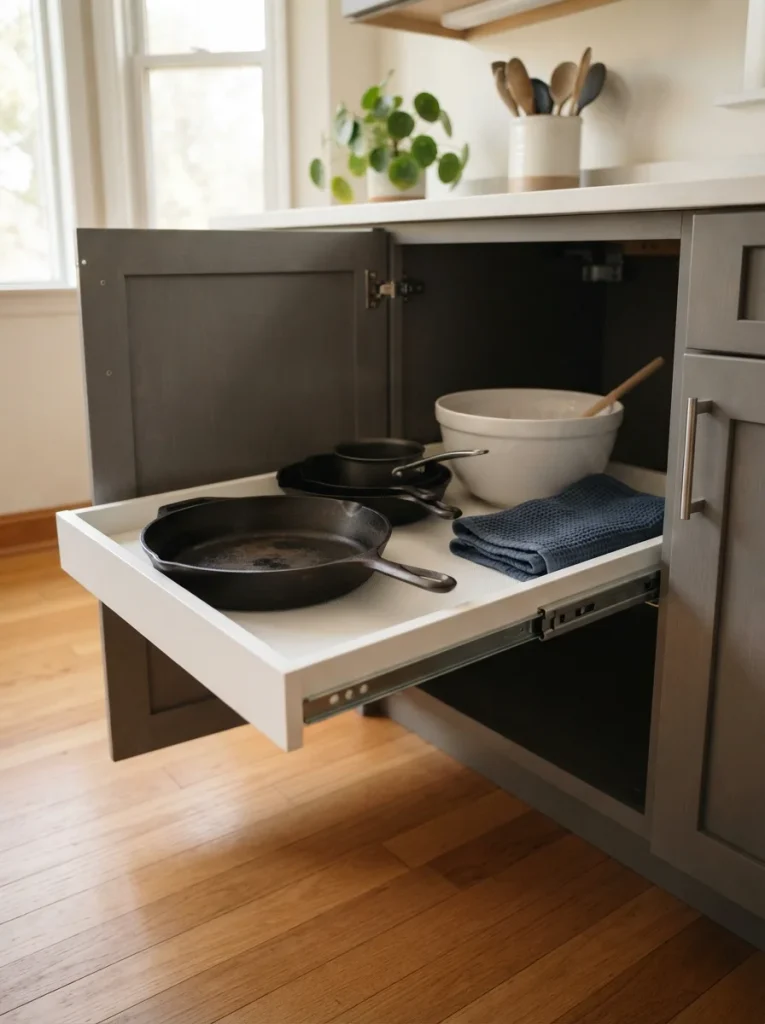
Deep base cabinets swallow things at the back. A pull-out shelf brings the whole contents to you in one smooth motion, and a variable-depth version fits your exact cabinet. It gives the cabinet a custom-fitted look.
Material note: Expect around $30 to $45 per pull-out and about 30 minutes to install with a screwdriver. Check your cabinet’s door-opening clearance first, because hinges and hinge plates can block the slides.
Color note: Gray runners and a white tray recede, so the cookware becomes the focal point.
Styling swap: Put heavy items like Dutch ovens on the lowest pull-out. Best for anyone with back pain or a deep corner base cabinet.
Shop The Look
- Clear storage bin with handle
- Acrylic shelf divider panels
- Round adhesive soft-close bumpers
- Silicone pot rest trivets
- Magnetic cabinet catch
5. Turn a Shallow Drawer Into a Spice Library
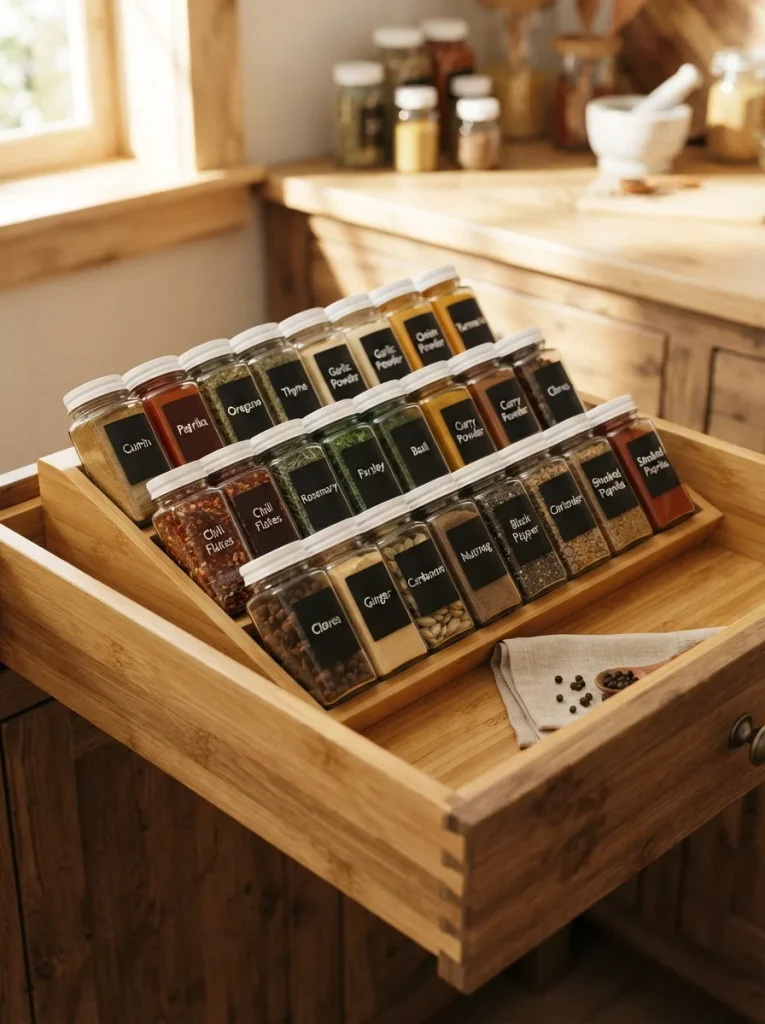
Spices lose to cabinets and win in drawers. An angled bamboo rack tilts every label toward you, so you can read all 20 jars at a glance. The drawer smells faintly of cumin and warm wood whenever it opens.
Material note: Allow around $15 for the rack and $20 for matching jars, and set up takes about an hour. The usual mistake is mixing jar heights, so measure drawer depth first and buy jars that clear the closed drawer by half an inch.
Color note: Bamboo and black labels keep the look warm and legible, while clear glass shows the spice colors.
Styling swap: Alphabetize left to right so guests can find anything. Best for the cook who hates digging.
💡 Quick Win: Label the lid and the front so you can read it from any angle.
Shop The Look
- 4-ounce glass spice jars with shaker lids
- Waterproof spice label set
- Mini stainless funnel
- Spice scoop spoons
- Label maker with black-on-white tape
6. Under-Sink Order With Sorting Bins and Pipe-Friendly Layout
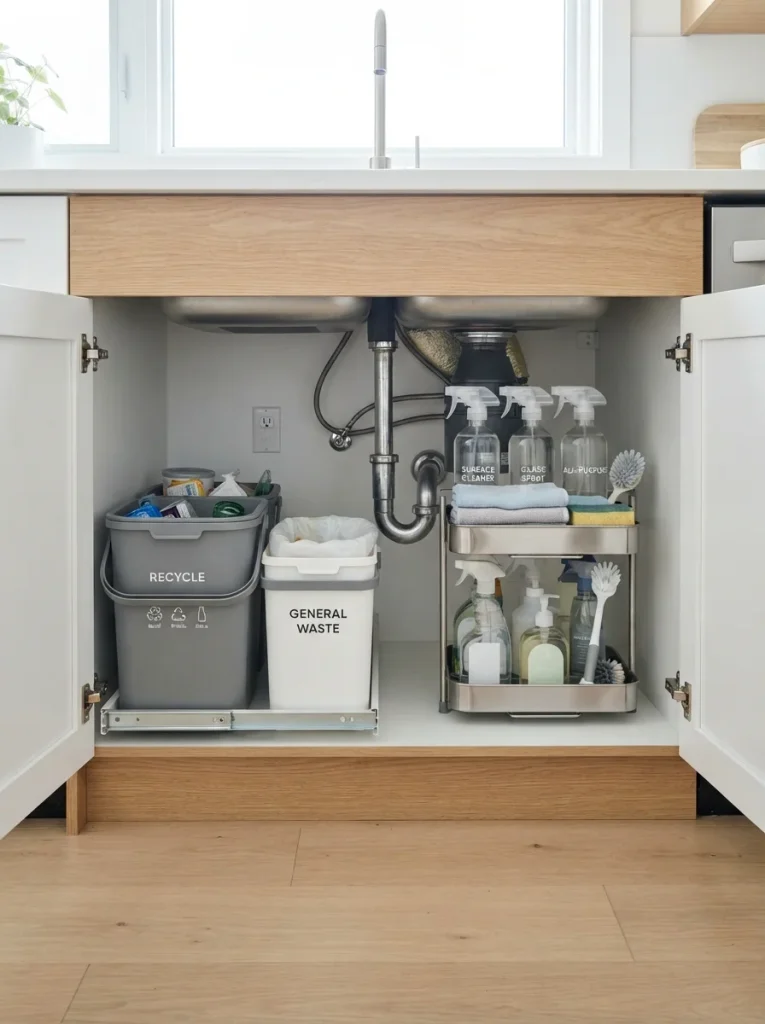
Under the sink is where organization goes to die, thanks to pipes and awkward space. Sorting bins on one side and a tiered caddy on the other work around the plumbing so nothing stacks or topples.
Material note: Budget about $25 for two bins and a caddy, and 20 minutes to place. Measure the pipe width before buying, since the common mistake is a bin that fits the cabinet but not the drain.
Color note: White, gray, and a touch of pale blue make a utilitarian space feel fresh.
Styling swap: Label bins “recycle” and “compost” in black marker on white tape. Best for households that sort waste.
Shop The Look
- Silicone under-sink drip tray
- Water leak detector alarm
- Two-tier cleaning supply caddy
- Cabinet door trash bag holder
- Microfiber cleaning cloth set
7. A Pegboard Wall Hidden Inside a Cabinet
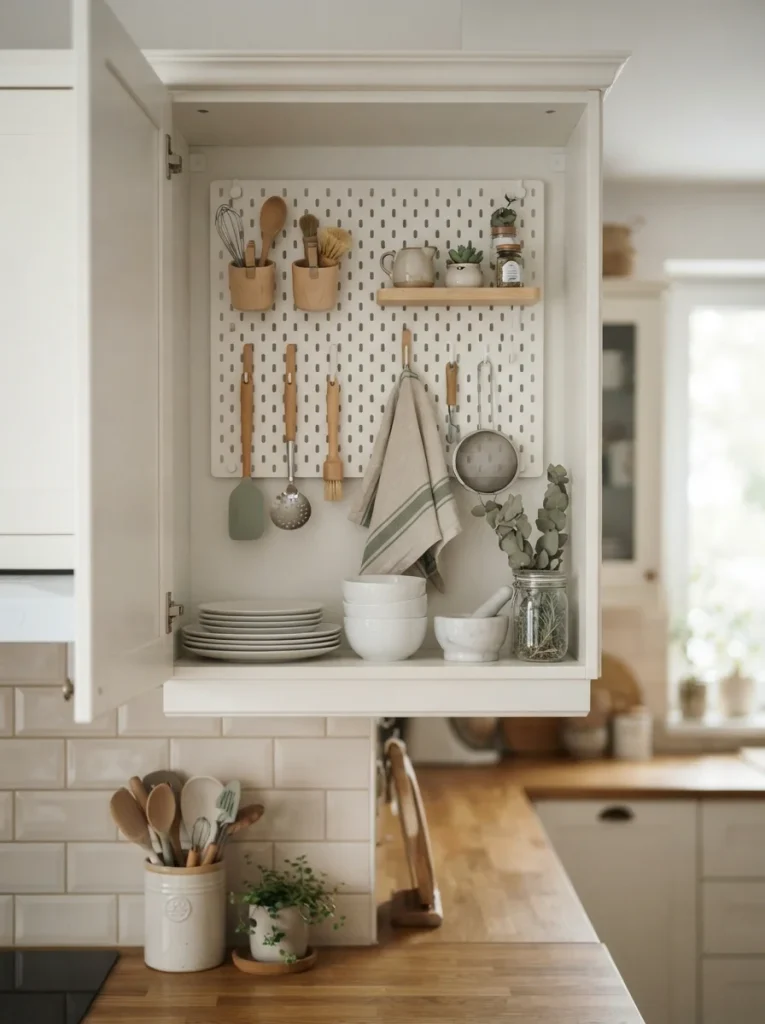
A perforated pegboard fixed to a cabinet’s back wall adds modular storage without any shelves. Hooks, cups, and tiny shelves can be moved anytime, so the layout evolves as your tools do.
Material note: Cut or buy a board 1 inch smaller than the cabinet width and mount it with four 1/2-inch spacers so hooks can seat. Allow about $25 and an hour. The beginner mistake is mounting flush, which leaves no room for pegs.
Color note: A white board with natural wood cups looks calm and Scandinavian.
Styling swap: Group by task, baking tools on the left, prep tools on the right. Best for those who like to rearrange.
💡 Quick Win: Keep one hook row empty for future tools.
Shop The Look
- Pegboard hooks, assorted pack
- Mini wall cup organizers
- Clip-on pegboard shelf
- Nylon spacers, 1/2-inch
- Pegboard bin set
8. Store Baking Sheets and Cutting Boards Vertically
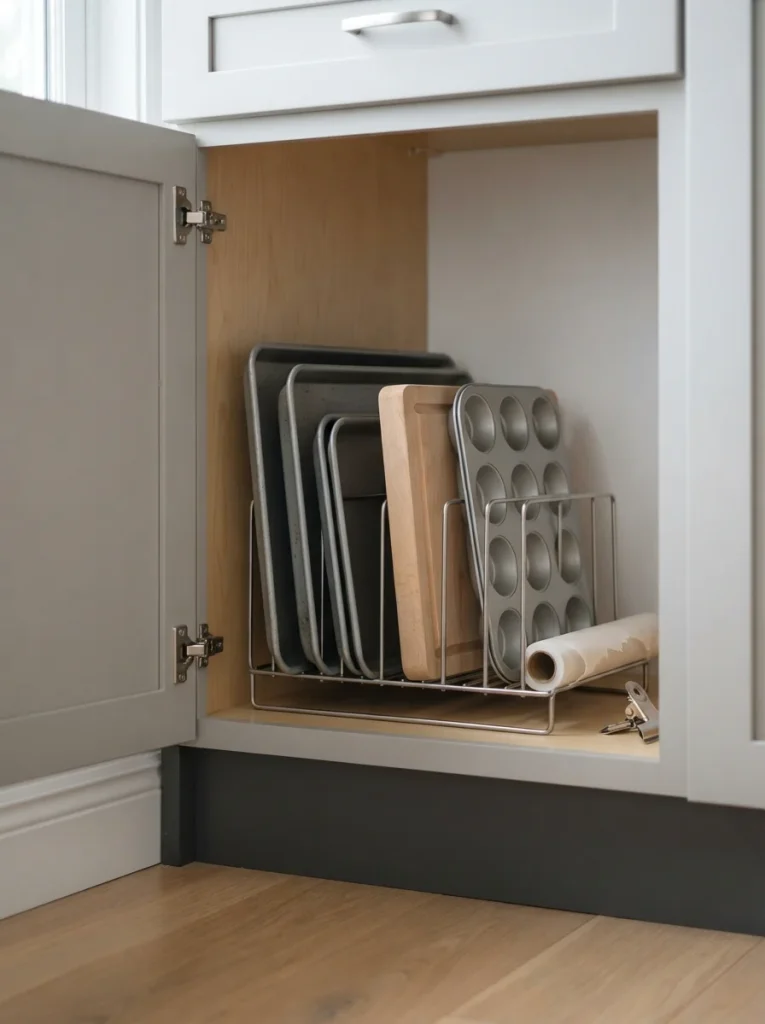
Stacking baking sheets flat buries the one you need. A plate rack laid on its side holds them upright like files, and you pull one without moving the rest. The result looks like a professional prep station.
Material note: A stainless rack costs around $10 and installs in under five minutes. The common mistake is placing the rack with slots facing the back, so turn it to face the door for easy sliding.
Color note: Steel and charcoal make a quiet, high-contrast pairing that suits any kitchen.
Styling swap: Add a small parchment roll beside it so the baking zone is complete. Best for weekend bakers.
Shop The Look
- Silicone baking mat set
- Parchment paper roll, 15-inch
- Stackable cooling rack
- Muffin tin, 12-cup nonstick
- Non-slip rubber feet for rack
9. A Corner Carousel That Ends the Dead-Zone Problem
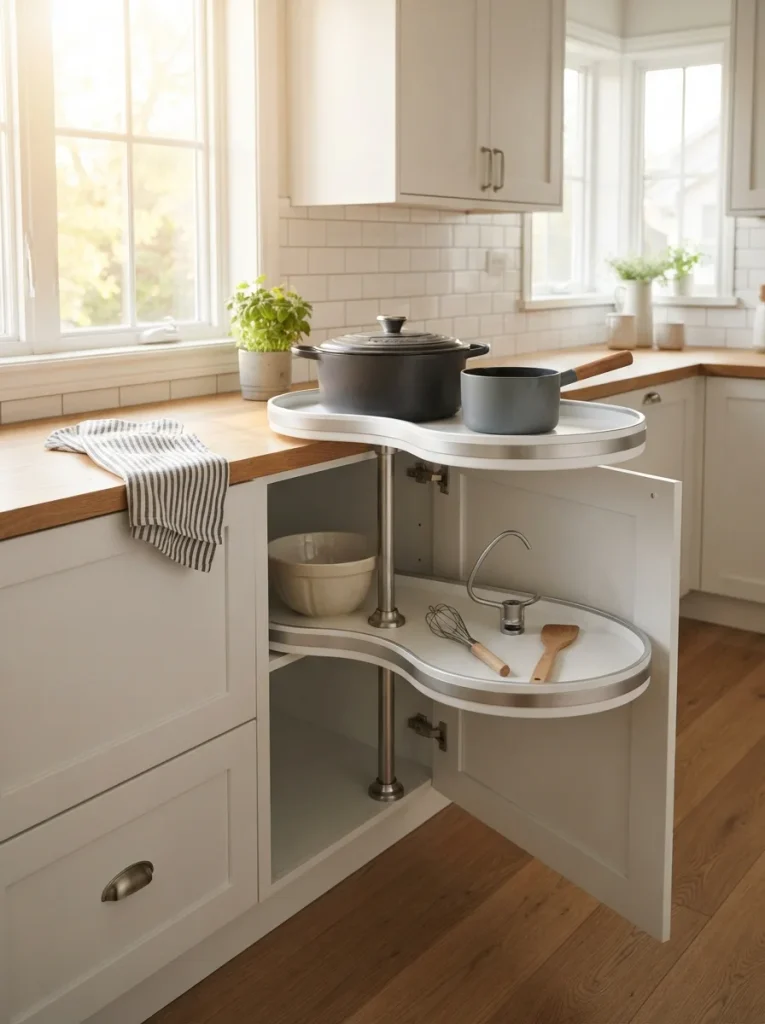
Corner cabinets swallow things forever. A rotating carousel pulls the whole corner toward you with one spin, so even the item at the back is a quarter turn away. It looks high-end without a custom price.
Material note: Expect $60 to $100 and about 45 minutes to install, as it requires measuring the door opening. The usual mistake is ignoring door clearance, so confirm the shelf diameter fits through the opening.
Color note: White shelves and silver poles keep a crowded corner looking light.
Styling swap: Store heavier items on the bottom shelf. Best for anyone with an L-shaped kitchen.
💡 Quick Win: Use a non-slip mat on each shelf to keep items steady during the spin.
Shop The Look
- 360-degree lazy susan turntable
- Non-slip silicone shelf mat
- Clear bottle holder rack
- Adjustable tension rod
- Stainless steel storage canisters
10. Deep Drawers for Plates and Bowls
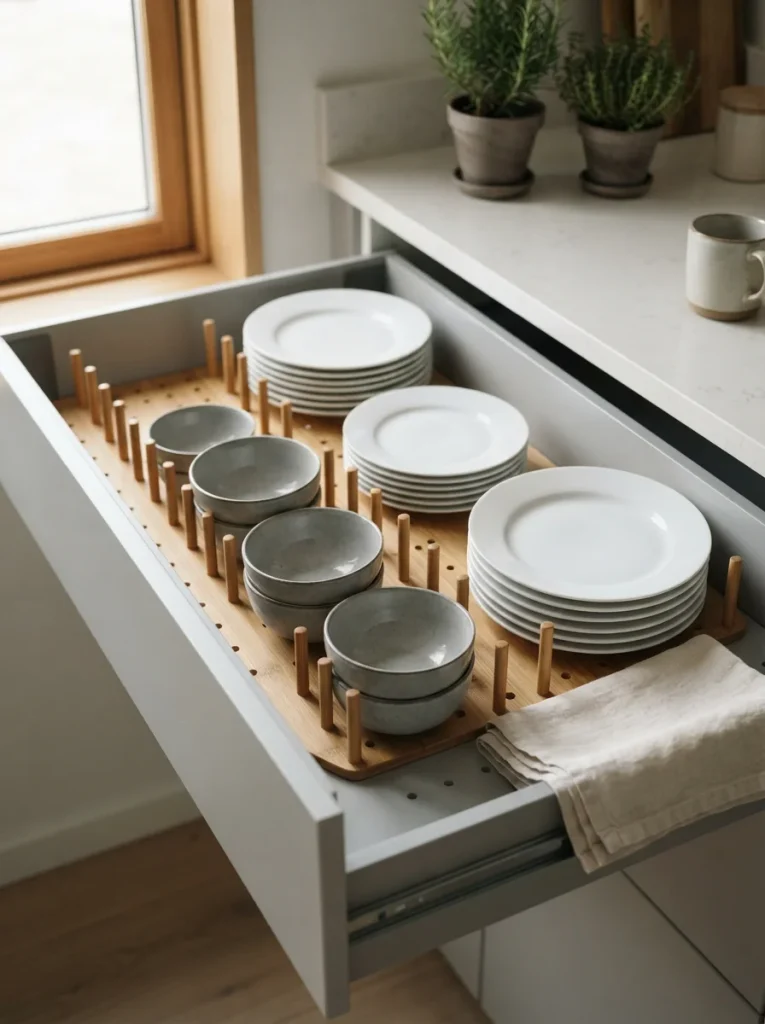
Putting plates in a deep drawer beats reaching up into a cabinet. You see every dish from above, and heavy stacks stay at waist height. Peg organizers hold each row in place so nothing slides when you close it.
Material note: Allow around $40 for a deep drawer set and about $15 for pegs. Drawer weight limits matter, so confirm the capacity before loading, since the mistake is overloading a standard drawer.
Color note: White and soft gray dishes on bamboo pegs keep the drawer calm and consistent.
Styling swap: Line the base with a silicone trivet mat for grip. Best for older family members.
Shop The Look
- Adjustable bamboo peg dish organizer
- Silicone trivet mats, large
- Felt plate separators
- Rubber bowl dividers
- Drawer-safe bamboo tray
11. Cabinet Lighting That Makes Storage Feel Larger
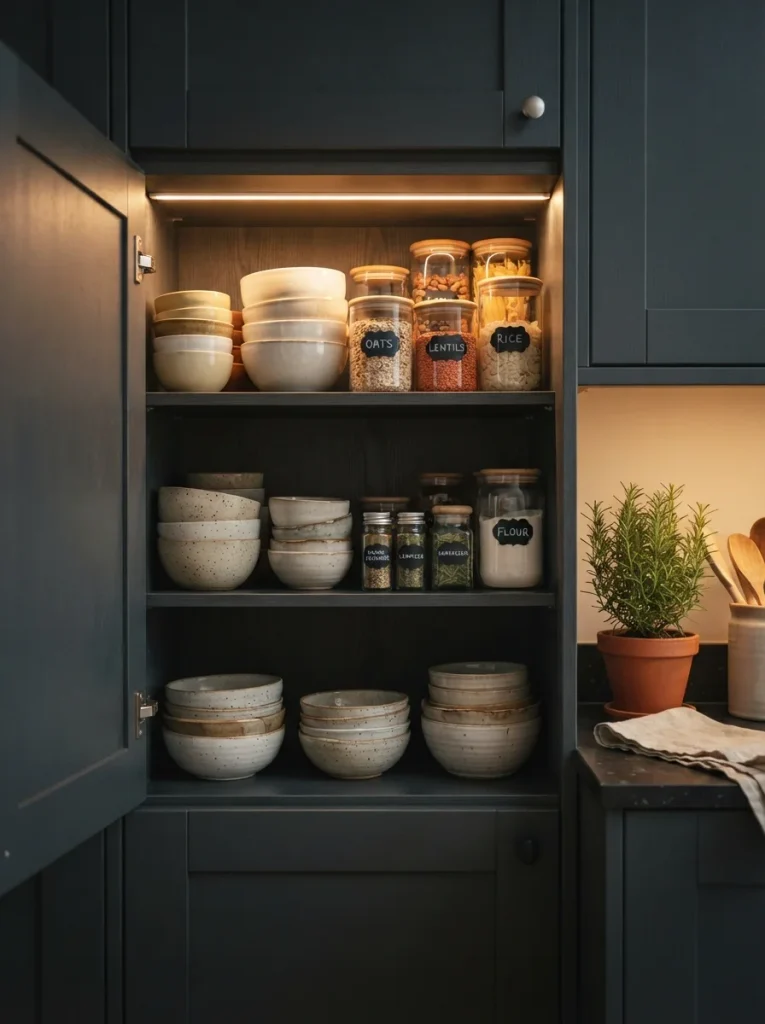
Dark cabinets hide their contents. A warm LED strip that turns on when you open the door makes everything easy to find and makes the kitchen feel finished. It costs less than most organizers.
Material note: A battery or plug-in LED strip runs $15 to $30 and installs in 10 minutes with adhesive. The beginner mistake is placing it at the back, which creates shadows, so mount it at the front edge facing in.
Color note: Warm white, around 2700K, flatters wood and ceramic better than cool light.
Styling swap: Pair with a motion sensor so lights switch on automatically. Best for dim, older kitchens.
💡 Quick Win: Test the strip with tape before sticking it permanently.
Shop The Look
- Motion sensor LED strip, battery-powered
- USB rechargeable puck lights
- Cable raceway channel
- Adhesive mounting clips
- Warm white LED strip dimmer
12. Make the Top Shelf Useful With a Step Stool and Bins
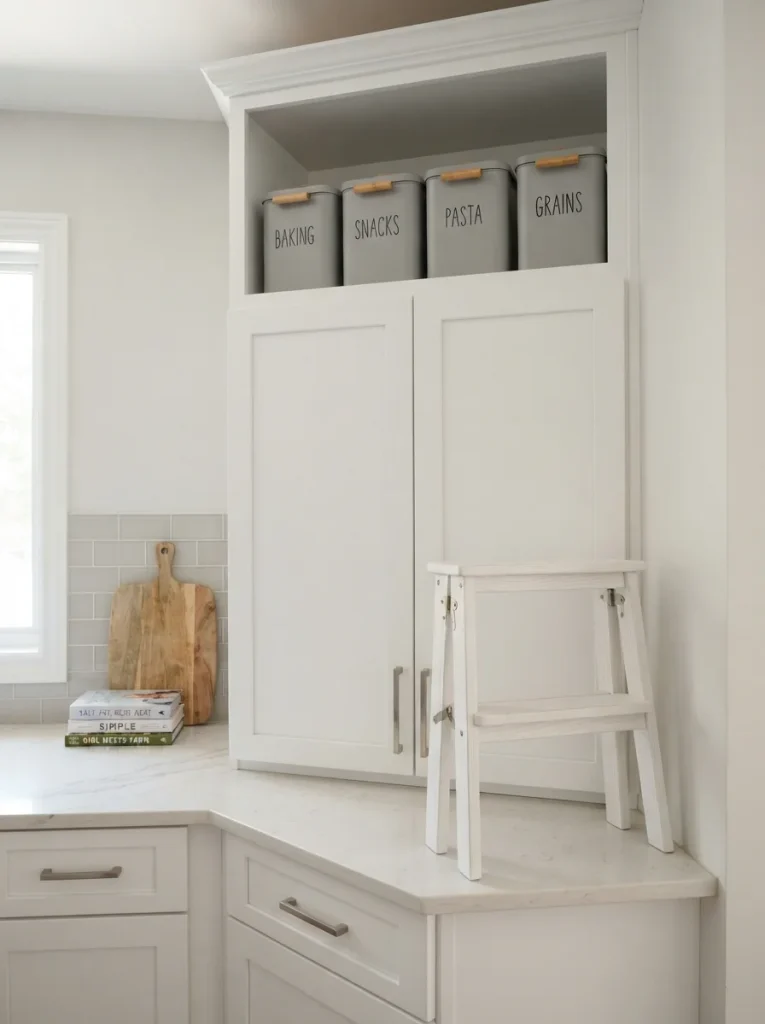
The top shelf is prime real estate you only avoid because it’s out of reach. A compact step stool and a few lidded bins turn it into storage for seasonal or special-occasion items. It keeps daily shelves clear.
Material note: A small step stool runs around $15, and three lidded bins cost $20. Label every bin and use only items you touch fewer than five times a year, since the mistake is storing daily tools up high.
Color note: Matching white bins with gray labels make the top shelf look intentional and clean.
Styling swap: Keep the stool in a nearby slim gap so it’s always handy. Best for tall cabinets over fridges.
Shop The Look
- Lidded fabric storage bins
- Wide-mouth glass canisters
- Reach grabber tool
- Cabinet door bin pocket
- Chalkboard label tags with string
13. Pantry Staples in Matching Boxes
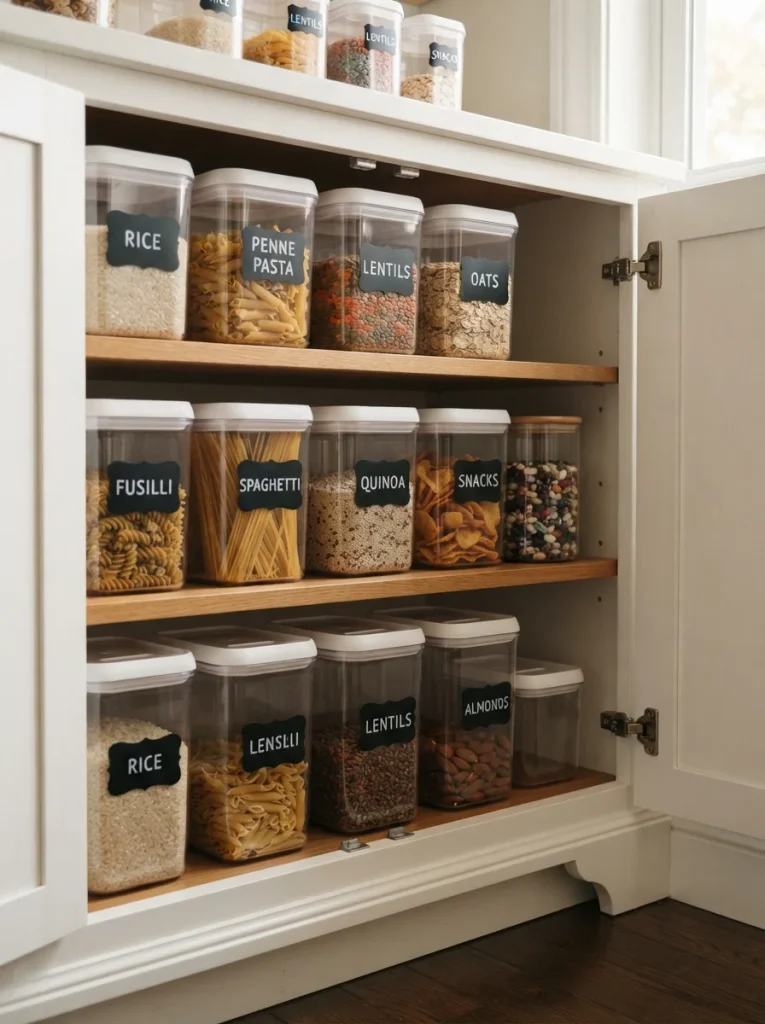
Matching boxes make a pantry feel like a shop. Everything has a home, and you can see the pasta supply at a glance. Stackable lids let you build upward without losing access.
Material note: A set of four boxes is around $15 to $25, and refilling the pantry takes an hour. Decant dry goods into airtight containers and label dates, because the mistake is mixing old and new rice.
Color note: Clear boxes with white lids and black labels keep the pantry visually quiet and easy to read.
Styling swap: Group by meal type, breakfast, pasta night, snacks. Best for busy families.
💡 Quick Win: Tape a small label to each shelf edge to teach everyone where things go.
Shop The Look
- Airtight pantry containers with locking lids
- Chalkboard label stickers
- Rice dispenser with measuring cup
- Bag clips, assorted
- Lazy susan turntable for cans, 9-inch
How to Start Your IKEA Kitchen Cabinet Organization Project
Start with one cabinet, the one you hate opening most. Empty it, wipe it, and measure the interior width, depth, and height before you buy anything. That single cabinet teaches you how the whole system works and gives you a win that motivates the next one.
The most common mistake is buying organizers before measuring. Hinges, shelf pegs, and door edges all reduce the real space, so write down usable width and door clearance, and bring those numbers to the store or check them online before checkout.
For budget entry points, three items under $50 make the biggest difference: a pot lid organizer at around $4, an extra shelf insert at around $8, and a door-mounted rail with hooks at around $5. Together they cost under $20 and change three different cabinets.
For realistic expectations, plan one weekend for the no-drill items, lids, shelf inserts, rails, and spice racks. Pull-outs, carousels, and lighting take another weekend and a bit more patience. Starter budgets run $30 to $50, while a full kitchen refit can reach several hundred dollars, so build it in stages.
Frequently Asked Questions About IKEA Kitchen Hacks for Maximizing Kitchen Cabinet Storage
What is the difference between UTRUSTA and RATIONELL?
UTRUSTA is IKEA’s line of kitchen cabinet fittings, covering shelves, hinges, lighting, and corner solutions. RATIONELL is the interior organizing line, with pull-out shelves, wire baskets, and variable-depth drawers. Many hacks use both, for example a UTRUSTA shelf with a RATIONELL basket. Names and stock change often, so check current listings before buying.
What colors look best for cabinet organizers?
White, light gray, and natural bamboo are the safest choices because they bounce light and hide visual clutter. In dark cabinets, white bins stand out and make labels easy to read. If your cabinets are white, bamboo adds warmth without clashing.
How much does it cost to organize kitchen cabinets with IKEA?
A single cabinet can be transformed for $10 to $30 using lid organizers, shelf inserts, or rails. A full kitchen with pull-outs and a carousel can reach $300 to $600. Build it cabinet by cabinet so you spread the cost and stop whenever you’re happy.
Will IKEA organizers fit non-IKEA cabinets?
Often yes, as long as you measure the interior width and depth first. IKEA lists dimensions in both inches and centimeters, so compare them to your actual cabinet, subtracting hinge intrusion. Pull-out systems are the most picky, so check slide clearance carefully.
What is the best IKEA pot lid organizer?
The VARIERA pot lid organizer is the most common pick because it’s cheap, narrow, and holds lids up to roughly 12 inches. It sits on a shelf or mounts inside a door. If you own very large lids, measure first or choose a deeper rack.
Ready to Reorganize With IKEA Kitchen Hacks for Maximizing Kitchen Cabinet Storage?
You’ve seen how lids, spices, corners, pantries, and even the top shelf can all work harder with a few small IKEA pieces. Starting small is the right approach, because one organized cabinet makes the next one easy. Today, open your most chaotic cabinet, take a photo, and measure the inside width so you’re ready to shop. The payoff arrives every time you reach for a pan and it rolls forward without a single clatter. Save your favorites, especially the pull-out pots drawer and the warm-lit bowl shelf, so you can come back when you’re ready to build.