13 IKEA Kallax Makeover Ideas for Stylish Shoe and Bag Storage
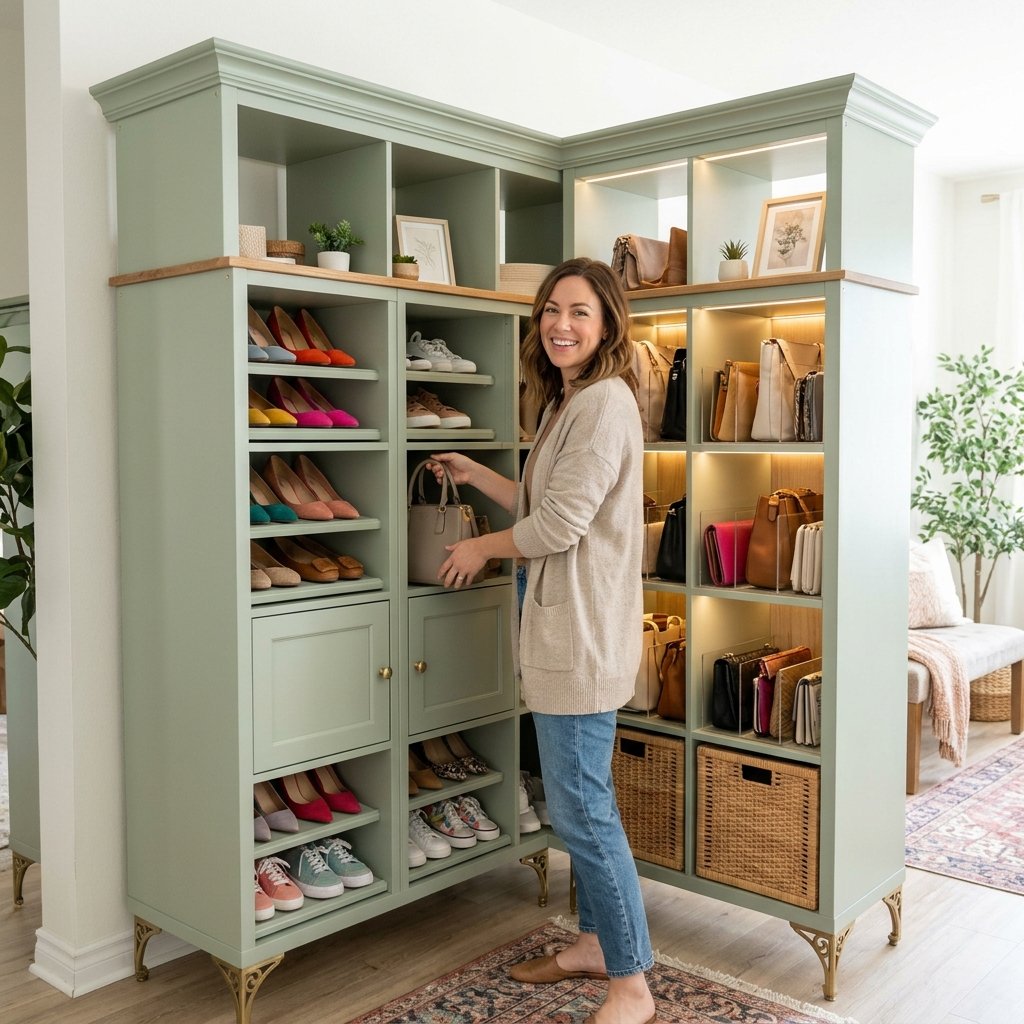
A Kallax makeover turns a plain cube shelf into custom storage that holds shoes and bags in an organized, display-worthy way. This guide gives you 13 IKEA Kallax makeover ideas for stylish shoe and bag storage, each with materials, costs, and a shopping list.
Picture a cane door with a soft woven grain under your fingertips. Picture warm LED light washing over a row of leather loafers, and sage paint that feels like satin. A good makeover looks calm and finished, and the shelf stops reading as flat-pack furniture. Your entryway starts to look curated instead of cluttered.
Here are 13 ideas worth saving — and stealing.
Why IKEA Kallax Makeover Ideas for Stylish Shoe and Bag Storage Work So Well
The Kallax is a square-cube shelving unit that IKEA launched in 2014 as the successor to Expedit. Its 13-inch interior cubes are almost the exact size of a shoe pair or a medium handbag, which is why it adapts so well to makeovers.
The base materials are a white, black-brown, or oak-effect laminate shell. Upgrades use pine lath, rattan cane webbing, peel-and-stick vinyl, cabinet enamel, and solid brass hardware. Sage green, warm white, natural oak, and matte black are the most reliable colors.
It is trending because small-space living and renter-friendly “IKEA hacks” keep going viral on Pinterest. People want built-in looks without hiring a carpenter. The cube grid also suits sneaker collecting and handbag display.
Beginners can do most of these projects, and many cost under $60. Be honest about limits, though. The shell is hollow-core particleboard, so heavy mounting and leg attachment need extra support, and paint needs proper prep.
| Style at a Glance | |
| Philosophy | Keep the clean grid, add warmth and function |
| Key Materials | Pine lath, cane webbing, peel-and-stick vinyl, cabinet enamel, brass hardware |
| Key Colors | Sage green, warm white, natural oak, matte black |
1. The Mid-Century Shoe Bench That Costs Under $90
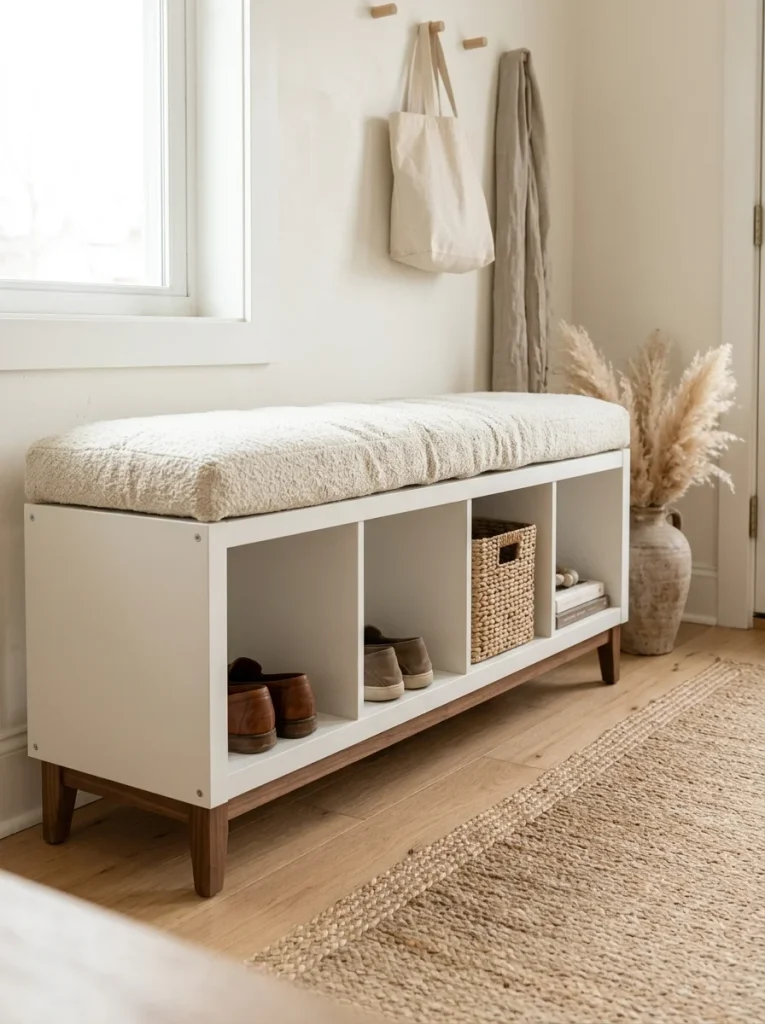
Turning a 1×4 on its side creates a 58-inch bench with four shoe cubes beneath the seat. Tapered legs lift it to a comfortable 18 inches. The cushion adds softness, and the raised silhouette makes it look like a designer piece.
Material note: Use four 4-inch tapered beech legs with mounting plates, a 15 x 58-inch piece of ¾-inch plywood, wood glue, and a 2-inch foam cushion cut to size. Total cost is about $85 and assembly takes 2 hours. Beginners often screw legs straight into the hollow particleboard, and they pull out within weeks.
Color note: Walnut legs against white laminate give a clear two-tone contrast. A cream cushion bridges the two tones without adding a third color.
Styling swap: Add a woven leather strap handle on one end, about $6, so the bench can be shifted. Suits a small family entryway.
Shop The Look
- Walnut tapered furniture legs 4-inch with mounting plates
- ¾-inch birch plywood panel cut to size
- High-density upholstery foam 2-inch thick
- Cream bouclé fabric by the yard
- Staple gun with ⅜-inch staples
ALso view: 15 IKEA Kallax Makeover Ideas to Turn Basic Shelving Into Custom Furniture
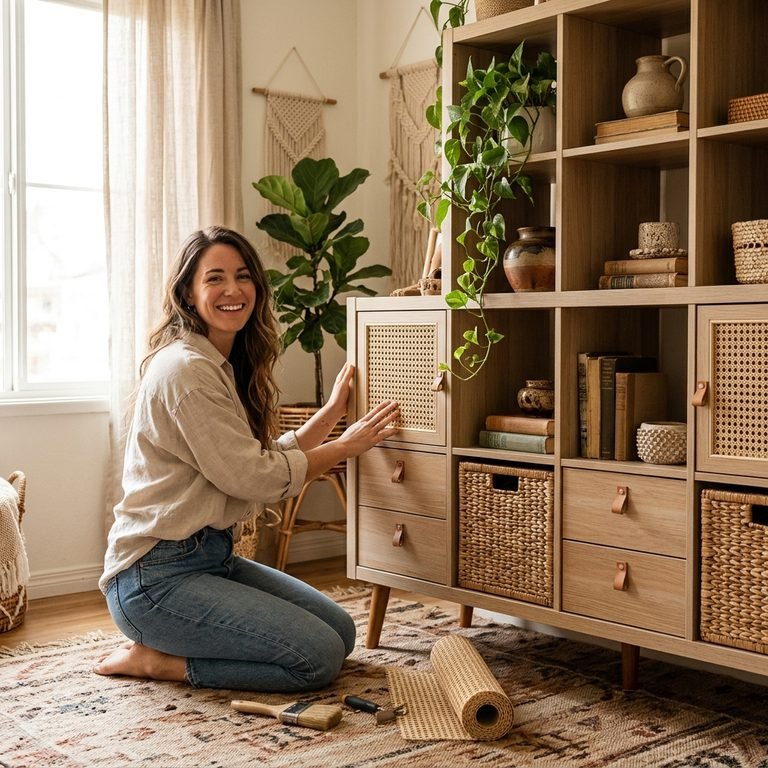
2. Cane Door Fronts That Hide Shoe Clutter

Cane doors let air reach shoes while hiding the mess. The open weave gives the shelf a boutique-store texture. Each 14-inch frame is made from pine strips and covers one cube neatly.
Material note: Cut 1×2 pine into four 14-inch frame pieces per door, glue and pin the corners, and staple an 18-inch-wide strip of cane webbing over the back. Soak the cane in warm water for 15 minutes first so it tightens as it dries. Each door costs about $9. Skipping the soak leaves the cane saggy.
Color note: Natural cane, oak tan, and brass pull the same warm range together. The doors read as one finish, not as separate add-ons.
Styling swap: Replace stock knobs with 1-inch brass knobs, about $2 each. Suits boho and rental apartments.
💡 Quick Win: Buy pre-woven cane webbing with a spline-free edge so you can staple it in place without routing a groove.
Shop The Look
- Natural cane webbing roll 18-inch wide open weave
- Pine 1×2 boards 8 foot
- Corner clamps for picture frames
- Brass cabinet knobs 1-inch round
- Magnetic cabinet catches
3. Wood-Grain Contact Paper Interiors on a Budget

Lining the cubes with oak-look vinyl hides scuff marks and makes cheap laminate look like real wood. Shoes sit on a wipeable surface, and the exterior stays white for a fresh contrast.
Material note: One 17.5-inch x 20-foot roll covers a 2×2 for about $25. Start with the back panel, then the sides, and smooth with a felt squeegee, using a hair dryer on low around corners. Wipe the glossy laminate with rubbing alcohol first or the vinyl lifts within a month.
Color note: Light oak against warm white keeps the look Scandinavian. Dark shoes stand out against the pale wood.
Styling swap: Add a strip of matching vinyl along the front edge for about $3, so the edges don’t peel. Suits renters who want a reversible look.
Shop The Look
- Light oak wood-grain peel-and-stick vinyl roll
- Felt-edge plastic squeegee
- 91% isopropyl alcohol spray
- Precision craft knife with spare blades
- Steel ruler 24-inch
4. A Handbag Showcase With Acrylic Risers and Felt Dividers

Each cube becomes a mini display case. Bags stand upright instead of sagging in a pile, so leather keeps its shape. Risers double the shelf capacity inside a cube.
Material note: Cut ⅛-inch gray felt into 13 x 13-inch vertical dividers and place a 6-inch acrylic riser at the back of each cube. Budget about $40 for six cubes. Do not stack more than two totes per cube, because the weight of the top bag deforms the one beneath.
Color note: Charcoal brown and gray felt let camel and cognac leather glow. Brass trim adds one metallic accent.
Styling swap: Slip an acid-free tissue paper stuffing pad inside each bag, about $8 for a pack, to protect the shape. Suits anyone with a growing designer bag collection.
💡 Quick Win: Use stick-on felt furniture pads on the shelf floor so bags slide in without scratching.
Shop The Look
- Clear acrylic shelf risers set of 6
- Adhesive-backed gray felt sheets
- Acid-free tissue paper for bag stuffing
- Adhesive brass edge trim strips
- Clear acrylic bag shelf dividers
5. Slatted Wood Fronts for Closed Sneaker Storage

Slim vertical slats give the shelf a built-in, fluted-cabinet look. Closed fronts hide visual noise, and the open cube gives you one display spot for your favorite pair.
Material note: Cut ½ x 1½-inch pine lath to 14½ inches, space with ¼-inch spacers, and glue onto two ¾-inch back rails. Apply pre-stain conditioner before a natural water-based stain, about $35 total for eight doors. Skipping the conditioner makes pine blotchy.
Color note: Natural oak tones and white laminate create a Scandinavian look. Matte black pulls sharpen the lines.
Styling swap: Use 2-inch matte black bar pulls, about $3 each. Suits modern minimalist entryways.
Shop The Look
- Pine lath strips ½ x 1½-inch bundle
- Pre-stain wood conditioner water-based
- Natural oak water-based wood stain
- Matte black cabinet bar pulls 3-inch
- Quarter-inch plywood spacer strips
6. Canvas Bins That Keep Clutches and Flat Bags Tidy
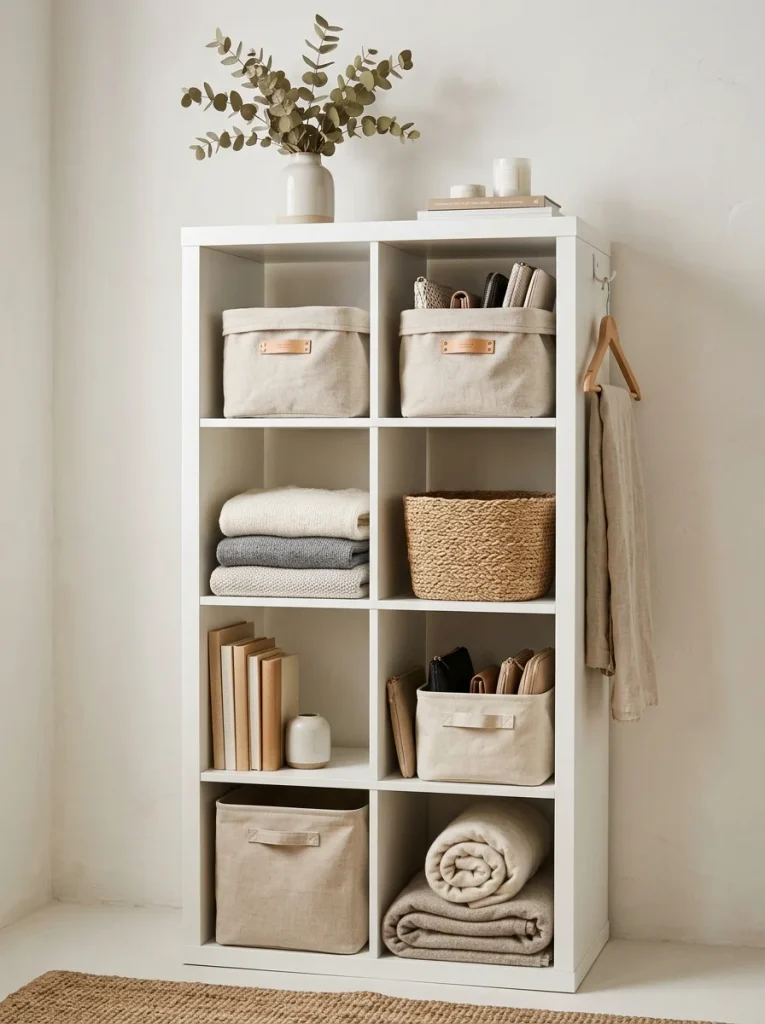
Fabric bins soften the hard grid and corral small items. Clutches, wallets, and belts stay grouped by type. Pull-out handles make each bin work like a drawer.
Material note: Choose 12½ x 12½ x 12½-inch bins to leave a finger’s room in each 13-inch cube. Six bins run about $45. A bin that is too snug is hard to pull out and tears the handle.
Color note: Oatmeal canvas and tan leather labels stay in the same warm neutral range. Olive accents add one pop.
Styling swap: Attach faux-leather tags with a 4-inch cotton cord, about $7 for six. Suits a dressing-room corner or a bedroom closet.
💡 Quick Win: Label bin fronts with iron-on letters in a single typeface for a uniform finish.
Shop The Look
- Linen canvas storage bins 12.5-inch cube
- Faux leather label tags with grommet
- Cotton cord 2mm natural
- Iron-on letter patches
- Wire bin pull handle inserts
7. Two-Tone Sage Paint That Makes Laminate Look Custom
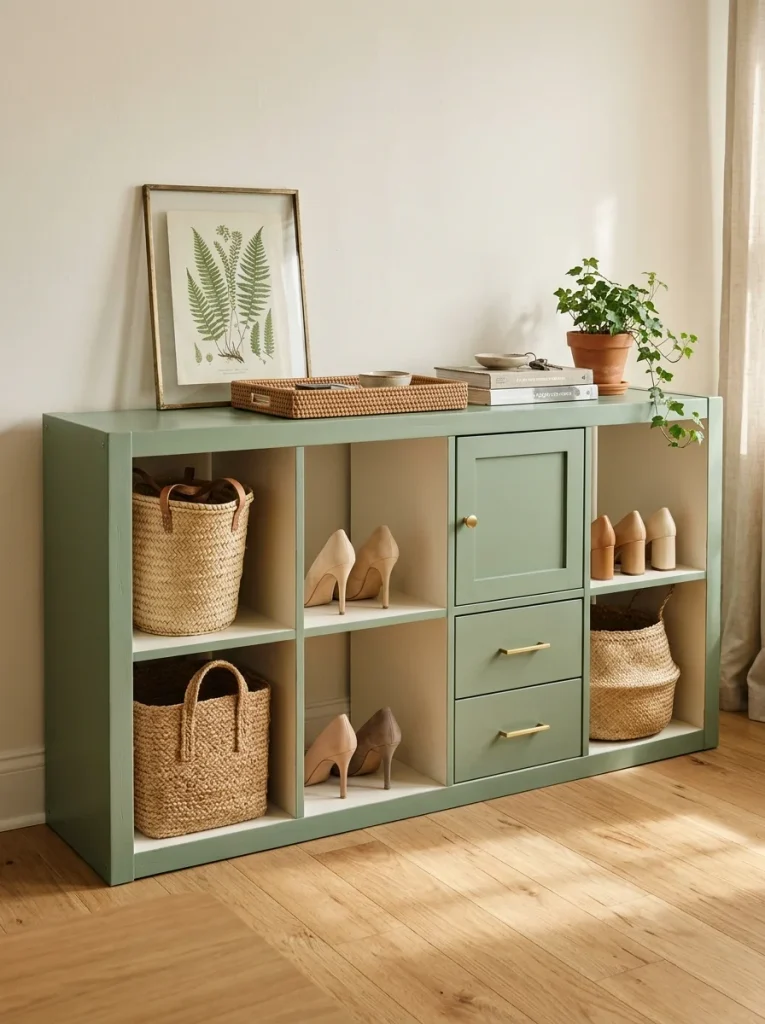
Two colors change the entire personality of the unit. Sage on the frame and warm white inside feel like a custom cabinet. The finish is smooth and satiny, not plasticky.
Material note: Scuff-sand with 220-grit, prime with a bonding primer, then roll two thin coats of satin cabinet enamel using a 4-inch foam roller. Cost is around $50. Dry 24 hours between coats and leave shoes out for 3 days, because paint without primer peels at the edges.
Color note: Sage green and warm white feel soft and natural. Brass adds warmth against the cool green.
Styling swap: Swap leg caps for brass ferrules, about $8. Suits a bedroom or a rented entry.
Shop The Look
- Bonding primer for laminate surfaces
- Satin cabinet enamel paint sage green
- Foam mini roller set 4-inch
- 220-grit sanding sponges
- Brass furniture leg caps
8. A Peg Rail Above for Crossbody Bags
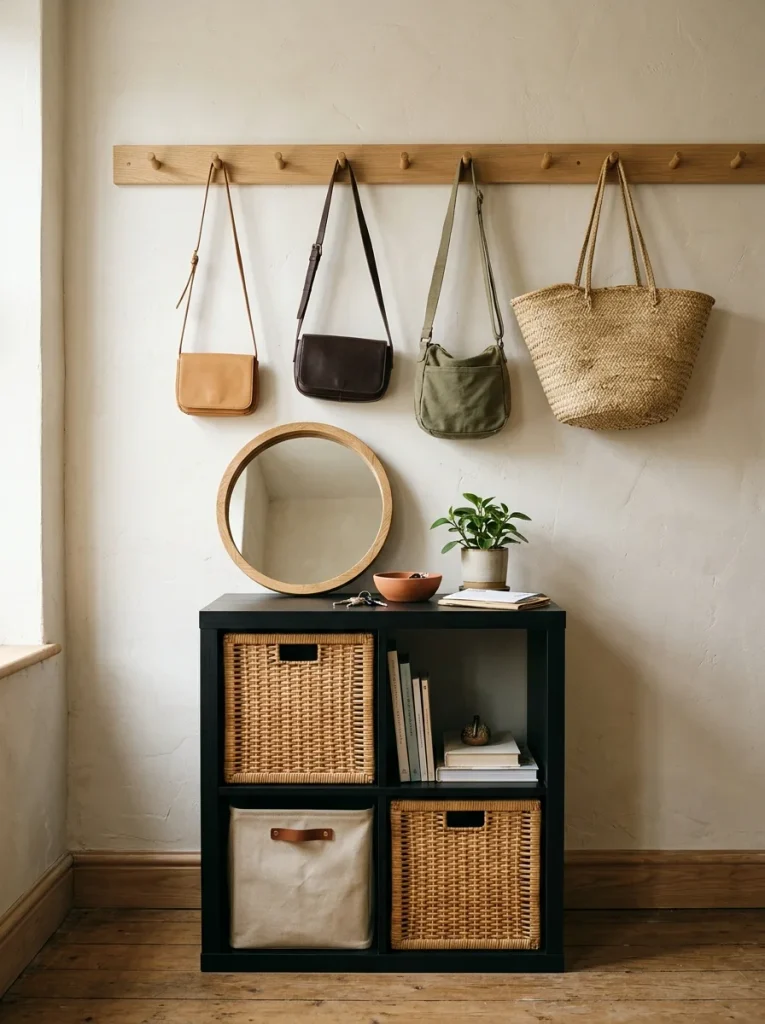
Bags that hang free of the shelf keep the cubes open for shoes. A single wall rail adds vertical storage without changing the Kallax itself, and the crossbody you grab daily stays at hand.
Material note: Use a 36-inch oak Shaker peg rail with five pegs, mounted into studs with 2½-inch screws. Cost is about $28. Mounting only into drywall anchors fails once pegs hold more than 10 pounds.
Color note: Oak pegs against matte black gives crisp contrast. Camel and terracotta bags make warm accents.
Styling swap: Add a small leather valet tray on the top shelf for keys, about $12. Suits busy families.
💡 Quick Win: Use a stud finder with edge detection to mark the rail location before you drill.
Shop The Look
- Shaker peg rail oak 36-inch
- Stud finder with edge detection
- 2½-inch wood screws pan-head
- Self-leveling laser line
- Leather key valet tray
9. Peel-and-Stick Botanical Wallpaper Back Panels
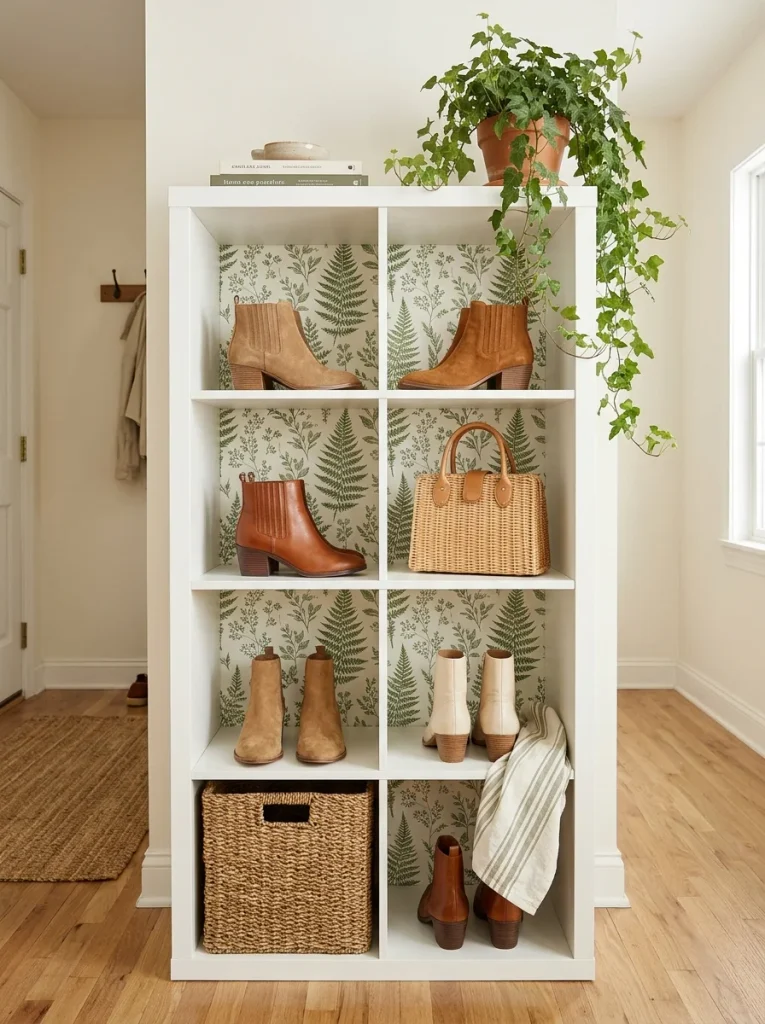
A patterned back panel turns each cube into a framed vignette. A fern print behind tan boots feels like a gallery wall, and it costs less than a framed print.
Material note: Trace each 13 x 13-inch back panel on the paper’s backing, cut ⅛ inch smaller, and press from the center outward. One 20-inch x 16-foot roll is $22. Applying wallpaper to dusty laminate is the usual cause of bubbles.
Color note: Fern green with cream gives a gentle botanical feel. White shells keep the pattern from feeling busy.
Styling swap: Mount the wallpaper offcuts on matching ¼-inch foam board as drawer-liner for belts, about $5. Suits plant lovers.
Shop The Look
- Fern botanical peel-and-stick wallpaper roll
- Wallpaper smoothing tool
- Self-healing cutting mat 18 x 24-inch
- Foam board sheets ¼-inch
- Microfiber cleaning cloths
10. Closet-Insert Kallax With LED Strip Lighting

Light makes shoes look like a boutique wall. A glowing cube row also solves the dark-closet problem, so you can find the right pair at 6 a.m.
Material note: Run a 3000K warm-white USB LED strip (16 feet, about $15) along the underside of each shelf edge and plug into a USB wall adapter. Test the strip before peeling the adhesive. Cheap tape fails on laminate, so wipe with alcohol first.
Color note: Warm 3000K light keeps leather tones rich, where cool white would look clinical. Blush hangers add softness.
Styling swap: Add a motion-sensor switch, about $12, so the lights turn on when you open the closet door. Suits dressing-room lovers.
💡 Quick Win: Use aluminum LED channels with frosted covers to hide dots and spread light evenly.
Shop The Look
- Warm white 3000K USB LED light strip
- Aluminum LED channel with frosted diffuser
- USB wall adapter 5V 2A
- Motion sensor LED switch
- Velvet slim hangers blush pink
11. Waterproof Tray Cubes for Muddy Boots
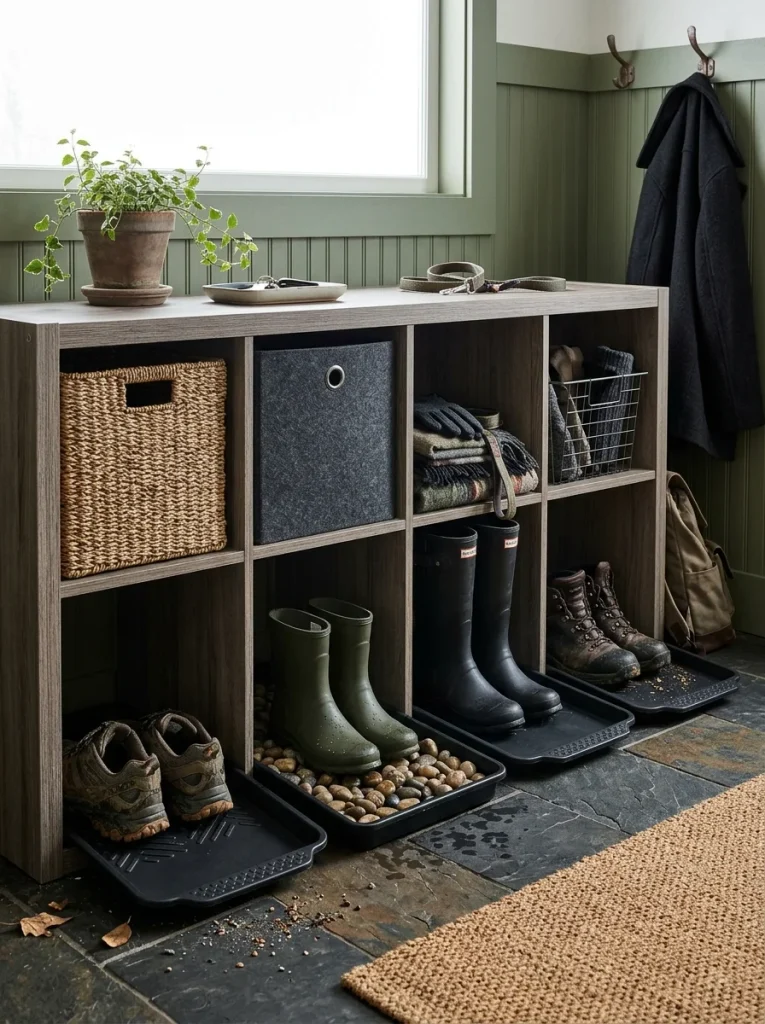
Rubber trays catch dirt and meltwater so laminate stays dry. A layer of river pebbles lets boots drip-dry without sitting in water. The unit is built for a real rainy-season entry.
Material note: Use 12½ x 14-inch flexible rubber boot trays with a 1-inch lip, about $10 each. Fill with 1 inch of smooth river pebbles. Leaving wet boots on bare laminate swells the particleboard edges in a few weeks.
Color note: Slate gray with matte black trays looks deliberate. Moss green mats tie it to outdoor tones.
Styling swap: Add a leather boot-pull tag, about $5, to the tray edge. Suits hiking families and dog owners.
Shop The Look
- Flexible rubber boot trays with raised lip
- Smooth river pebbles decorative 1-inch
- Waterproof shelf liner roll
- Woven outdoor entry mat
- Leather loop pull tabs
12. A Floating Kallax That Frees the Floor
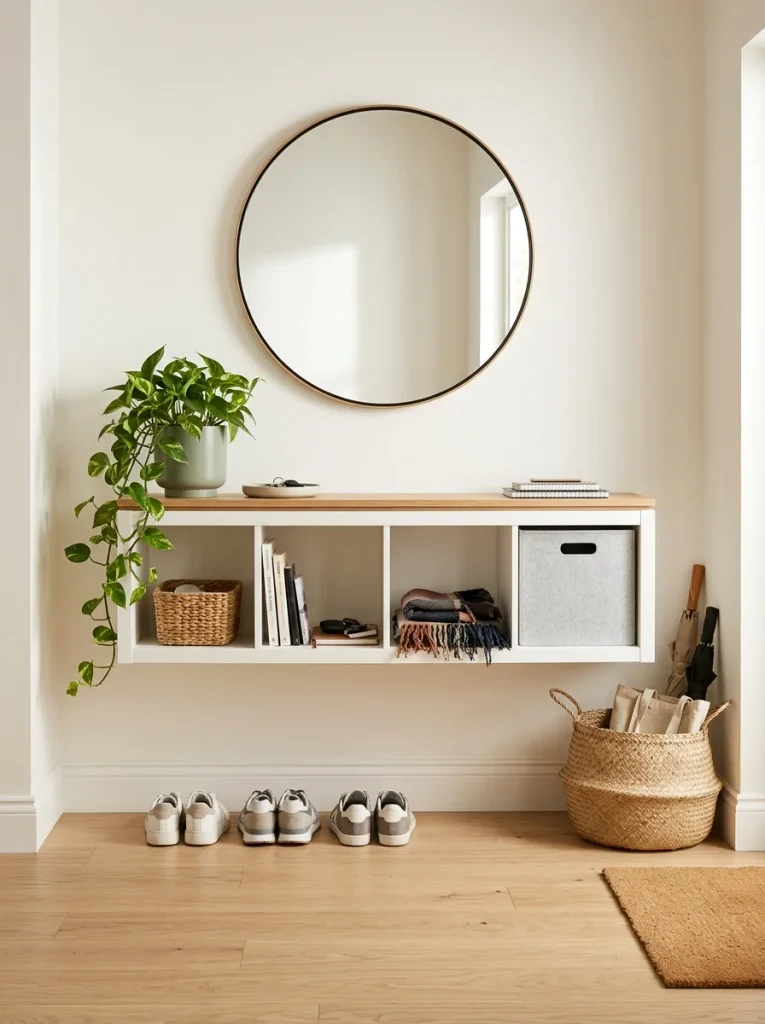
Lifting a unit off the floor makes a small entry feel larger and makes mopping easy. The cubes carry shoes, and tall boots stand below.
Material note: Attach a 1×4 oak French cleat to wall studs with 3-inch screws and the other half inside the shelf, behind a ¾-inch plywood stiffener glued to the back. Cost is about $35. A hollow-core shelf screwed straight into drywall is the classic failure.
Color note: White shell, oak cleat edge, and sage plant stay light and calm. The shadow gap adds depth.
Styling swap: Trim the underside with 1×2 oak lipping, about $8, to hide the open edge. Suits renters with a narrow hallway.
💡 Quick Win: Use a 24-inch level on the cleat and mark the stud locations with painter’s tape first.
Shop The Look
- Oak French cleat hanging kit 1×4
- 3-inch structural wood screws
- Birch plywood ¾-inch cut panel
- Oak edge banding iron-on
- 24-inch aluminum level
13. A Family Shoe Station With Chalkboard Tags

One cube per person ends the morning shoe hunt. Chalkboard tags let names and seasons change without repainting, and kids can reach their own cube.
Material note: Hang 2 x 3-inch chalkboard tags from small brass cup hooks screwed into the cube’s top edge with pilot holes, about $12 for eight. Use a liquid chalk marker. Regular chalk smudges every time a shoe slides past.
Color note: Black tags on warm white have the highest contrast, so names are easy to read at a glance. Brass hooks add a warm detail.
Styling swap: Add a woven basket on top for hats and gloves, about $15. Suits families with young kids and teens.
Shop The Look
- Chalkboard hanging tags with twine
- Liquid chalk markers white
- Brass cup hooks small
- Woven seagrass basket with handles
- Small pilot-hole drill bit set
How to Start Your Kallax Shoe and Bag Storage Project
Begin with the simplest project: wood-grain contact paper inside a 2×2 (Idea 3). It teaches measuring, cutting, and smoothing in one afternoon, and it costs about $25. Every later project uses those same skills.
The most common mistake is skipping surface prep. Kallax laminate is glossy, so paint, vinyl, and adhesive all slip. Wipe every surface with 91% rubbing alcohol, and scuff-sand any painted area with 220-grit paper before you start.
Three starter items under $50: a roll of oak peel-and-stick vinyl at $25, a set of six felt shelf dividers at $12, and a 36-inch oak peg rail at $28 (just under your budget with the first item). These cover the three biggest upgrades.
Plan on a weekend for most ideas. Contact paper, bins, and dividers take 2 to 4 hours. Paint and stain need 3 days to dry and about 2 weeks to cure fully, so keep heavy shoes off until then. A starter makeover runs $40 to $60, and a full multi-cube build reaches $150 to $200.
Frequently Asked Questions About IKEA Kallax Makeover Ideas for Stylish Shoe and Bag Storage
Is a Kallax or a Billy better for shoe storage?
A Kallax is better, because its cubes are square and fit shoes upright or stacked. Billy shelves are tall and narrow and need adjustable shelf pegs to hold footwear. A single 13-inch cube fits two pairs of sneakers or three pairs of flats.
What color should I paint a Kallax for shoe storage?
Sage green, warm white, and matte black are the safest picks, because they work with leather, canvas, and suede alike. Light colors make a small entry feel bigger. Use satin enamel, since it wipes clean when shoes scuff the edges.
How much does a Kallax shoe and bag makeover cost?
Most projects cost $25 to $90 on top of the shelf, which starts around $50 to $90 for a 2×2. Contact paper, bins, and dividers sit at the low end. Cane doors, slats, and LED lighting land near the upper end.
Can renters do Kallax makeovers?
Yes. Contact paper, peel-and-stick wallpaper, fabric bins, felt dividers, and freestanding legs are all removable. The wall-mounted ideas need screws, so check your lease and patch holes with spackle when you move.
How many shoes fit in a Kallax cube?
A 13-inch cube holds two pairs of sneakers stacked, or three pairs of flats, or one pair of ankle boots. A 2×4 unit holds about 16 to 24 pairs. Heels with tall shafts need the top row, where you can angle them in.
Ready to Build Your Kallax Shoe and Bag Storage?
You now have 13 makeover ideas that cover wood, cane, paint, textile, light, and wall-mounted storage. Starting small is the right approach, because one cube teaches you everything the full wall will ask of you. Today, measure the cube width of your shelf and order one roll of oak peel-and-stick vinyl. Every time you reach for a pair of shoes and find them where they belong, the morning gets a little easier. Save your favorites, whether that is the sage green frame, the cane doors, or the glowing closet cubes, and pin them for your next weekend project.

2 Comments