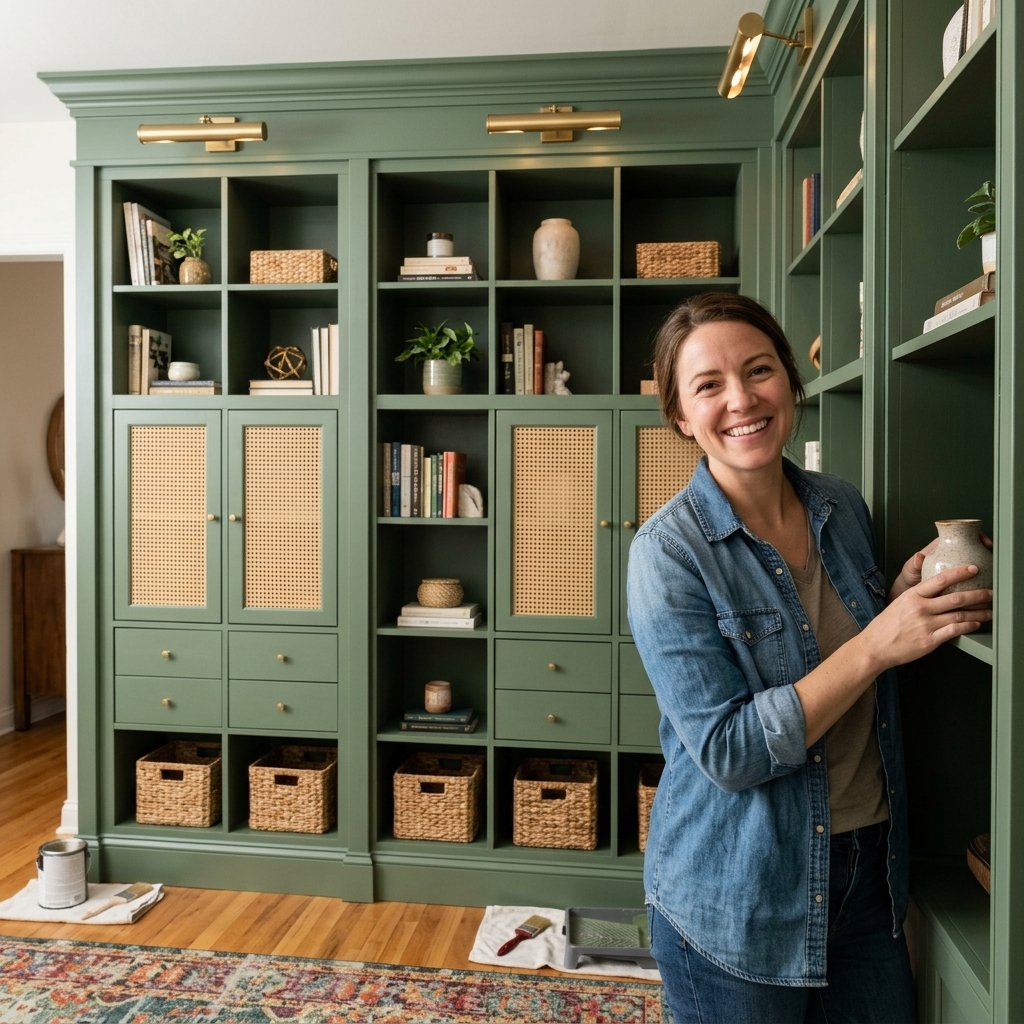
11 IKEA Kallax Makeover Ideas for Creating a Custom Built-In Look
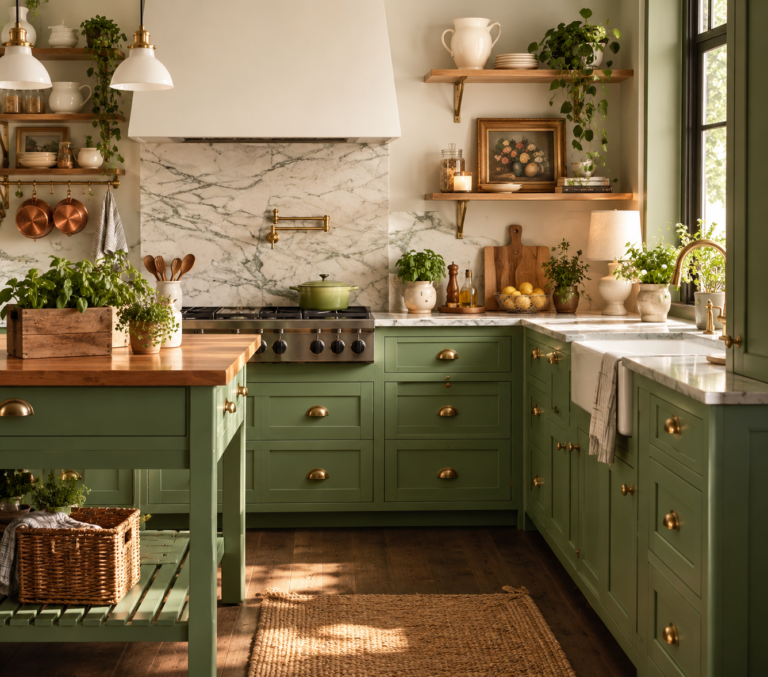
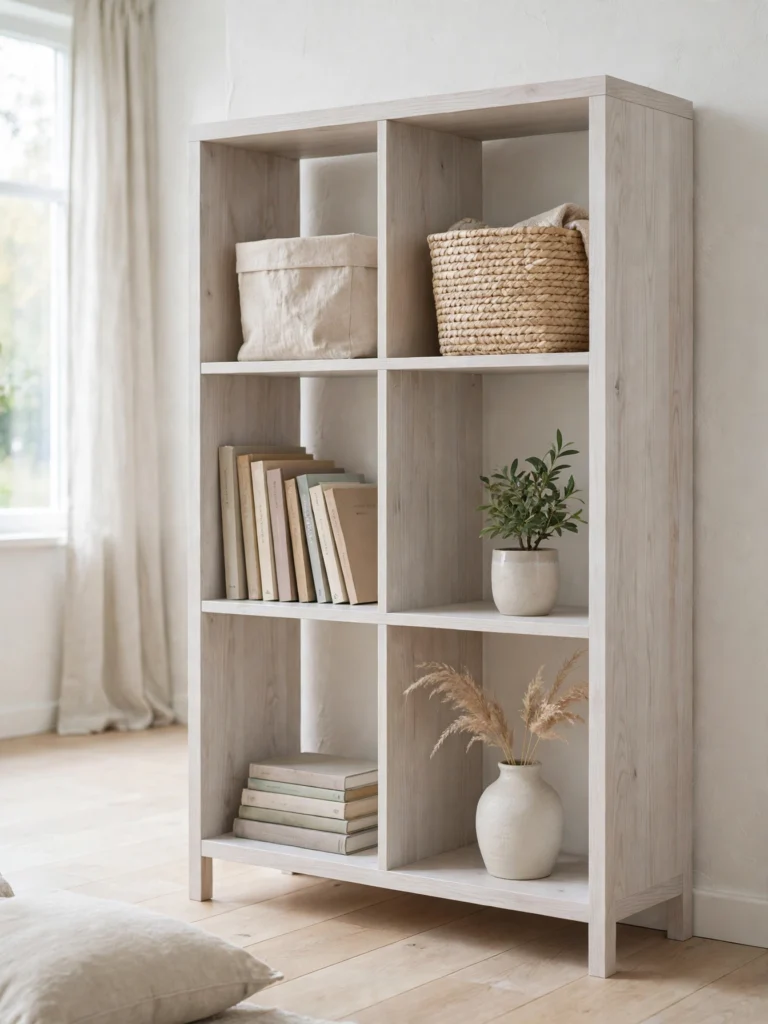
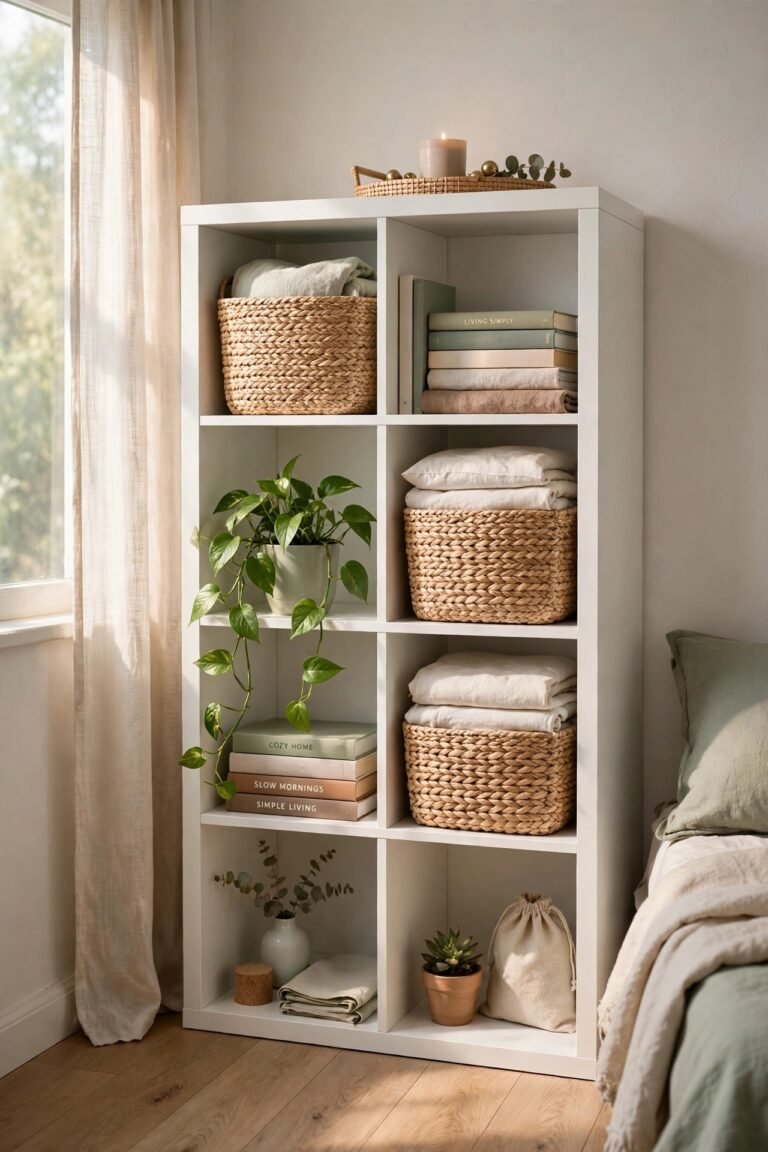
A Kallax makeover turns IKEA’s plain cube shelf into furniture that looks framed into the wall and made for the room. These 11 IKEA Kallax makeover ideas for creating a custom built-in look show you how to add trim, paint, doors, lighting and seating without hiring a carpenter. Picture a crisp white face frame under your fingertips, a deep green finish with a soft satin sheen, and warm light spilling across a row of books at dusk. The cabinet-grade look comes from a few smart details, and the shelf underneath stays the same. Here are 11 ideas worth saving — and stealing.
Why IKEA Kallax Makeover Ideas for Creating a Custom Built-In Look Work So Well
The Kallax has been an IKEA staple since it replaced the Expedit in 2014. Its square cubes and uniform depth make it an ideal blank canvas. Hacking it is a tradition in itself, and “IKEA hack built-ins” is a category with its own devoted following. The trick is to hide what screams “flat-pack” (the exposed edges, the bare bottom, the gap at the top) and let the clean grid do the work.
The core materials are inexpensive and easy to find. Think 1×2 poplar boards for face frames, primed MDF baseboard for plinths, 3-inch crown moulding, 1/4-inch birch plywood for doors, and a shellac-based bonding primer, since Kallax’s laminate finish rejects ordinary paint. Popular colors include warm white, forest green, ink navy and soft greige, all in satin or semi-gloss cabinet enamel.
The trend is easy to explain. Custom cabinetry often costs several thousand dollars, and a dressed-up Kallax costs a fraction of that. Color drenching, reeded details and cane accents are everywhere right now, and they happen to be very DIY-friendly. Renters and first-time buyers get a built-in look they can mostly take with them.
Beginners can absolutely do this, with honest limits. Basic cutting, gluing, painting and anchoring are all manageable. Walls and ceilings are rarely perfectly straight, so expect to caulk and shim, and always anchor tall units to a wall stud.
| Style at a Glance | |
| Philosophy | Treat the Kallax as a cabinet carcass, and hide every sign of flat-pack |
| Key Materials | 1×2 poplar, primed MDF baseboard, 1/4-inch birch plywood, bonding primer, satin cabinet enamel |
| Key Colors | Warm white, forest green, ink navy, natural oak, brushed brass |
1. The $40 Plinth Base That Makes a Kallax Look Floor-Anchored
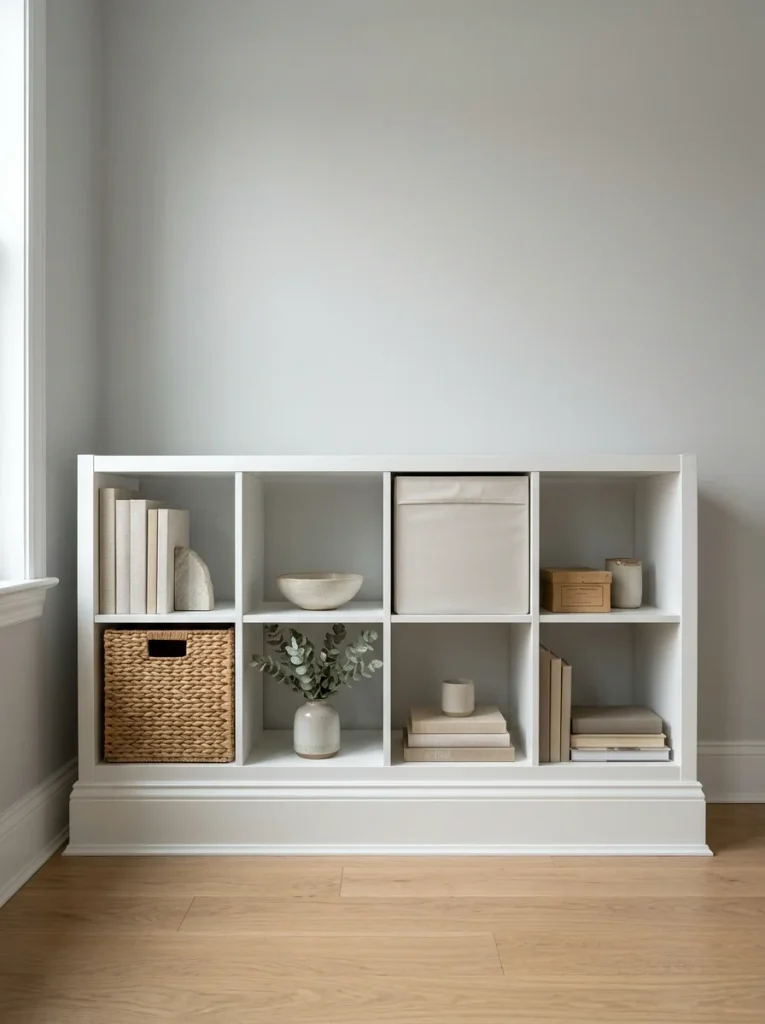
Built-ins sit on a solid base, while flat-pack shelves float on small feet. A plinth built from 1×4 boards and a 3-1/4-inch baseboard cap, painted to match the unit, solves that in an afternoon. The Kallax looks planted and finished.
Material note: Cut two 1×4 boards to the unit’s width and two to its depth, minus 1.5 inches, and glue and screw them into a hollow rectangle with 2.5-inch screws. Lay the frame flat, level it with shims, then set the Kallax on top. Skipping the level check is the classic beginner mistake, since a tilted plinth tilts every shelf above it.
Color note: Paint the plinth and baseboard in the same satin white as the Kallax, so the base reads as one continuous piece. A single shade of warm white keeps the seams invisible.
Finishing swap: Wrap the front of the plinth with matching primed baseboard so it blends into your room’s existing trim, which costs about $15 and suits any living room or hallway.
💡 Quick Win: Run a bead of construction adhesive between plinth and unit before setting it down. It locks everything in place and stops creaks.
Shop The Look
- 1×4 primed pine boards, 8-foot
- Primed MDF baseboard moulding, 3-1/4 inch
- Heavy-duty construction adhesive cartridges
- #8 wood screws, 2.5-inch
- 4-foot aluminum torpedo level
Also view: 10 IKEA Kallax Makeover Ideas for Seasonal Home Organization
2. The Face Frame Trick That Hides Every Raw Kallax Edge

Kallax edges are the biggest giveaway that a shelf came in a box. Gluing 3/4 x 1.5-inch poplar strips around the front face turns those thin edges into thick, cabinet-style rails. This single change does more for the “built-in” effect than any other step.
Material note: Cut four to eight 1×2 poplar strips with 45-degree miters, glue them down, and secure with 1.25-inch 18-gauge brads. A 2×4 unit needs roughly four 8-foot boards, about $25 total. Don’t drive nails deep into the hollow honeycomb edges, since brads can poke through. Glue is your main bond, and clamps or painter’s tape hold it while it sets.
Color note: Fill nail holes with wood filler, caulk every seam, and paint in one tone so wood and laminate read as a single surface. Satin white enamel looks clean and intentional.
Finishing swap: Add a thin 1/2-inch cove moulding inside the frame for a shadow line, about $10 more, ideal for formal living rooms.
Shop The Look
- 1×2 poplar boards, 8-foot
- 18-gauge brad nailer with 1.25-inch brads
- Titebond III wood glue
- Stainable wood filler
- Paintable acrylic latex caulk with a smoothing tool
3. Color-Drench the Kallax Into the Wall for a Custom Built-In Look

When the shelf and the wall share one color, the unit disappears into the architecture. This color-drench approach is the fastest way to a custom built-in look because it hides the seam between furniture and wall.
Material note: Scuff-sand every surface with 220-grit paper, wipe clean, then apply one coat of shellac-based bonding primer. Follow with two coats of satin cabinet enamel, drying 4 hours between coats. A quart covers one 2×4 unit for about $40. The common mistake is skipping primer, which makes paint peel within months.
Color note: Use the wall color at 100% on the Kallax, a flat or eggshell finish on the wall and satin on the unit. The sheen difference adds depth without breaking the match.
Finishing swap: Paint the inside back panels a shade darker for contrast, using a sample pot at about $6, which suits dens and reading corners.
💡 Quick Win: Use a 4-inch mini foam roller on flat areas to avoid brush marks.
Shop The Look
- Shellac-based bonding primer, 1 quart
- Satin urethane-modified cabinet enamel, 1 quart
- 4-inch mini foam roller set with tray
- 2-inch angled sash brush
- 5-inch random orbital sander with 220-grit discs
4. Fluted Doors That Turn Open Cubes Into Cabinet Fronts

Closed doors on the lower cubes hide clutter and make the unit look like cabinetry, while open cubes above stay display-ready. Fluting adds a handmade, architectural texture, using nothing fancier than 1/2-inch half-round moulding on thin plywood.
Material note: Cut 1/4-inch birch plywood to 12-3/4 inches square (or use IKEA door inserts), then glue half-round dowel strips side by side with no gaps, about $12 per door. Weigh them flat overnight while the glue sets. Test-fit before painting, since a paint coat adds thickness and tight doors will stick.
Color note: Paint the doors and unit the same warm white, so only the shadow in the ribs shows. Brass knobs add a single warm accent.
Finishing swap: Install magnetic push latches instead of knobs for a handle-free look, about $8 for four, suiting minimalist kitchens and playrooms.
Shop The Look
- 1/4-inch birch plywood sheet, 2×4 foot
- 1/2-inch half-round wood moulding
- Unlacquered brass round knobs, 1-inch
- Self-adhesive felt bumpers for door edges
- Kallax door insert, 13-inch, white
5. Crown Moulding and a Header Box for a Floor-to-Ceiling Built-In
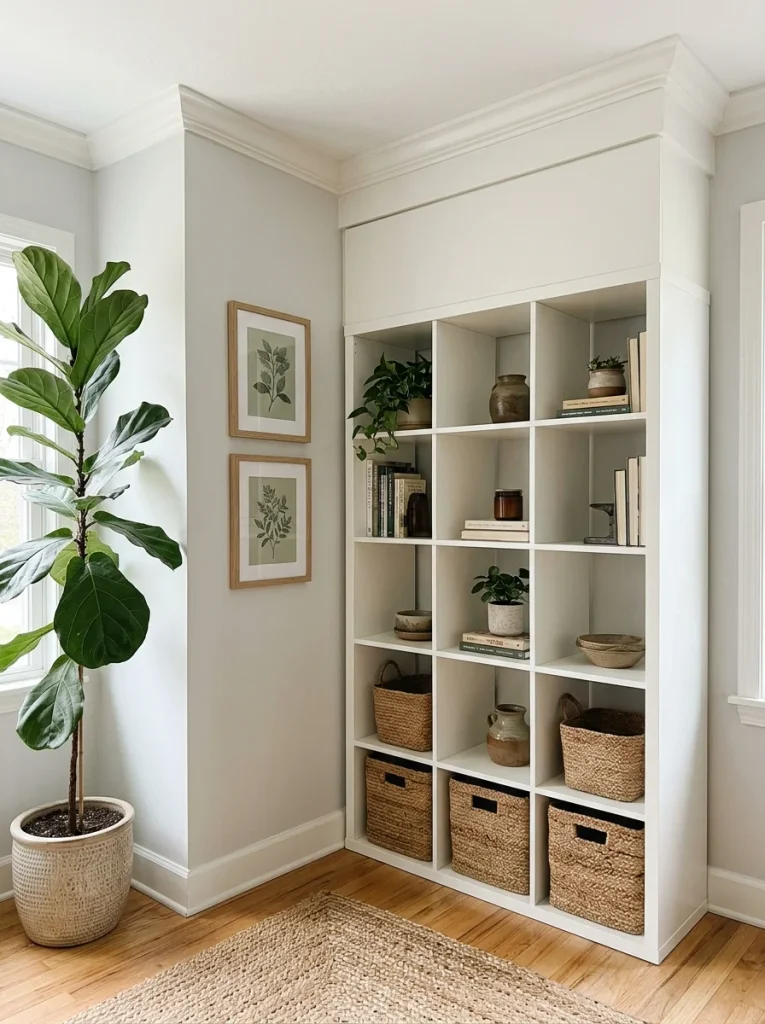
The gap between a shelf and the ceiling screams “furniture.” Fill it with a painted 1×12 header box topped with 3-inch crown moulding, and the whole unit reads as architecture. The effect lifts a room’s height, which is a real design win in small spaces.
Material note: Measure the ceiling gap at both ends, since ceilings slope. Build a 1×12 box in pine, cut crown with a miter box at 38 degrees, and attach with 2-inch finish nails into studs. Budget about $60. The common mistake is measuring just once, then discovering the gap varies by half an inch.
Color note: Paint the moulding, header and shelf the same white, and caulk the ceiling line so no shadow gap shows.
Finishing swap: Add inside-corner crown blocks to skip tricky mitered cuts, about $12, ideal for beginners in older homes.
💡 Quick Win: Hold the crown upside down in the miter box to match its angle against the ceiling and wall.
Shop The Look
- 3-inch primed MDF crown moulding
- 1×12 pine board, 6-foot
- Miter box with fine-tooth back saw
- Magnetic stud finder
- Heavy-duty 3-inch steel angle brackets
6. Flank a Fireplace With Two Kallax Units for a Full Wall Built-In

Placing a Kallax on each side of a fireplace or window creates the classic built-in layout homeowners pay a lot for. Filler panels close the gap to the wall, and a continuous top ties the whole composition together.
Material note: Rip 3/4-inch birch plywood into side fillers and a 15-inch-deep top, then scribe the filler edge to match your wall with a scribe compass. Screw units together and into studs. Plywood sheets run about $70 each. Don’t skip anchoring, because tall units can tip.
Color note: Paint everything, including plywood, in one deep navy so the seams vanish, and pop it with brass hardware.
Finishing swap: Cover raw plywood edges with iron-on birch edge banding, about $10, suiting family rooms and dens.
Shop The Look
- 3/4-inch birch plywood sheet, 4×8 foot, pre-sanded
- Iron-on wood veneer edge banding, 3/4-inch birch
- Pocket-hole jig kit
- Scribe compass for fitting to walls
- Metal anti-tip furniture wall straps
7. Warm LED Lighting That Makes Cubes Glow Like Custom Cabinetry
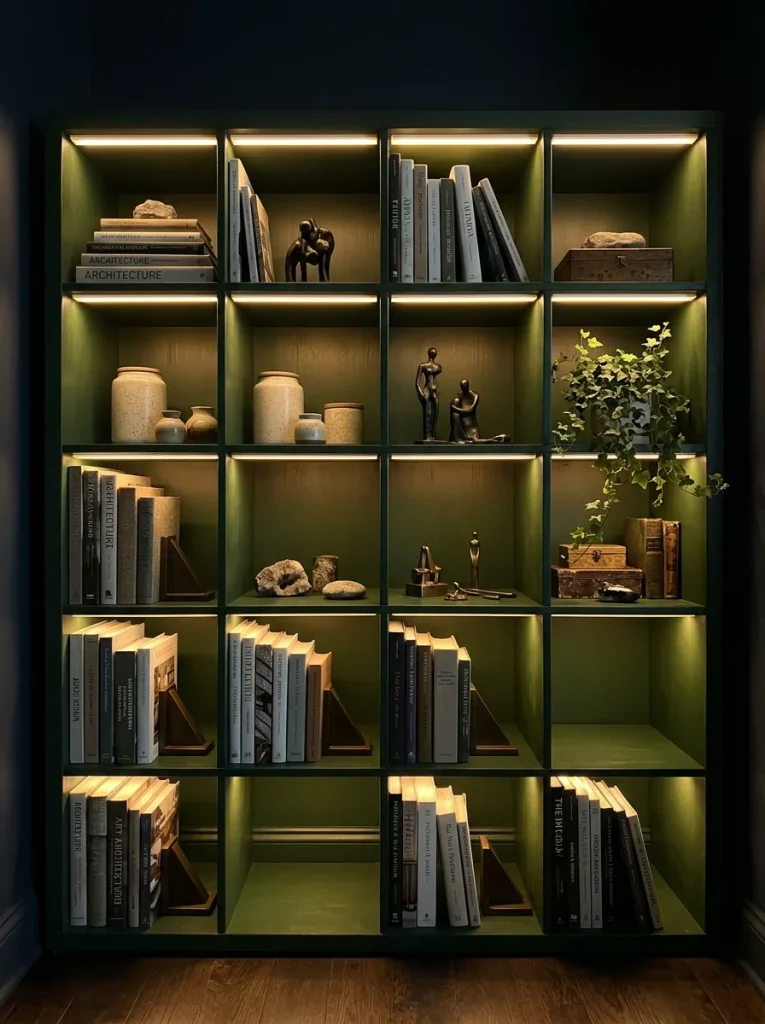
Built-in shelving almost always has hidden lighting, and adding it is the fastest way to fake a high-end look. A thin strip of warm LEDs under each shelf edge washes the objects below with a soft glow.
Material note: Cut 2700K warm white LED strip to the width of each cube (about 13 inches), set it in an aluminum channel with a frosted diffuser, and plug into a dimmable driver. Budget about $45 for a 2×4. Wipe each surface with isopropyl alcohol first, since adhesive fails on dust. Drill a 3/4-inch hole in the back panel for the cable.
Color note: Stay at 2700K, not cool white, which turns books and wood a flat bluish gray. Warm light flatters deep greens and navies.
Finishing swap: Run the cable through a paintable cord cover raceway painted to match the wall, about $10, for rentals and open rooms.
💡 Quick Win: Use plug-in strips with an inline dimmer, so no electrician is needed.
Shop The Look
- 2700K warm white LED strip lights, 16-foot
- Aluminum LED channel with frosted diffuser, 3.3-foot
- Dimmable plug-in LED power supply
- Paintable cord cover raceway kit
- Isopropyl alcohol wipes
8. Turn a Horizontal Kallax Into a Window Seat With Hidden Storage
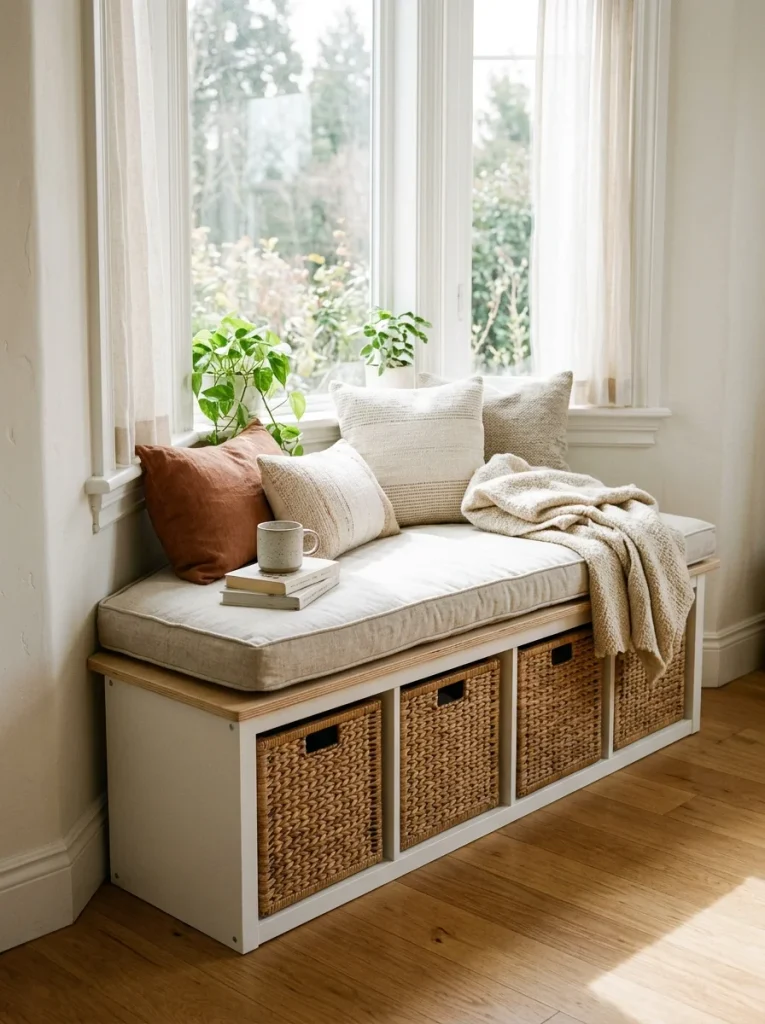
Lay a 4×1 Kallax on its side, and it stands about 15 inches tall and 15 inches deep, almost exactly bench size. Add a plywood top and a cushion, and you have a built-in window seat with six cubbies for blankets and toys.
Material note: Cut a 3/4-inch plywood top 2 inches longer than the unit, glue it down, and add a 3-inch high-density foam cushion cut to fit. Seat height ends up near 19 inches. Total cost about $90 beyond the unit. Anchor the unit to the wall, since the seat will take body weight.
Color note: Pair a warm white base with oatmeal or sand cushions, then add rust or terracotta pillows so the look stays cozy rather than flat.
Finishing swap: Make a slipcover from 3 yards of upholstery fabric with a hidden zipper, about $30, suiting kids’ rooms where washing matters.
Shop The Look
- High-density upholstery foam, 3-inch thick, 15×58-inch
- Performance linen-look upholstery fabric, 3 yards
- Heavy-duty staple gun with 3/8-inch staples
- Polyester batting wrap
- Lumbar pillow covers, 12×20-inch
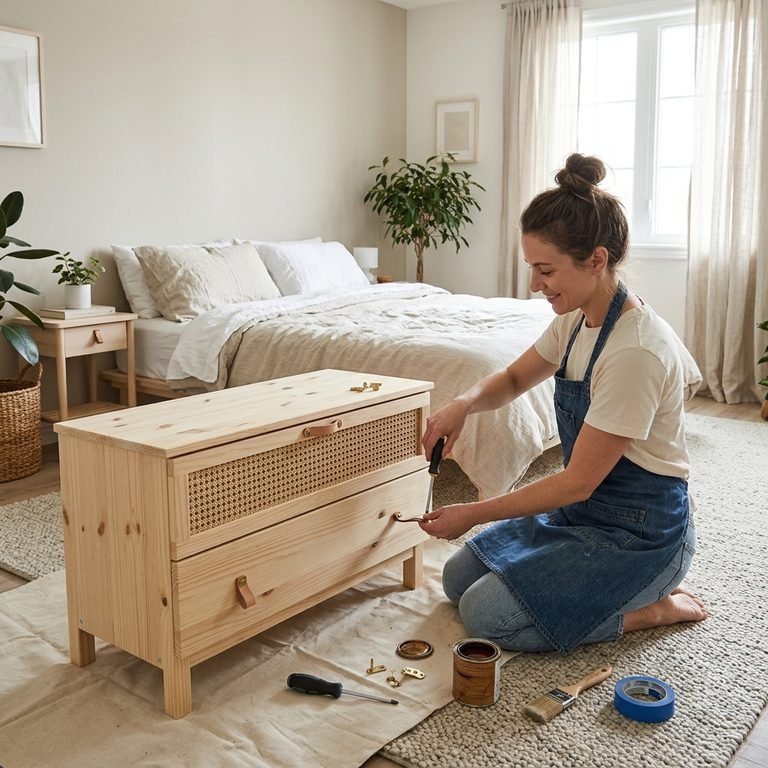
9. Cane Panel Doors for a Boho, High-End Built-In Look
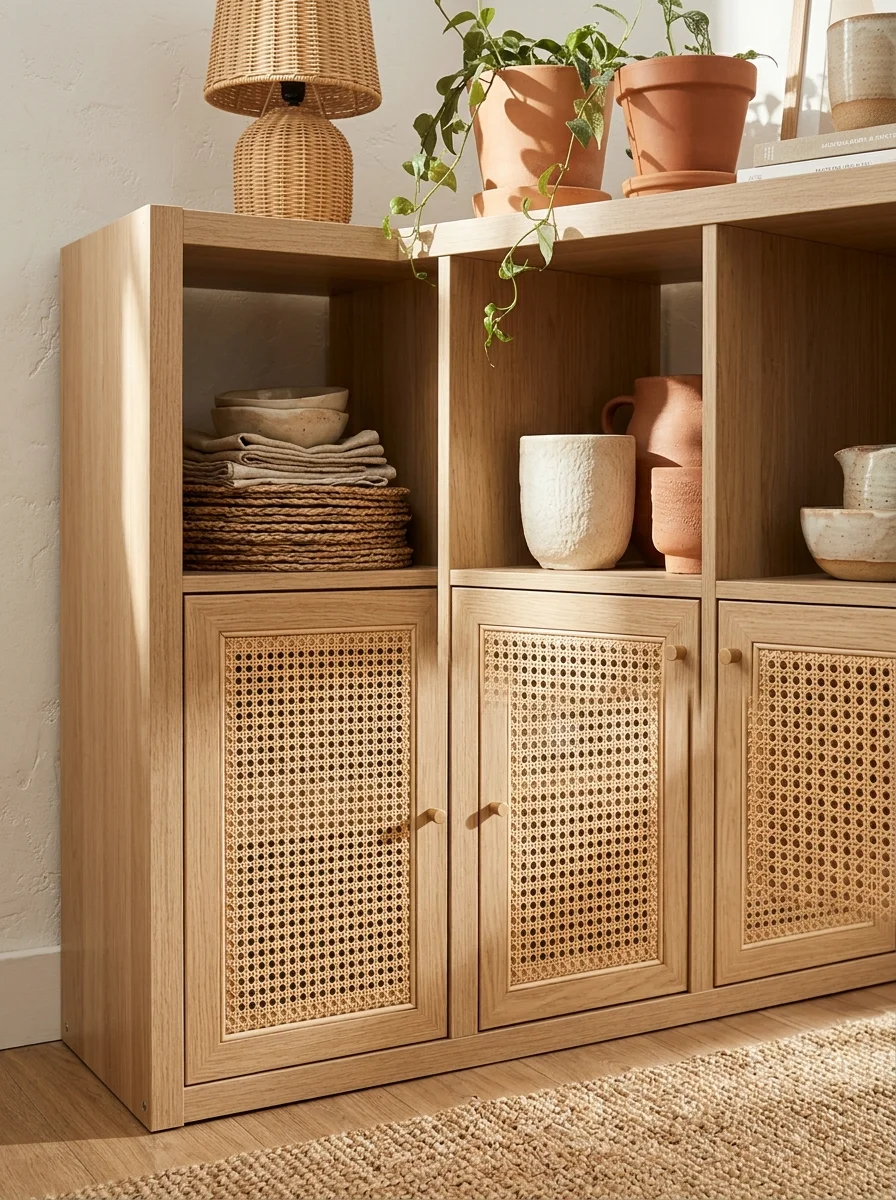
Cane inserts add instant warmth and a custom-furniture look. They hide what’s inside the cube while still letting air through, which makes them a great fit for media boxes, linens and baskets.
Material note: Soak 18-inch-wide natural cane webbing in warm water for 20 minutes, press it over a door frame, trim, and secure with flat reed spline and a caning tool. As it dries over 24 hours, it tightens like a drum. Skipping the soak is the typical mistake, and the webbing sags. Cost is about $15 per door.
Color note: Natural cane sits well against white or warm oak, and a clear coat keeps it honey-toned rather than dark.
Finishing swap: Seal with a water-based clear polyurethane spray, about $9, which suits living rooms where dust matters.
💡 Quick Win: Mist the webbing with a spray bottle if it dries before you finish trimming.
Shop The Look
- Natural rattan cane webbing, 18-inch wide roll
- Flat reed spline, 5/32-inch
- Spline-pushing caning tool
- Water-based clear polyurethane spray
- Rubber mallet
10. Peel-and-Stick Wallpaper Backs That Add Depth to Every Cube
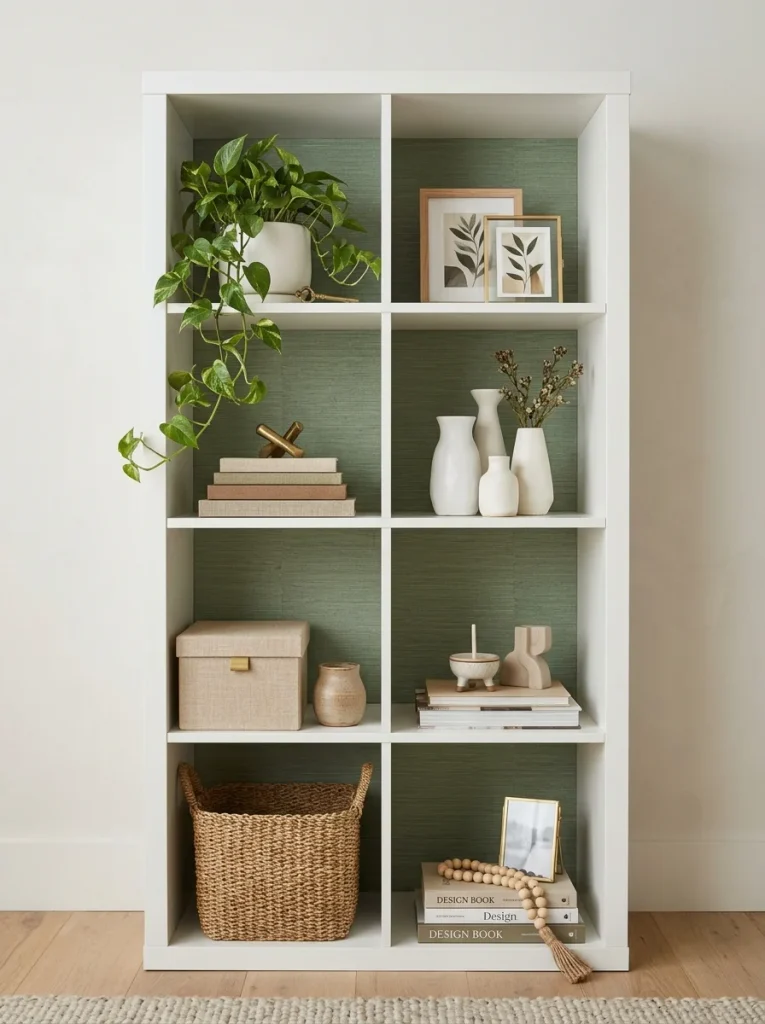
Covering just the back panel of each cube gives the unit depth and a custom feel. It’s a one-hour project that changes the whole look, and it’s removable, which renters will appreciate.
Material note: Wipe the backs with isopropyl alcohol, then cut 13-inch squares from one 20.5-inch roll, about $25 for a 2×4. Cut pieces in sequence from the same strip so the pattern flows from cube to cube. Mismatched patterns are the most common mistake, so mark “top” on each piece.
Color note: A tone-on-tone grasscloth in sage or soft taupe adds texture without competing with your objects.
Finishing swap: Add 1/4-inch painted trim around each opening to hide any rough edges, about $12, which suits bedrooms and nurseries.
Shop The Look
- Peel-and-stick grasscloth-look wallpaper, 20.5-inch x 16-foot roll
- Wallpaper smoothing tool
- Precision craft knife with spare blades
- Self-healing cutting mat, 24×36-inch
- Cork-backed 24-inch metal ruler
11. Two Kallax Pedestals and a Butcher Block Top for a Built-In Desk Nook
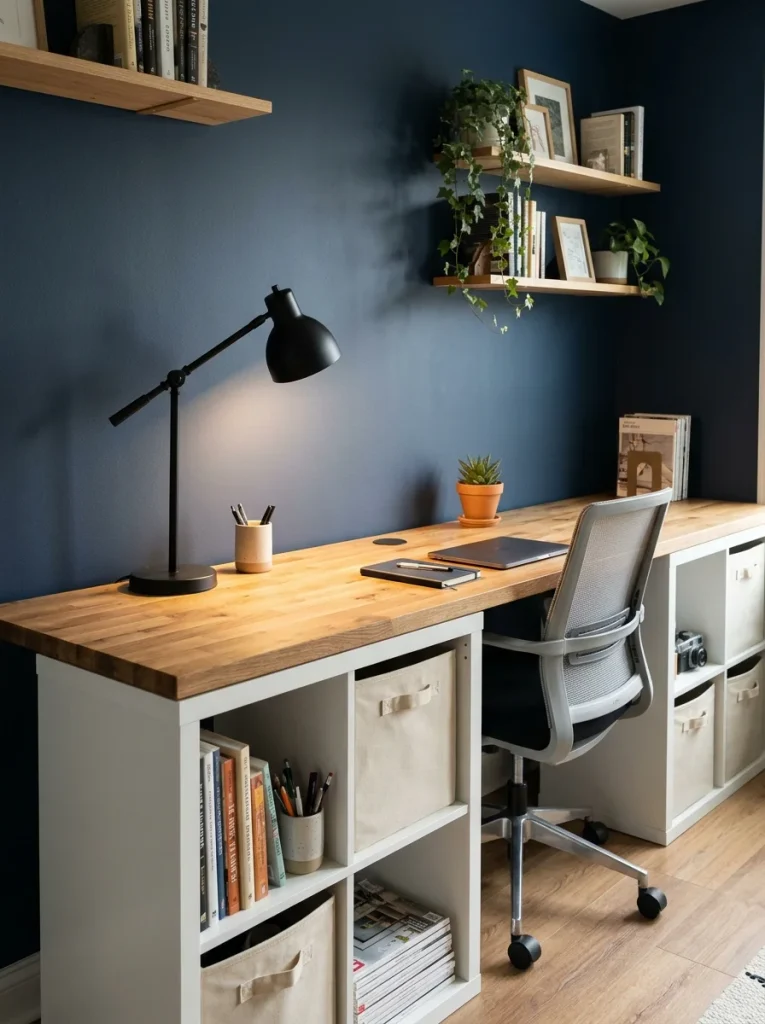
A 2×2 Kallax is about 30 inches tall, which is nearly desk height. Two of them with a butcher block between make a built-in workstation with plenty of storage and room for a laptop.
Material note: Space two 2×2 units 36 inches apart and screw a 1×2 cleat to each top for stability. Fix a 96 x 25-inch butcher block, finished with hardwax oil, using figure-8 fasteners. Expect about $180 for the top. Desk height lands near 31 inches, so pick an adjustable chair.
Color note: Warm white pedestals and oak create a calm, light contrast, and a navy wall behind them makes the oak glow.
Finishing swap: Mount an under-desk cable tray, about $15, to hide cords in a home office.
💡 Quick Win: Cut a 2.5-inch grommet hole before oiling the top, so the edge gets sealed.
Shop The Look
- Hardwood butcher block panel, 96 x 25-inch
- 2.5-inch desk cable grommet
- Under-desk cable management tray
- Figure-8 tabletop fasteners
- Hardwax oil finish, matte, 1 quart
How to Start Your Kallax Built-In Project
The one first move is a plinth, as in idea 1. It sets the height and level for everything above it, and it takes an afternoon. Once the base is level and anchored, every later step, from frames to crown, lines up without guesswork.
The most common mistake is painting straight onto the laminate. Kallax surfaces are slick, so ordinary paint peels in weeks. The fix is simple: scuff-sand with 220-grit, wipe clean, and apply a bonding primer before any color.
Three items under $50 will carry you a long way: a quart of shellac-based bonding primer (about $20), four 8-foot 1×2 poplar boards (about $25), and a tube of paintable caulk (about $5). That’s enough for a face frame, primed and ready to paint.
Realistically, a face frame and paint fit into one weekend, but give enamel about a week to cure before heavy use. Plan $150 to $250 for materials beyond the shelf itself, versus far more for a full custom build. Wallpaper backs, lighting and cane doors can each be done in under a day.
Frequently Asked Questions About IKEA Kallax Makeover Ideas for Creating a Custom Built-In Look
What’s the difference between a Kallax makeover and a real built-in?
A real built-in is built in place from raw lumber and fixed to the walls. A Kallax makeover uses a ready-made frame and adds trim, paint and fixings until it looks like one. The result costs far less and can be undone, but it won’t carry the same load as solid cabinetry.
What color should I paint a Kallax to look like a built-in?
Match your wall or trim color so the unit blends in. Warm white and deep green both work well. Use a satin cabinet enamel on the shelf and a flatter finish on the wall for subtle depth.
How much does a Kallax built-in hack cost?
Most makeovers run $150 to $400 on top of the shelf, depending on the number of extras. A face frame, plinth and paint land near $100 to $150. Lighting, doors and a butcher block top push the total higher.
Can renters or small rooms use IKEA Kallax makeover ideas?
Yes. A plinth, paint, peel-and-stick wallpaper and plug-in lighting are all removable. In small rooms, a single tall unit with a header box adds storage without eating floor space. Always anchor it with a wall strap, and ask your landlord about stud screws.
Can you paint an IKEA Kallax without it peeling?
Yes, if you prep it. Scuff-sand the laminate with 220-grit, apply a shellac-based bonding primer, then two thin coats of satin cabinet enamel. Let it cure for a week before loading shelves.
Ready to Create Your Custom Built-In Look With a Kallax?
You’ve seen plinths, face frames, color drenching, fluted and cane doors, crown, lighting, a window seat and a desk nook, and every one starts with a simple shelf. Starting small is the right approach, so pick one upgrade and finish it well. Today, measure your wall and ceiling height and tape the footprint of your unit on the floor with painter’s tape. The reward is walking into a room that looks designed, with storage that fits your life and a shelf no one will recognize. Save your favorites, like the fluted doors or the glowing green drench, and pin them so they’re ready when you start building.