
14 IKEA Kallax Makeover Ideas for Small Home Offices and Workspaces
A Kallax makeover turns IKEA’s classic cube shelf into custom home office furniture using paint, wood, lighting, and a few smart add-ons. This guide gives you 14 IKEA Kallax makeover ideas for small home offices and workspaces, each with materials, costs, color notes, and a ready-to-search shopping list.
Picture warm oak under your palms and a lamp glowing softly through a cube at dusk. Imagine felt-lined shelves that swallow keyboard clatter, and the faint smell of fresh paint on a desk built for exactly your corner. A good makeover makes a cramped room feel quiet, ordered, and yours.
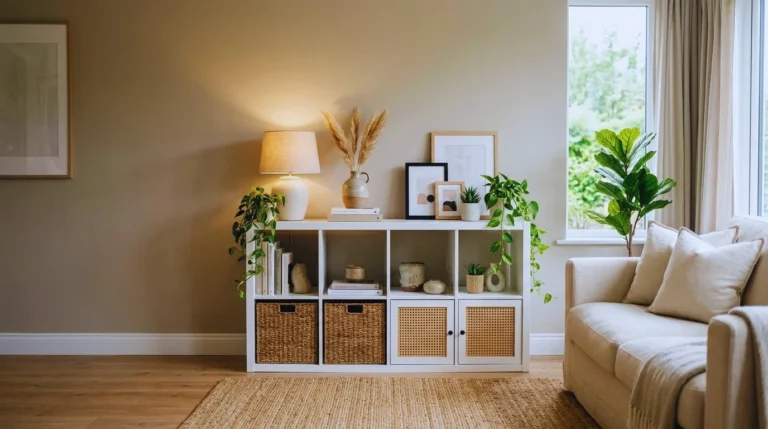
Here are 14 ideas worth saving — and stealing.
Why IKEA Kallax Makeover Ideas for Small Home Offices and Workspaces Work So Well
Kallax arrived in 2014 as the successor to IKEA’s Expedit, and its square grid of 13-inch openings has been the most hacked shelf in home decor ever since. A makeover keeps the sturdy, affordable frame and changes everything people see: the surface, the fronts, the backs, the top, and the light.
The frame is foil-wrapped particleboard with a honeycomb core, so it takes primer, paint, and adhesive well but holds screws poorly outside the solid edges. Most makeovers use quarter-inch plywood, fluted oak veneer, open-weave cane webbing, acoustic felt, brass hardware, and warm 2700K LED strips. The colors that work best are forest green, sage, warm oak, matte black, and chalk white.
The moment is right because hybrid work stuck around, and many people now work from a bedroom corner, a hallway nook, or a dining room edge. A cube unit can be a desk, a room divider, a printer hideaway, and a bookcase at once, and it moves with you when you rent.
Beginners can handle most of these projects in a weekend for under $100. The honest limits: painting needs a bonding primer and a week to cure, and any unit taller than your hip must be anchored to a wall stud.
| Style at a Glance | Details |
| Philosophy | Modular, repaintable, anchored storage that makes small rooms work harder |
| Key Materials | Birch butcher block, fluted oak veneer, cane webbing, acoustic felt, pegboard, brass pulls |
| Key Colors | Forest green, sage, warm oak, matte black, chalk white |
1. The Butcher-Block Kallax Desk Under $200

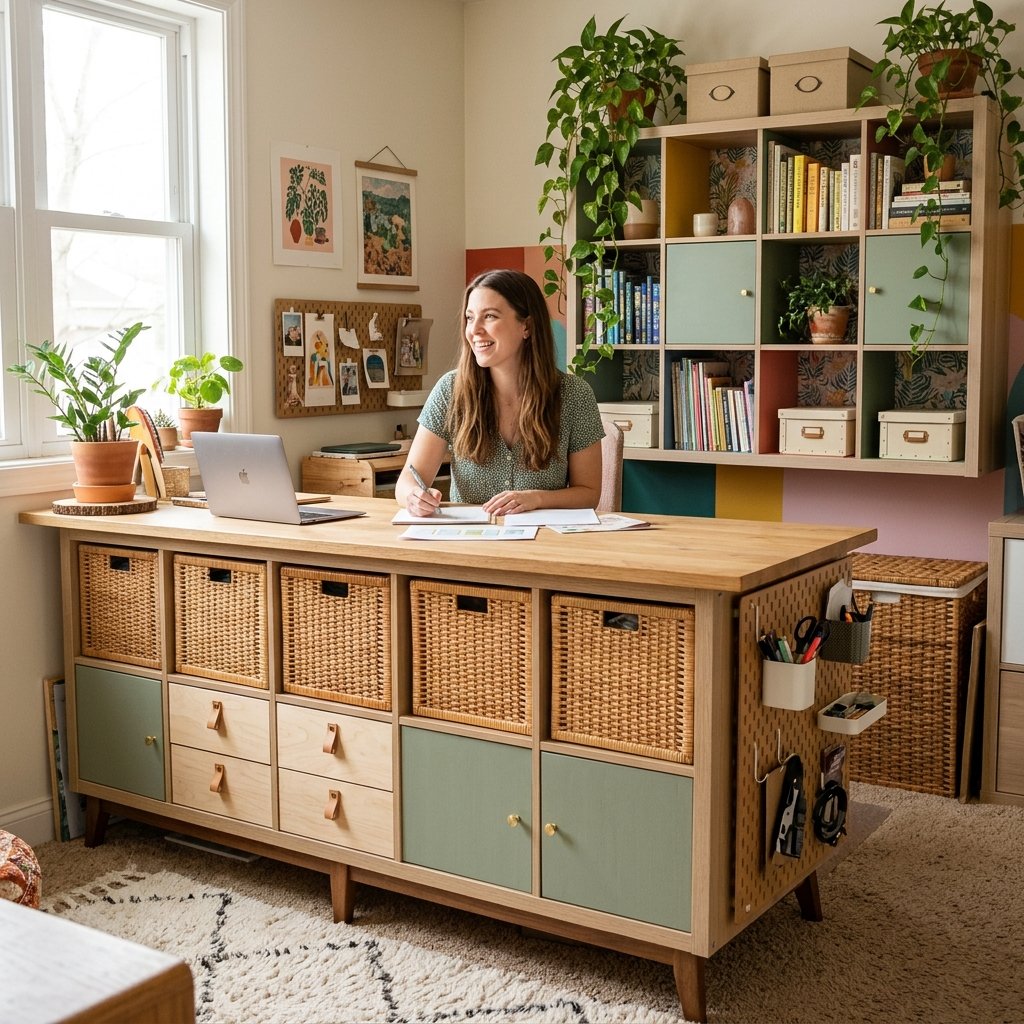
Two upright 1×2 Kallax units become desk pedestals, and a 60 x 24 inch butcher-block top spans the gap with about 27 inches of knee room. The grain reads like custom cabinetry, while the cubes quietly absorb paper, chargers, and files.
Material note: Use two 1×2 units, one 60 x 24 inch birch top (3/4 inch thick keeps the desk near 31 inches high), four steel corner brackets, and two coats of food-safe oil with four hours between coats. Expect roughly $150 to $180 and one afternoon. Beginners often drive screws into the flat honeycomb faces, where they strip out, so fasten into the solid edge frame instead.
Color note: Honey-toned birch against chalk white feels bright and deliberate, and the single warm wood keeps a small room from looking busy.
Finishing touch: Add a 2-inch cable grommet at the back edge for about $6 so cords drop cleanly into the cube. It suits freelancers who work from a laptop and a single monitor.
💡 Quick Win: Stick adhesive felt pads under the top corners so it never scratches the units.
Shop The Look
- 60-inch birch butcher block desktop, 24 inches deep
- Heavy-duty steel L corner brackets, 3 inch
- Anti-tip furniture wall straps
- Food-safe butcher block oil
- 2-inch desk cable grommet
Also view: 15 IKEA Kallax Makeover Ideas to Turn Basic Shelving Into Custom Furniture
2. Fluted Oak Cube Fronts That Hide a Printer in Plain Sight

Thin fluted oak panels cut to cover selected cubes hide the router, printer, and tangled wires behind rhythmic vertical lines. The ridges catch light like boutique cabinetry, and each front pops open with a gentle press.
Material note: Cut a quarter-inch fluted oak veneer panel (a 24 x 48 inch sheet yields about six 13 x 13 inch fronts) with a fine-tooth pull saw, then glue each to a thin plywood backer and clamp for 24 hours. Budget about $55. The common slip is cutting with grooves running sideways, so mark every panel with vertical arrows before you cut.
Color note: Pale oak with a clear satin sealer stays light, so the fronts blend into a white frame instead of reading as dark boxes.
Finishing touch: Press in magnetic push-to-open catches (about $8 for four) so no handles interrupt the grooves. It suits renters who want a tidy look without drilling pulls.
Shop The Look
- Flexible fluted oak veneer panel sheet
- Magnetic push-to-open cabinet catches
- Interior carpenter’s wood glue
- Clear satin water-based polyurethane
- Fine-tooth Japanese pull saw
3. Cane Webbing Doors for a Boho Home Office Storage Wall
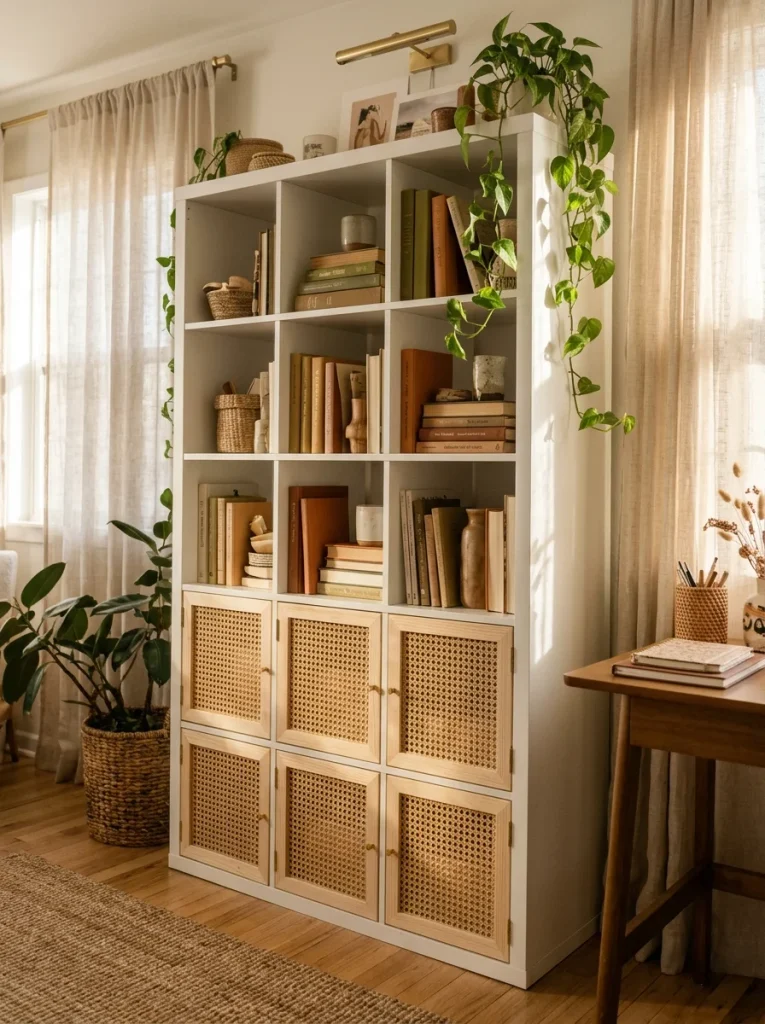
Open-weave cane webbing in slim pine frames turns plain cubes into a softly textured storage wall that still lets air through. You see a hint of what is inside, which keeps closed storage from feeling heavy in a small room.
Material note: Cut 1×2 pine furring strips into frames of 13 x 13 inches, soak 18-inch-wide cane webbing in warm water for 20 minutes until pliable, then staple it over the frame with a heavy-duty staple gun and trim. Cost is about $30 for six doors. The classic error is stretching dry cane, which cracks, so never skip the soak.
Color note: Straw-gold cane against white keeps the palette limited, while a matte clear coat on the pine matches the webbing’s warmth.
Finishing touch: Mount each frame with two 1-inch brass butt hinges (about $6 for a set of four). It suits anyone who wants a boho study without dark furniture.
💡 Quick Win: Soak the cane in the bathtub while you sand the frames so both are ready at the same time.
Shop The Look
- Open-weave cane webbing roll, 18 inch wide
- Pine 1×2 furring strips
- Heavy-duty staple gun with 3/8 inch staples
- Mini brass butt hinges, 1 inch
- Matte water-based wood sealer
4. LED-Backlit Cubes That Glow Like a Gallery Wall
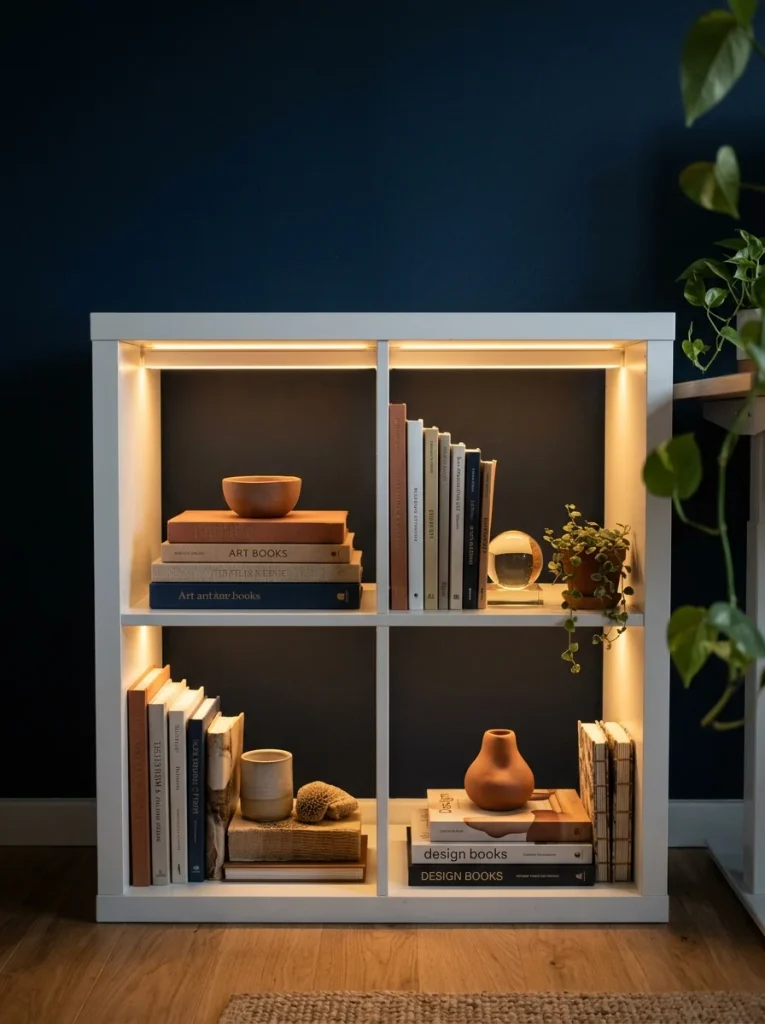
A thin 2700K LED strip tucked along the top of each cube washes your objects in soft, even light. The shelf becomes a glowing focal point that doubles as ambient lighting, so you can skip a bulky floor lamp.
Material note: Use about 10 feet of warm white USB LED strip (about $15), set into aluminum channels with frosted diffusers, and cut at the marked copper pads. Total is about $25 and takes under an hour. The usual mistake is mounting the bare strip, which shows every LED dot, so always use a diffuser channel.
Color note: 2700K warm white flatters wood and paper, while cool white makes a small room feel clinical. Navy walls make the glow richer.
Finishing touch: Clip an inline dimmer to the cable (about $7) so evening work gets a gentle glow. It suits night-shift freelancers and anyone on late video calls.
Shop The Look
- Warm white 2700K USB LED strip lights
- Aluminum LED channel with frosted diffuser
- Inline LED dimmer switch
- Adhesive cable clips
- 5V 2A USB wall power adapter
5. Forest Green Two-Tone Paint With Brass Pulls

Painting the frame deep green and leaving the cube interiors white makes a basic shelf look like built-in library joinery. Brass pulls on the door inserts add warmth, and the two tones make objects inside read as curated.
Material note: Scuff the foil surface with 220-grit sponges, apply one coat of bonding primer, then two coats of satin cabinet enamel with a 4-inch foam roller, waiting 4 hours between coats. Plan about $55 and a week for full cure. The classic mistake is skipping primer, which makes the paint peel at the corners.
Color note: Forest green and warm brass are classic partners, and white interiors keep the inside bright enough to read labels.
Finishing touch: Swap in 3-inch brass bin pulls (about $14 for four). It suits anyone who wants a study that feels older and more serious than the room really is.
💡 Quick Win: Run painter’s tape along the white interior edges before painting so the lines stay razor sharp.
Shop The Look
- Bonding primer for laminate and foil surfaces
- Satin cabinet enamel, forest green
- 220-grit sanding sponges
- 4-inch mini foam roller set
- Brass bin pulls, 3 inch
6. Pegboard Backs That Turn Cubes Into Supply Stations

A quarter-inch pegboard sheet cut to 13 x 13 inches lines the back of a cube and gives you hooks, baskets, and holders at eye level. Tools you reach for every hour stay visible but out of the way, and the desk surface stays clear.
Material note: Cut hardboard pegboard (24 x 48 inches gives about six panels) with a handsaw, sand the edges, and wedge each panel against the back or fix it with four small cleats. Cost is about $35 with accessories and it takes under 90 minutes. The most common error is cutting panels a hair too large, so subtract an eighth of an inch from your measurements.
Color note: Painting the pegboard sage lets white accessories stand out, and a soft green keeps the grid from feeling industrial.
Finishing touch: Add a pegboard pen and scissors holder (about $5) so small tools never drift to the desk. It suits crafters, students, and teachers who juggle many supplies.
Shop The Look
- Hardboard pegboard panel, 1/4 inch, 24 x 48 inches
- Pegboard hook and accessory kit
- Small wire pegboard baskets
- Pegboard pen and scissors holders
- Pegboard shelf bracket set
7. Trailing Plant Cubes for a Greener Workspace

Trailing pothos in the upper cubes softens the grid and lets vines fall toward the desk. Fresh leaves bring color and a little humidity to a closed room, and the green gives your eyes a place to rest between screens.
Material note: Use waterproof liners to protect the foil, a 4-inch pothos per cube, and a clip-on full-spectrum grow light on an 8-hour timer. Plan about $45 for two cubes with light, and let plants settle for two weeks. Beginners often overwater, so water only when the top inch of soil is dry.
Color note: Leaf green against white and terracotta feels natural and calm, and the glossy foliage contrasts nicely with matte paper and fabric.
Finishing touch: Tuck sheet moss over the soil (about $6) so liners vanish. It suits anyone whose desk has no windowsill for plants.
💡 Quick Win: Plug the grow light into a timer so the plants get light even when you forget.
Shop The Look
- Live trailing pothos plants, 4-inch pots
- Rectangular waterproof plant liner trays
- Clip-on full-spectrum grow light with timer
- Decorative sheet moss
- Self-watering planter, 6 inch ceramic
8. A Wall-Mounted Floating Kallax Above a Narrow Desk

Mounting a 1×4 unit sideways on the wall frees the floor and gives a narrow desk a shelf above it. The unit hovers like a built-in, and a clear lower wall makes a small room feel bigger.
Material note: Fix a 24-inch aluminum French cleat into wall studs with 3-inch structural screws, then hook the unit onto the matching cleat strip glued into the unit’s top edge. Plan about $40 and two hours. Never rely on drywall anchors alone, which can pull out under books, so find studs first.
Color note: Pale gray walls with white cubes keep a tight, quiet palette, and a single oak accent warms it up.
Finishing touch: Add a thin oak edge strip (about $9) to the front so the unit looks custom. It suits renters with a narrow wall who still need a visible book shelf.
Shop The Look
- Aluminum French cleat set, 24 inch
- Electronic stud finder
- 24-inch magnetic level
- Structural cabinet screws, 3 inch
- Iron-on oak veneer edge banding
9. Acoustic Felt Backs for a Quieter Home Office

Polyester felt panels cut to fit inside the cubes dampen echo, which helps video calls and recordings. The soft gray backs make books pop, and the shelf becomes part of the room’s acoustic treatment.
Material note: Cut 12 mm polyester acoustic panels (24 x 48 inches) into 13 x 13 inch squares with a snap-blade knife against a steel straightedge, then spray-glue them to the back panels. Cost is about $50 for the full unit, with one afternoon of work. People often cut ragged edges, so replace blades every 10 cuts.
Color note: Heather gray is neutral enough for any wall color and makes warm objects look richer.
Finishing touch: Line one cube with leftover felt and use it as a mic and webcam nook (about $0 extra). It suits podcasters, tutors, and anyone on daily calls.
💡 Quick Win: Trace one cube onto kraft paper and use it as a template for every cut.
Shop The Look
- 12 mm polyester acoustic panels, 24 x 48 inches
- Multi-purpose spray adhesive
- Self-healing cutting mat
- Steel straightedge ruler, 24 inch
- Heavy-duty utility knife with snap blades
10. Gallery Cubes for Prints, Awards, and Portfolio Pieces

Treat each cube as a mini gallery with a frame, a book on a riser, and one object that matters to you. Your inspiration becomes visible from the desk chair, and the shelf feels personal instead of purely functional.
Material note: Group 5 x 7 inch frames in odd numbers per cube, lift books with small wooden risers, and secure each with museum putty (about $4 for a pack). Plan about $45 for a full unit. The mistake to avoid is filling every cube, so leave at least one in three mostly empty.
Color note: Black frames against white cubes look crisp, and a single ochre accent per row adds warmth.
Finishing touch: Add 4-inch acrylic mini easels (about $8) for postcards and awards. It suits designers, writers, and teachers who want a visible portfolio.
Shop The Look
- 5 x 7 inch black picture frames with mats
- Small acrylic easel display stands
- Museum putty for securing objects
- Wooden book risers
- Mini brass bookends
11. A Drop-Front Laptop Desk Built Into One Row
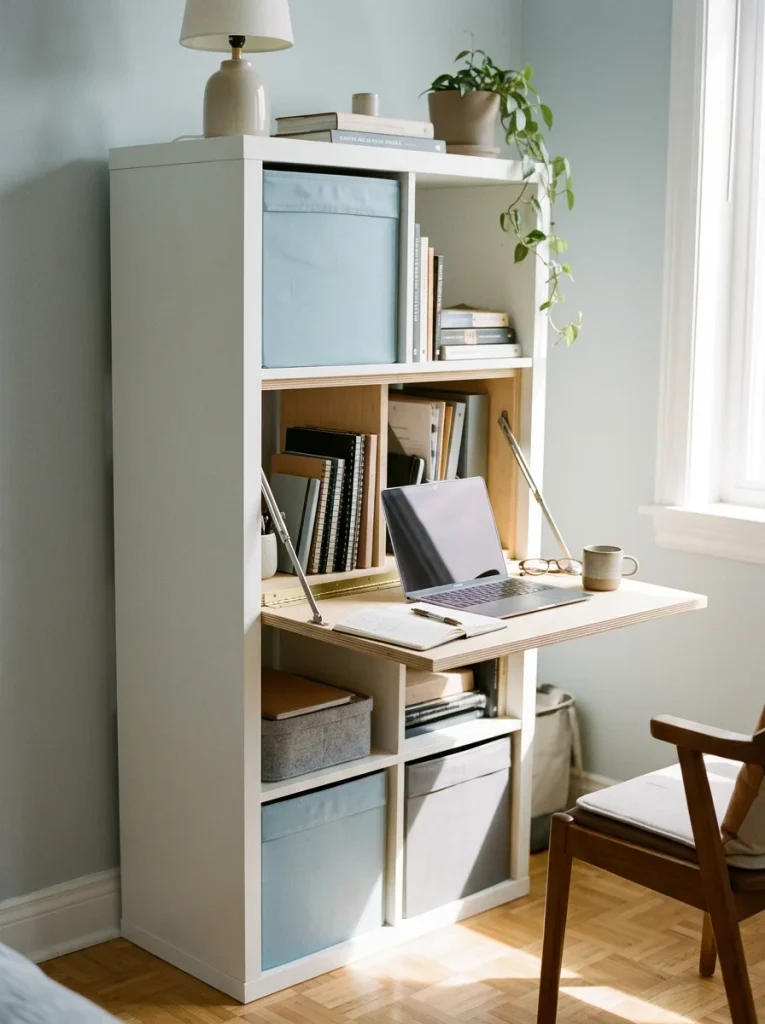
A hinged birch panel fits one cube row and folds down into a laptop desk at about 15 inches deep. When you finish, it flips up and the unit looks like ordinary shelving, which is ideal when your office lives in a bedroom.
Material note: Cut a 3/4 inch birch plywood panel to the row width, attach a 30-inch piano hinge to a glued plywood strip inside the bottom edge (solid wood holds screws, honeycomb does not), and add two folding support stays. Cost runs about $65 and takes one afternoon. Beginners forget to pre-drill, which splits the plywood.
Color note: Pale birch edge banding against white feels light and intentional, and brass hardware adds a quiet accent.
Finishing touch: Cut a small finger notch or add a flush pull (about $5) so the panel lifts easily. It suits studio dwellers who must reclaim their space every evening.
💡 Quick Win: Pre-drill every hinge hole with a 3/32 inch bit.
Shop The Look
- Brass piano hinge, 30 inch
- Folding lid support stays, pair
- 3/4 inch birch plywood project panel, 2 x 4 feet
- Iron-on birch veneer edge banding
- Recessed flush pull for cabinet doors
12. Peel-and-Stick Wallpaper Backs for a Pattern Pop
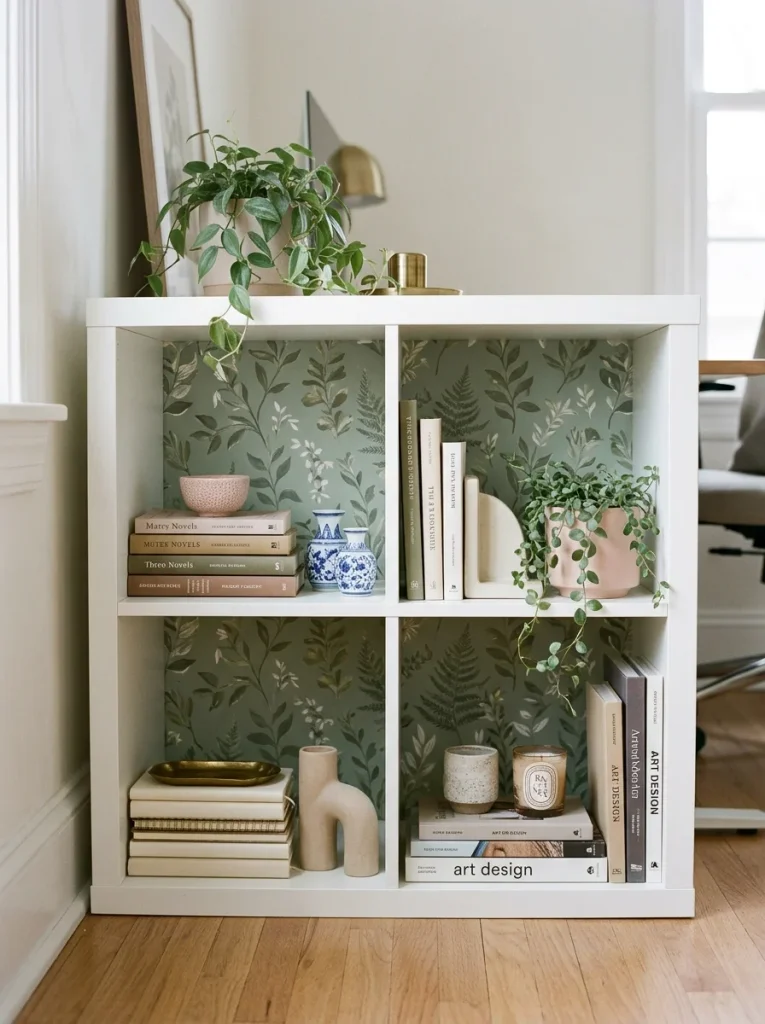
A botanical wallpaper pattern behind your objects makes the shelf feel like a wallpapered alcove. It is the fastest way to add personality, and you can peel it off when you move.
Material note: Cut a 20.5-inch-wide peel-and-stick roll into 13 x 13 inch squares, wipe each cube back with isopropyl alcohol, and smooth from the center out with a seam roller. Cost is about $28 and the job takes an hour. The usual mistake is rushing the alignment, so lay each square dry first and match the pattern before peeling.
Color note: Soft sage with gold details brightens white shelves without competing with objects.
Finishing touch: Use one extra wallpaper square as a drawer-bottom or tray liner (about $0). It suits anyone who wants a bold look without painting.
Shop The Look
- Peel-and-stick wallpaper, sage botanical pattern
- Wallpaper smoothing tool
- Wallpaper seam roller
- Isopropyl alcohol cleaning wipes
- Precision hobby knife set
13. Linen Bins and Label Holders That Tame Paper Piles
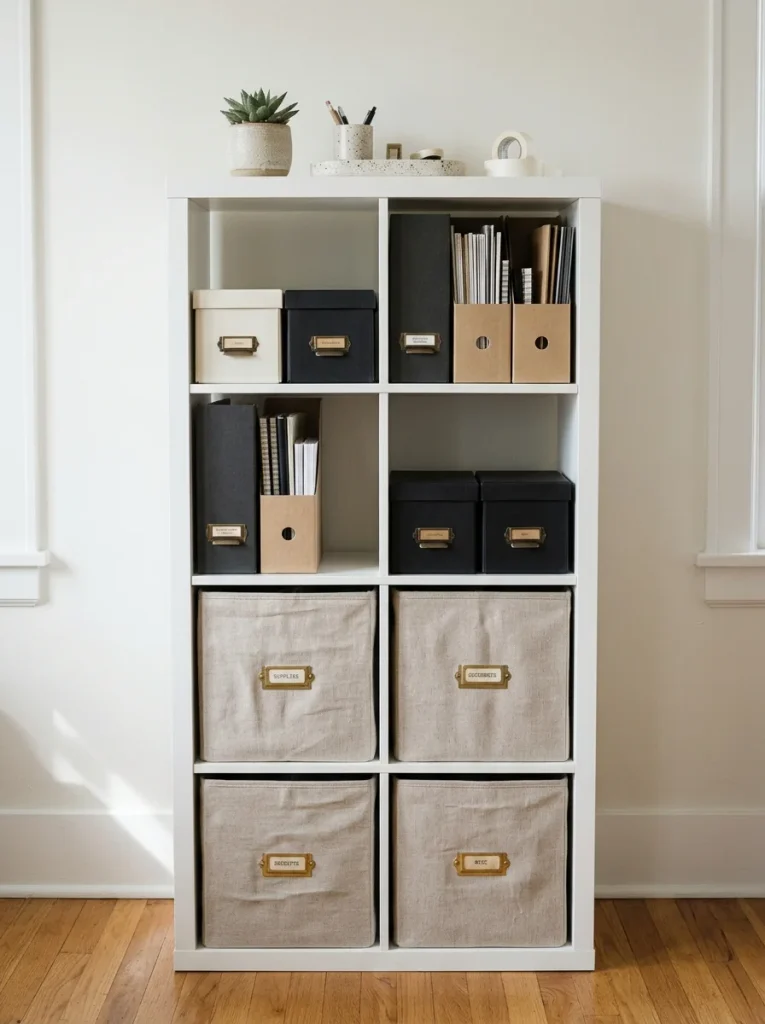
Uniform linen bins turn a shelf full of paper into a tidy wall of labeled storage. Taxes, receipts, and cables get their own homes, and the matching texture makes the whole unit look planned.
Material note: Choose 12.5 inch fabric cubes that slide in with a quarter-inch clearance, add clip-on label holders, and group items by project. Expect about $48 for six bins. People often buy bins that are too tight, so measure your cube openings before ordering.
Color note: Oatmeal linen against white feels soft and lets typed labels stand out.
Finishing touch: Print labels on kraft cardstock and slip them into brass holders (about $9 for six). It suits busy parents and students who share a desk.
💡 Quick Win: Use stick-on label tags instead of writing directly on the fabric.
Shop The Look
- Oatmeal linen fabric storage cubes, 12.5 inch
- Clip-on metal label holders
- Letter-size file storage boxes with lids
- Magazine file holders, set of six
- Drawer divider organizer trays
14. Cork and Magnetic Board Backs for a Planning Wall
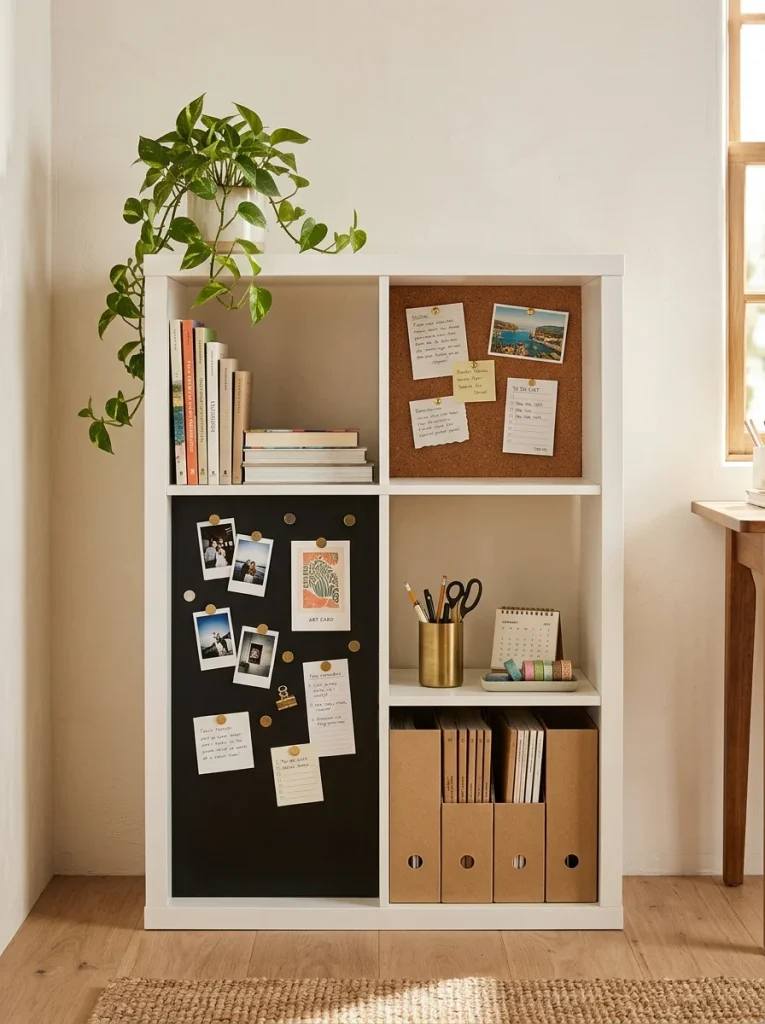
Self-adhesive cork and magnetic sheets turn cube backs into planning boards for notes, photos, and deadlines. The materials sit inside the shelf, so your desk stays free while your plans stay in view.
Material note: Cut self-adhesive cork roll (about 12 x 48 inches) and a magnetic sheet to 13 x 13 inch squares and press firmly from the center out. Cost is about $30 and takes 45 minutes. The usual error is skipping surface cleaning, so wipe backs with a damp cloth and let them dry first.
Color note: Natural cork next to matte black makes a strong, intentional contrast without extra decor.
Finishing touch: Add a washi tape border (about $5) around each board so it looks styled. It suits project managers and students who live by deadlines.
Shop The Look
- Self-adhesive cork roll
- Self-adhesive magnetic sheet
- Brass decorative push pins
- Neodymium disc magnets
- Washi tape set, neutral colors
How to Start Your Kallax Home Office Makeover
The one first move is a single painted 2×2 unit. It teaches you the primer, sanding, and curing steps that every other idea in this guide builds on, and a small unit is cheap to redo if you hate the color.
The most common mistake is skipping a wall anchor. A loaded Kallax can tip, so fix every unit to a stud with an anti-tip strap before you stock it. The second mistake is painting without bonding primer, which makes foil peel at the corners within weeks.
Here are three exact entry points under $50: a quart of bonding primer plus satin enamel (about $35), a 10-foot warm white USB LED strip kit with diffuser channel (about $25), and one 24 x 48 inch pegboard panel with hooks (about $20). Pick one and finish it this weekend.
Set realistic expectations. Peel-and-stick wallpaper, pegboard, felt, and LED lights can be done in an afternoon, while paint needs about a week to cure and a full desk build takes a weekend. A starter project runs $30 to $80, and a full office setup with desk, lighting, and storage lands at $250 to $400.
Frequently Asked Questions About IKEA Kallax Makeover Ideas for Small Home Offices and Workspaces
What is a Kallax hack, and how is it different from regular shelving?
A Kallax hack changes the look or function of a standard unit with paint, panels, tops, or lighting. Regular shelving stays as sold, while a hacked unit becomes a desk, a media wall, or a room divider. Most hacks keep the frame untouched, so you can undo many of them later.
What paint color works best on a Kallax for a home office?
Forest green, sage, and warm oak tones are popular because they read as built-in furniture. In a small room, lighter greens and warm whites keep the space feeling open. Always test a small patch first, because the foil surface can shift color under light.
How much does a Kallax home office makeover cost?
A single project such as LED lighting or wallpaper backs costs about $25 to $50. A butcher-block desk with two pedestals runs about $150 to $200 including the top. Expect $250 to $400 for a full office with desk, lighting, and storage inserts.
Can a Kallax hold a monitor and printer?
Yes, for light equipment, if the unit is anchored to a stud and the load stays modest per shelf. A 27-inch monitor and a compact printer are fine on a reinforced top, but check IKEA’s listed shelf limit before you add books. Heavy items belong on the bottom row.
Can you paint an IKEA Kallax without sanding?
You can, but the paint will scratch off more easily. A light scuff with 220-grit sponges plus a bonding primer gives the enamel something to grip. Allow about a week for the finish to cure before loading the shelves.
Ready to Start Your Kallax Home Office Makeover?
You have seen the range: wood desks, painted frames, cane doors, glowing cubes, and felt-lined backs for quiet. Starting small is the right approach, because one finished cube proves the method for the rest. Today, measure your corner and pick one idea from these IKEA Kallax makeover ideas for small home offices and workspaces. The payoff comes every morning when you sit down at a space that feels calm, organized, and clearly yours. Pin your favorites, especially the forest green frame and the glowing LED cubes, so they are ready for your first weekend project.


One Comment