14 IKEA Kitchen Hacks for Creating a Functional Kitchen Island
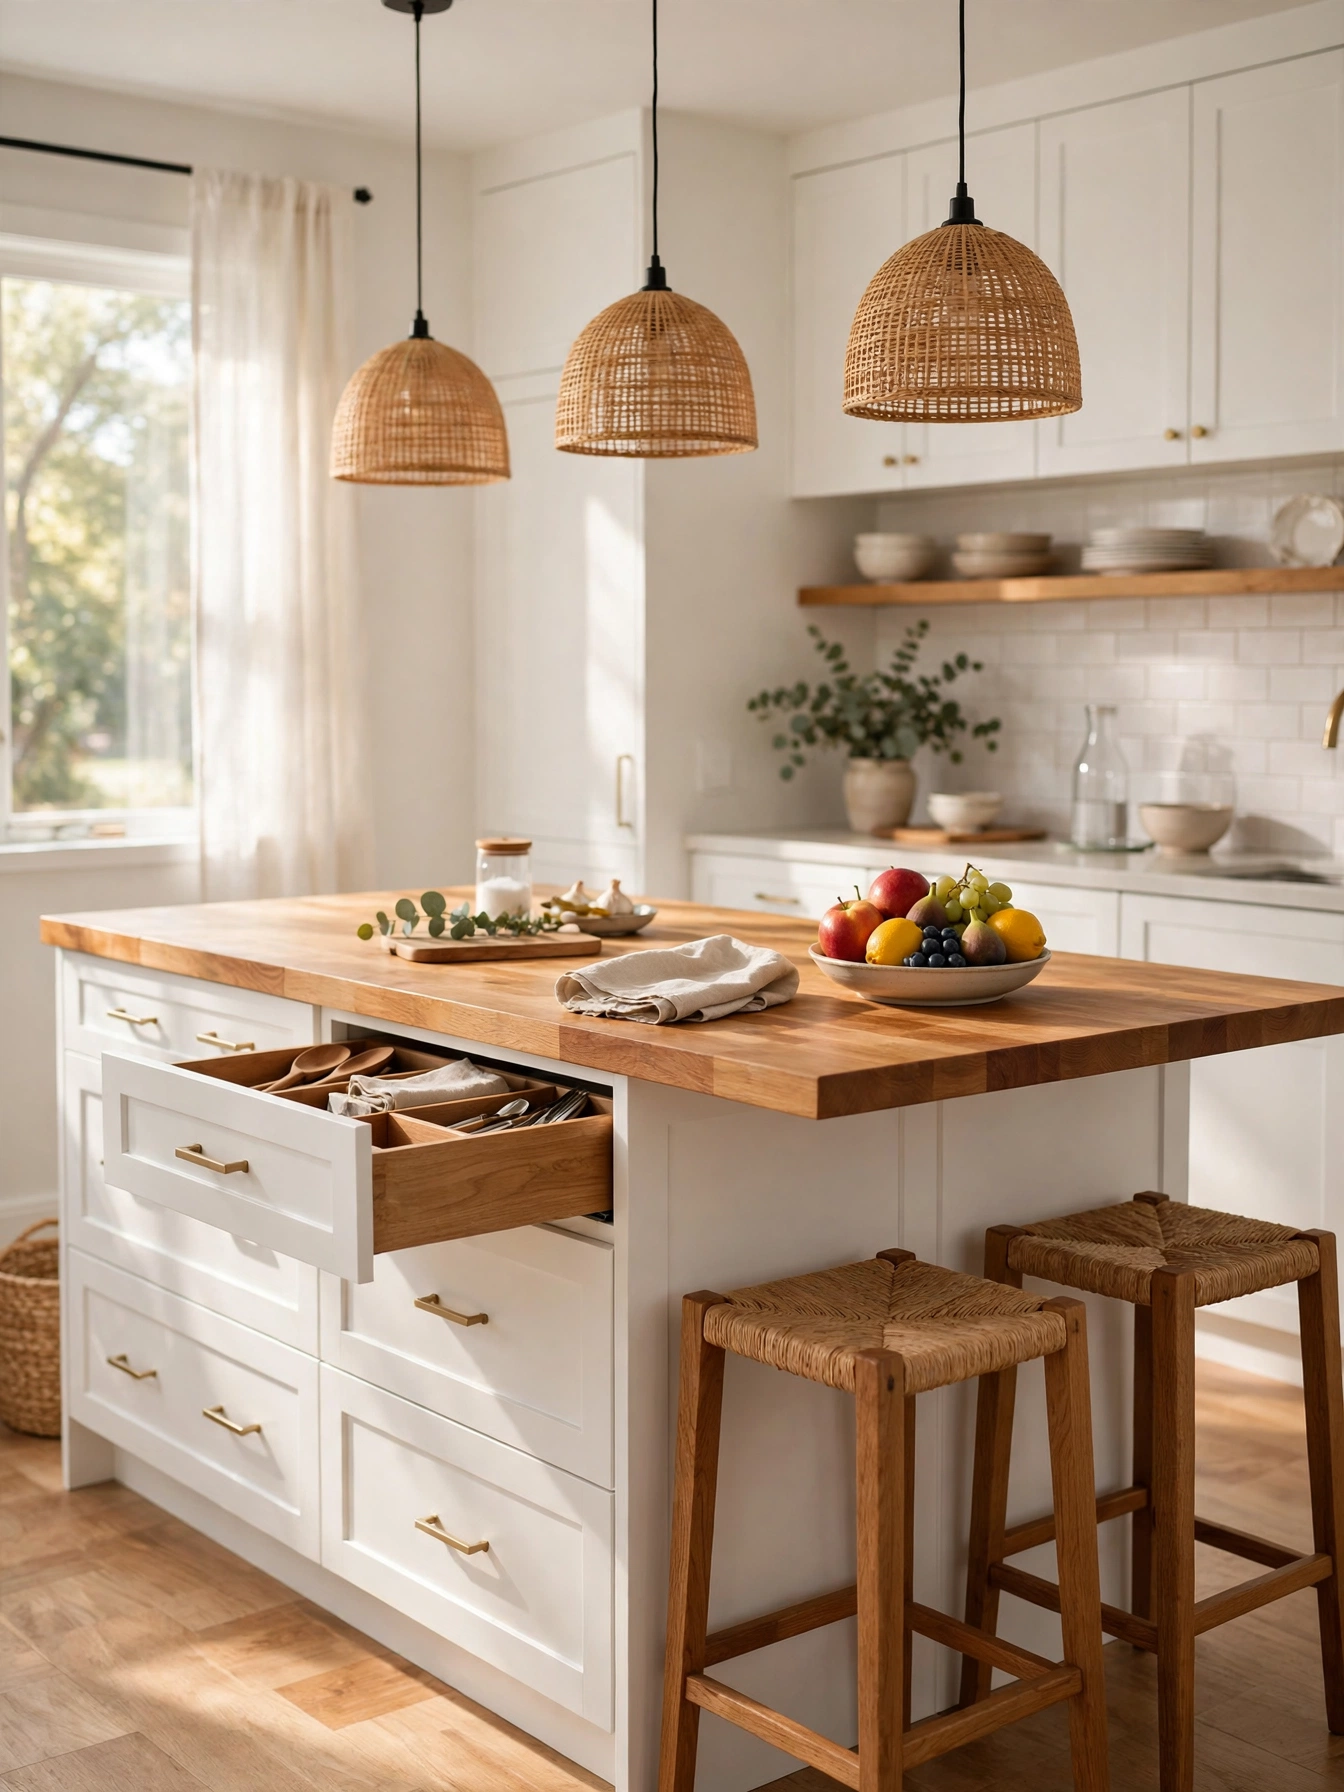
The kitchen island was meant to be the hardest working spot in the room. Instead, most islands end up as a dumping ground, a flat surface where post, school bags, and half finished shopping lists pile up until there is no room left to chop an onion.
The trouble is not a lack of space. The trouble is that the island has no fixed jobs, so nothing on it has a home and every task borrows the same bare stretch of counter.
These IKEA kitchen hacks give the island a job for every side of it. One end files the cookbooks, one side slides out the spices, and the top itself pops up power, weighs the baking, and keeps dinner warm while everyone finds a seat.
Pick three ideas from the list and fit them this weekend. Your island will stop being a dumping ground and start earning its place in the middle of the room.
1. A Cookbook Slot on the Island End Panel That Files Recipes Where You Cook
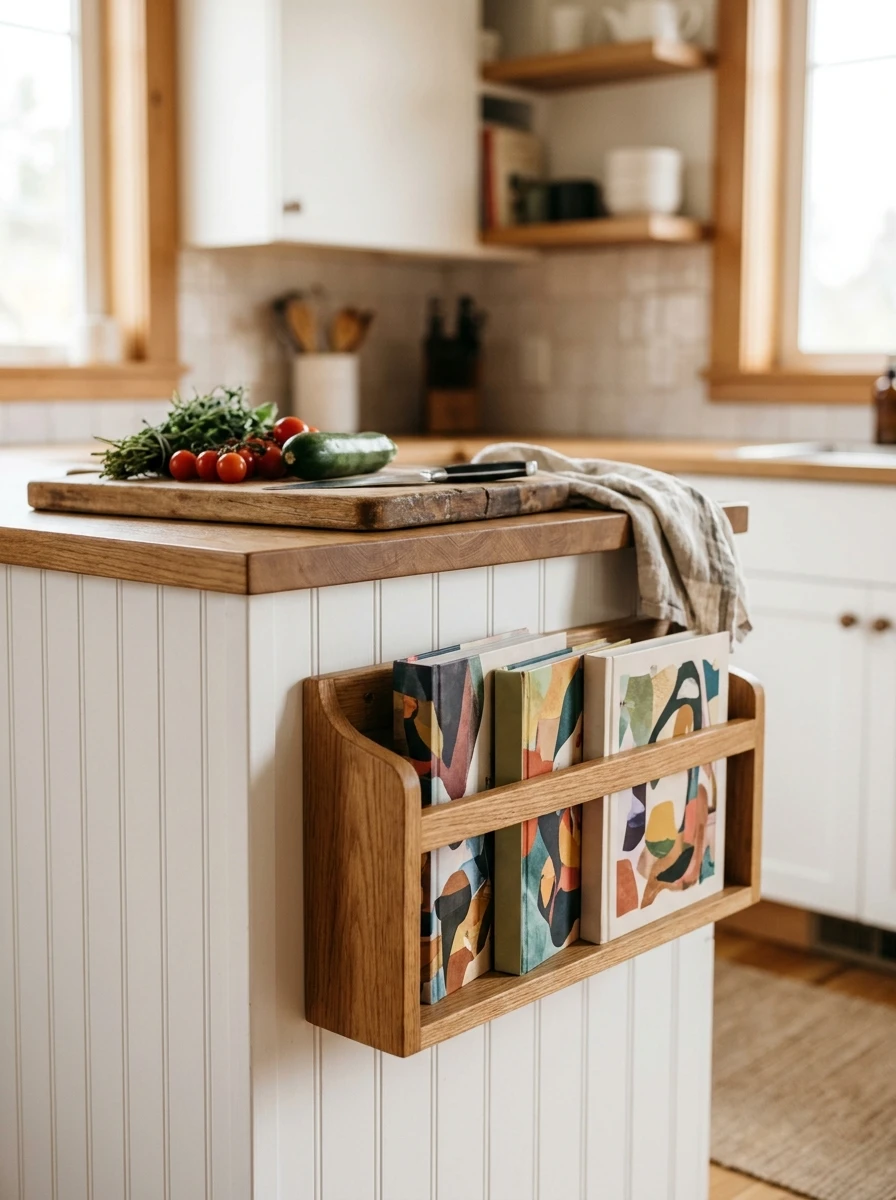
The cookbooks live on a shelf across the room, which means the recipe you need is never in reach when your hands are covered in flour. A slot on the island end panel fixes that, because the book you cook from most stands upright where you work.
Cut a shallow open slot into the end panel, or fix a slim wooden rack to it, sized to hold three or four books upright like files. Keep the everyday cookbook and one baking book in the front slots, and slide the rest behind them. The books stay clean, because the slot sits on the far end, away from the chopping spot and the sink splash.
Wipe the slot out once a week, so crumbs never settle in the bottom.
Also view: 12 IKEA Kallax Makeover Ideas for Organizing a Small Bedroom
2. A Pop-Up Power Tower in the Island Top That Charges Tools Without a Trailing Cord
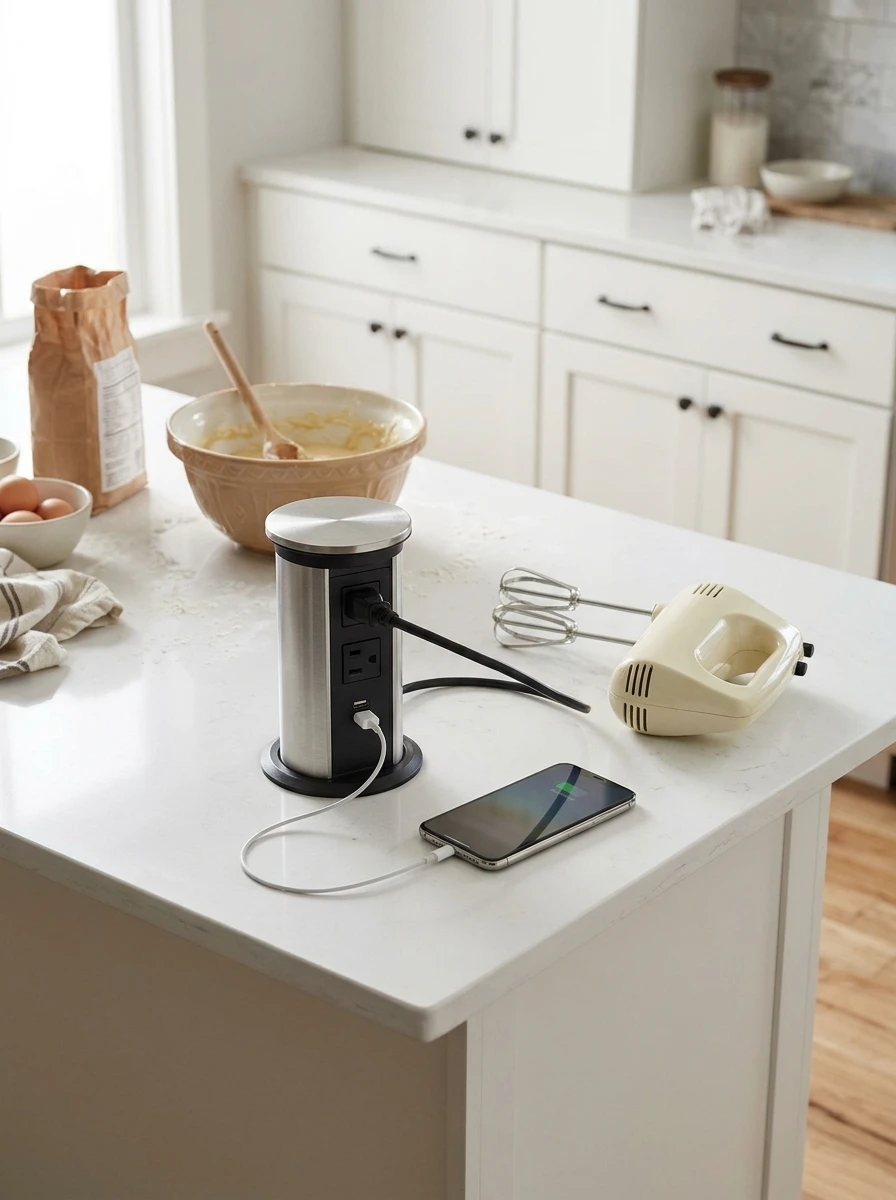
The island sits in the middle of the room, far from the wall sockets, so every gadget on it needs a cord stretched across the floor. A pop-up power tower in the island top ends that trip hazard, because the sockets rise only when you need them.
Fit a small round tower into a hole cut in the island top, near the end where you prep. Press the top and it pops up with two sockets and a USB port, ready for the hand mixer, the phone, or the laptop. Press it down when dinner is served, and the top is flat again for plates and serving bowls.
Keep the tower wiped dry, and never press it down while a plug is still in it.
What the tower gives you
3. A Pull-Out Spice Rack in the Island End That Puts Every Jar in Reach
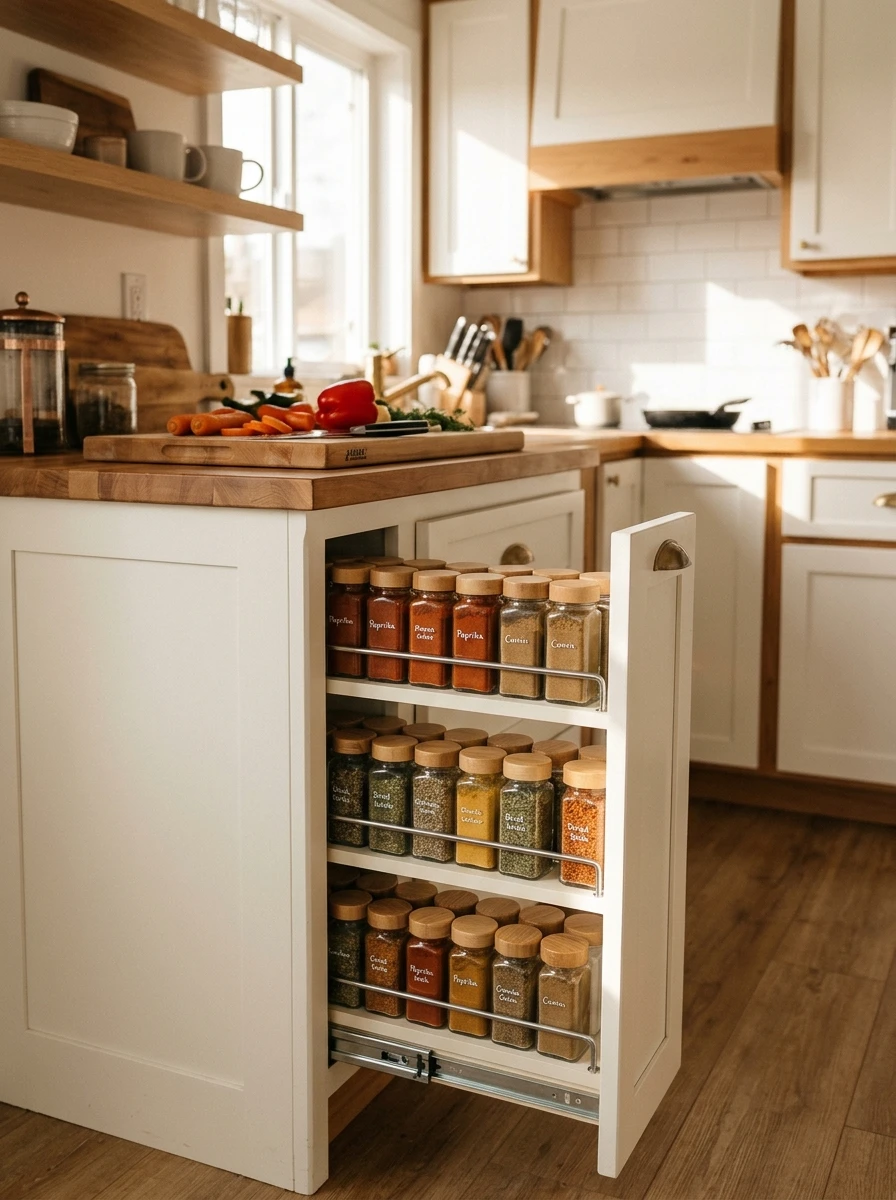
Spices live in a cupboard across the kitchen, so every pinch means a hunt through jars you cannot see. A narrow pull-out rack in the island end panel puts them at the prep end instead, and these IKEA kitchen hacks work best when the flavour is in reach while you cook.
Fit a slim pull-out into the end panel beside the chopping spot, with three or four shallow shelves sized for standard spice jars. Stand the jars in rows with the labels facing out, everyday paprika and cumin at the top and the rest below, and pull the rack out when you season the pan.
Wipe the shelves once a month, so spilled spice never sticks to the wood.
4. Vented Produce Drawers in the Island That Keep Onions and Potatoes Dark and Dry
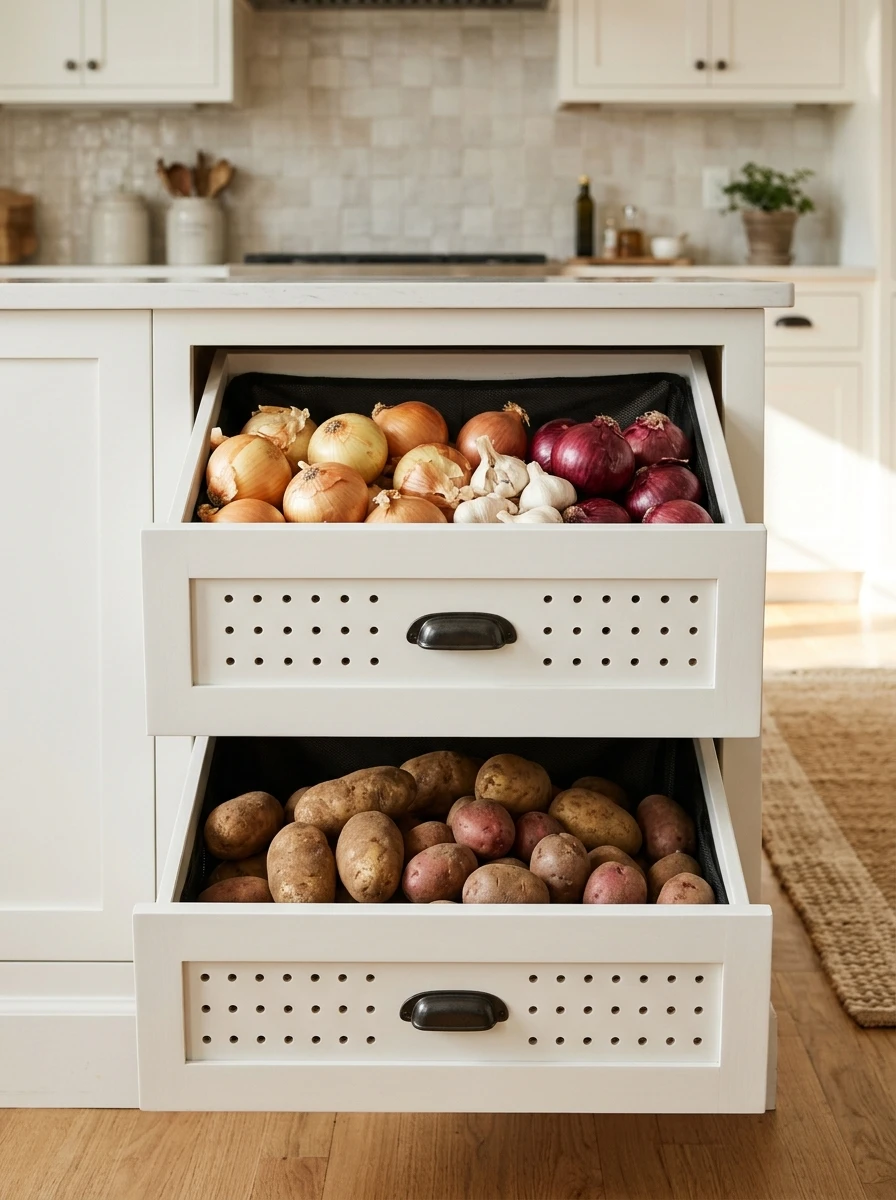
Onions and potatoes need the dark, but the pantry shelf is too warm and the fridge is too cold, so they sprout or soften within a week. A pair of vented drawers in the island gives them the cool dark spot they need, right where you cook.
Fit two deep drawers into the island side that faces away from the oven, with small vent holes drilled in the drawer fronts so air moves through. One drawer holds onions and garlic, the other holds potatoes, and a dark liner inside each one keeps the light out. Check the drawers once a week and pull out anything soft before it spoils the rest.
Never store onions and potatoes in the same drawer, since onions make potatoes sprout faster.
| In a Vented Drawer | On a Warm Shelf |
|---|---|
| Onions: dry and firm for weeks | Onions: sprout within days |
| Potatoes: cool and dark, no green spots | Potatoes: soften and turn green |
| Air: moves through the vent holes | Air: trapped, damp air builds up |
5. A Baking Drawer in the Island That Holds Flour, Sugar and Measuring Tools in One Pull
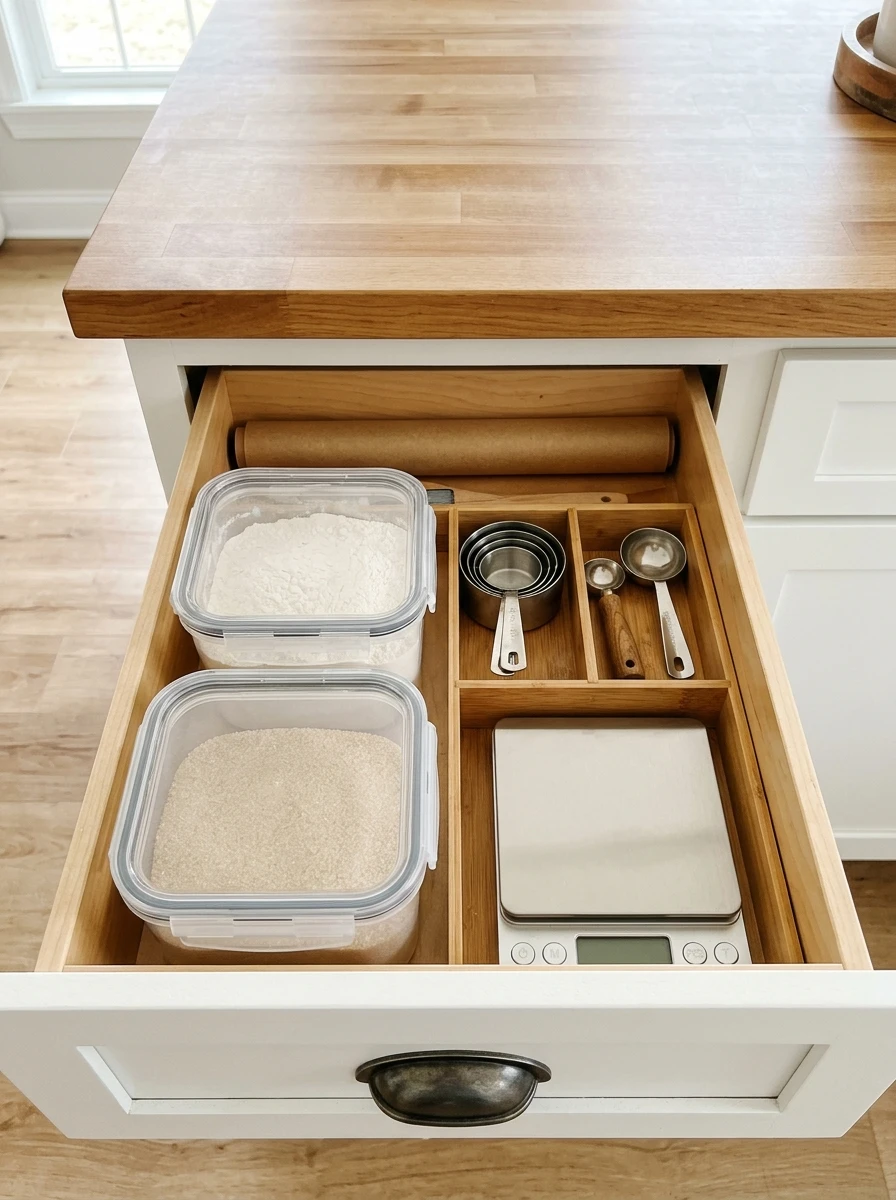
Baking starts with a hunt. The flour is in the pantry, the sugar is on a high shelf, and the measuring cups are in a drawer across the kitchen. A baking drawer in the island gathers the whole job into one pull, so biscuits start in a minute.
Fit a deep drawer into the island near the oven end, and stand two sealed tubs inside it for flour and sugar, with a scoop in each one. Lay the measuring cups, spoons, and a small set of scales flat beside them, and keep the baking paper roll at the back of the drawer. Everything for baking lives in that one drawer, and nothing else goes in it.
Refill the tubs on shopping day, so the drawer is always ready.
Flour in the pantry, sugar on a high shelf, and cups in a drawer across the kitchen.
One pull opens the whole baking job, tubs, cups and scales together.
6. Stool Cubbies in the Island Base That Swallow the Stools After Breakfast
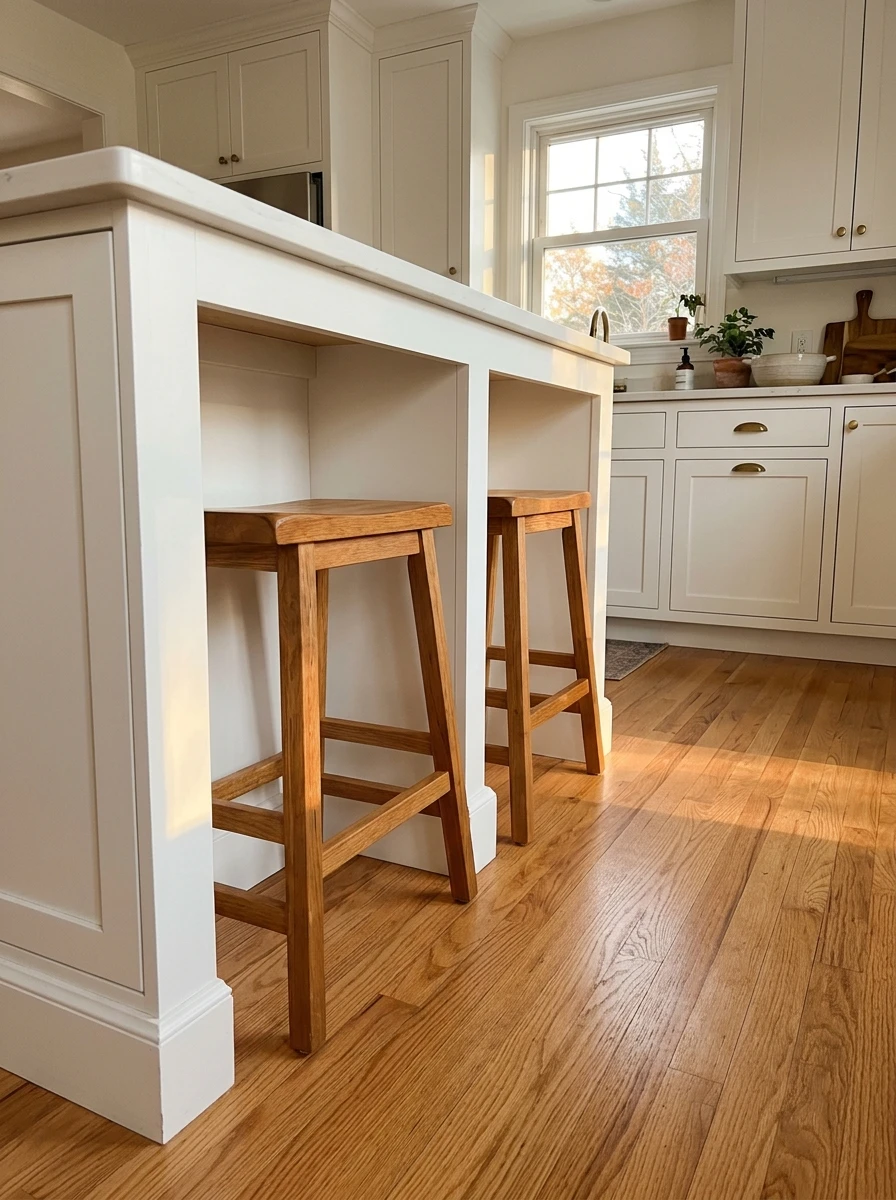
The stools never have a home. They drift around the island, block the walkway, and end up parked in front of the fridge. A cubby for each stool in the island base gives them a parking spot, and the floor stays clear.
Cut an open cubby into the island base on the seating side, one for each stool, sized so the stool slides in seat first. Push each stool into its cubby after breakfast, and pull it out when someone sits down to eat. The stools stay out of the walkway, and the island looks tidy even when nobody is eating.
Measure the stool before you cut, so the cubby fits with a finger of space on each side.
- ▸One cubby per stool, on the seating side of the island.
- ▸Stools slide in seat first, out of the walkway.
- ▸A finger of space on each side, so the stool never jams.
7. A Knife Slot Set Into the Island Top Beside the Chopping Spot
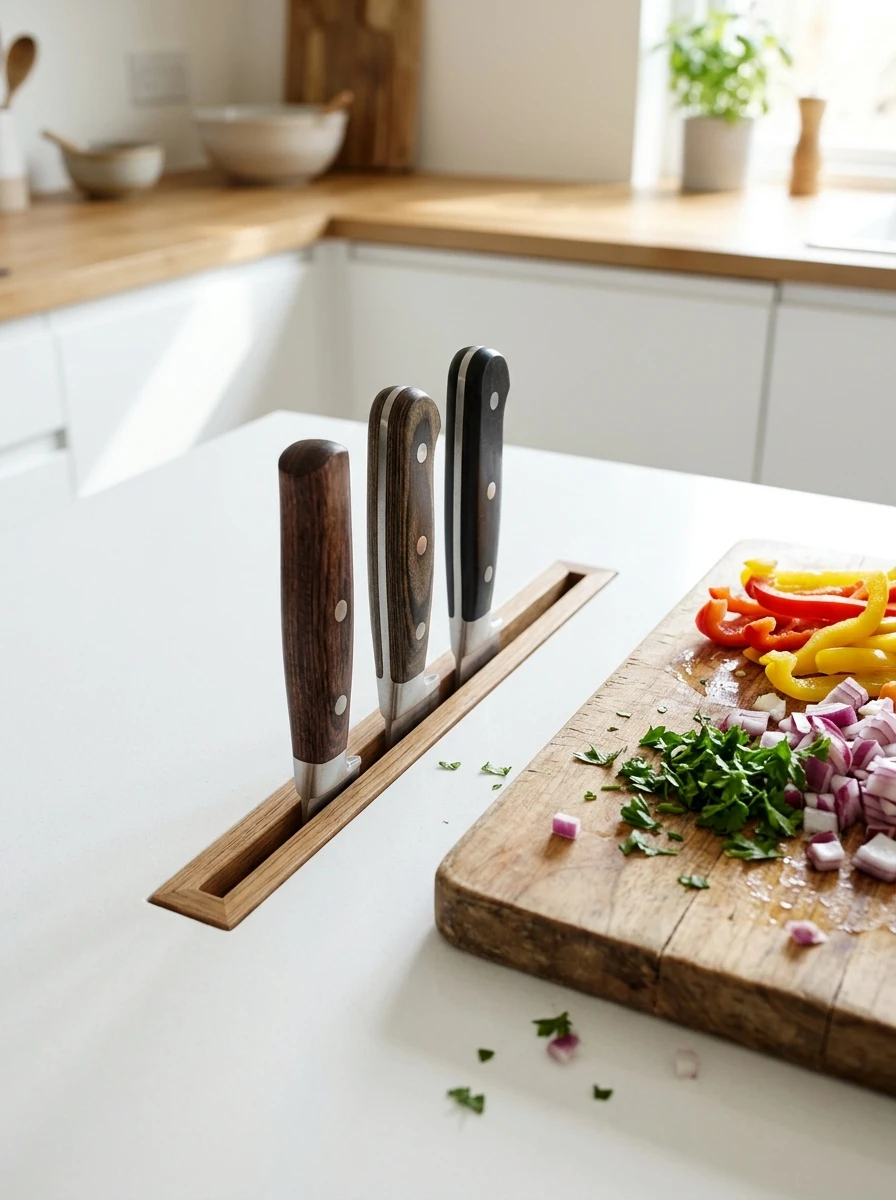
The knife block sits on the counter, taking up the best stretch of prep space, and the knives rattle around in a drawer. A slot set into the island top keeps the knives beside the chopping spot, and these IKEA kitchen hacks work best when the tool you reach for is in your hand.
Cut a narrow slot into the island top at the prep end, lined with a wooden insert that holds each blade apart. Slide the three knives you use most into the slot, handles up, and keep the rest of the set in a drawer. The blades stay sharp, because they never touch each other, and the counter stays clear for the board.
Wipe the slot out each night, so crumbs never gather round the blades.
Keep only the three knives you use most in the slot. The rest of the set stays in a drawer.
8. A Pet Bowl Drawer in the Island Base That Slides Away After Meals
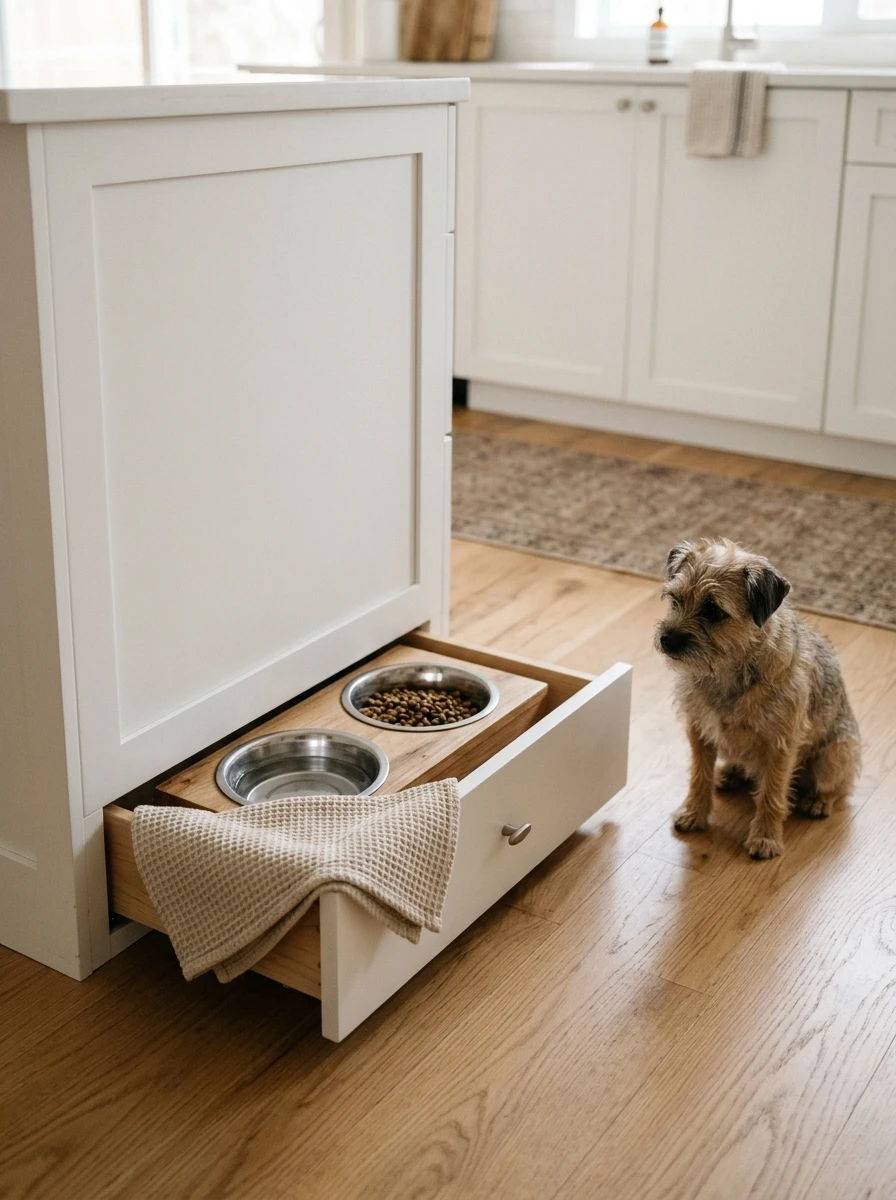
The pet bowls sit on the kitchen floor, in the way of every foot, and the water bowl gets kicked over at least once a week. A shallow drawer in the island base holds the bowls at floor level, and slides away when the meal is done.
Fit a low drawer into the island base on the side away from the oven, and set two stainless bowls into cut-outs in a wooden tray inside it. Pull the drawer out at feeding time, push it back in after, and the floor stays clear for cooking. Keep a folded towel in the drawer for wiping splashes, and wash the bowls in the sink each night.
Measure your pet first, so the bowls sit at a comfortable height.
💡 Quick Tip
Put the drawer on the side away from the oven, so the bowls never sit in the heat.
9. A Fruit Well Set Into the Island Top That Keeps the Bowl From Sliding Off
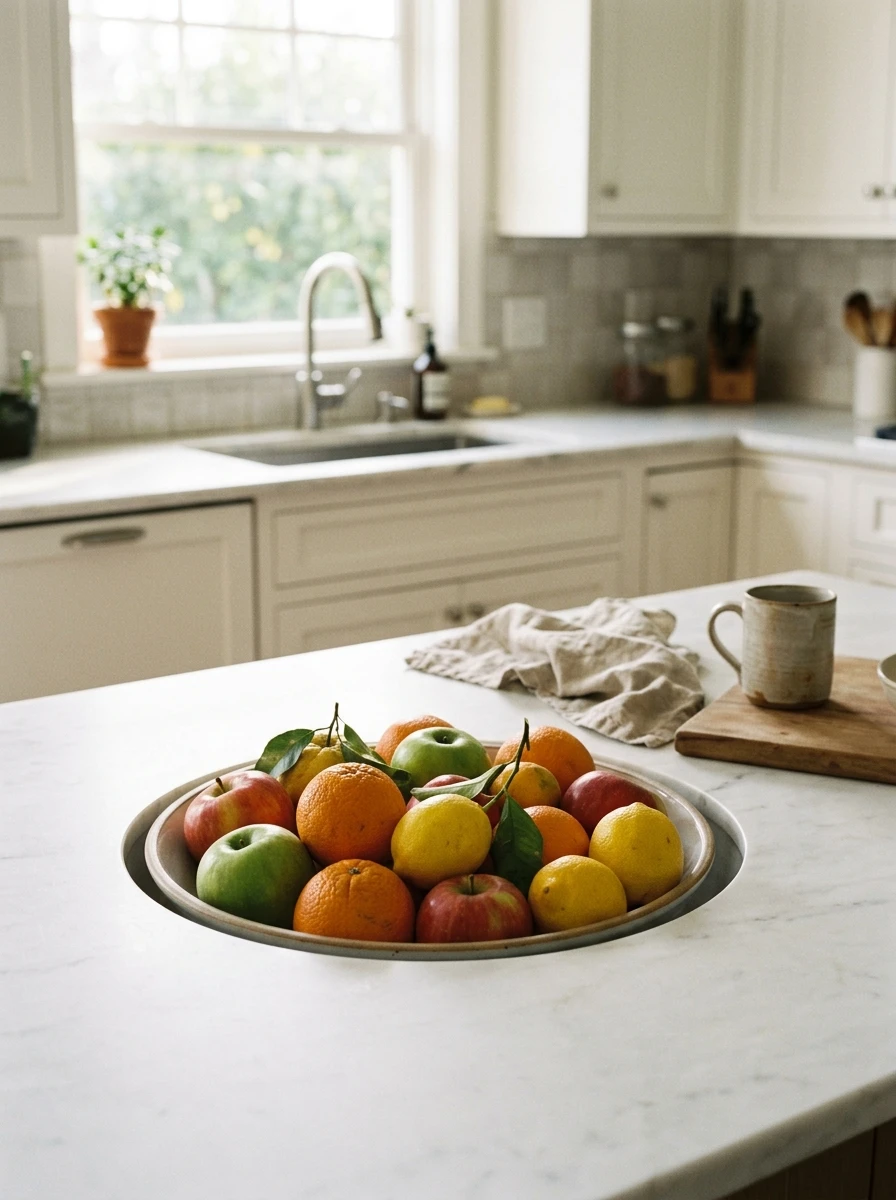
The fruit bowl slides across the island every time someone bumps the counter, and apples roll off onto the floor. A shallow well set into the island top holds the bowl in one spot, so the fruit stays put and the counter stays clear.
Cut a round dip into the island top near the seating end, just wide enough for your fruit bowl to sit in with its rim level with the surface. Set the bowl into the dip each morning, and fill it with the fruit for the day. The bowl cannot slide, the fruit cannot roll, and the well doubles as a spot for a salad bowl at dinner.
Wipe the well out after each use, so juice never dries in the dip.
Size the dip to your own fruit bowl, rim level with the top.
Use the well for a salad bowl at dinner too.
A dip so deep the bowl sits below the surface.
Putting the well right beside the chopping spot.
10. Fold-Down Seats Hinged to the Island End That Vanish After Dinner

Extra seats are useful at dinner and in the way for the rest of the day. Folding chairs lean in a corner, and spare stools crowd the hallway. Seats hinged to the island end fold down when you need them and vanish when you do not.
Fix two sturdy hinged seats to the end panel of the island, at sitting height, with a small leg that swings down to hold each one. Pull a seat down and swing the leg out when guests arrive, then fold the leg back and lift the seat flat against the panel after dinner. The seats take up no floor at all when they are folded away.
Check the hinges once a month, and tighten any screw that has worked loose.
Fix two hinged seats to the island end panel, at sitting height.
Swing the small leg down to hold each seat while guests eat.
Fold the leg back and lift the seat flat after dinner.
11. A Flush Scale Set Into the Island Top That Weighs Ingredients Where You Mix
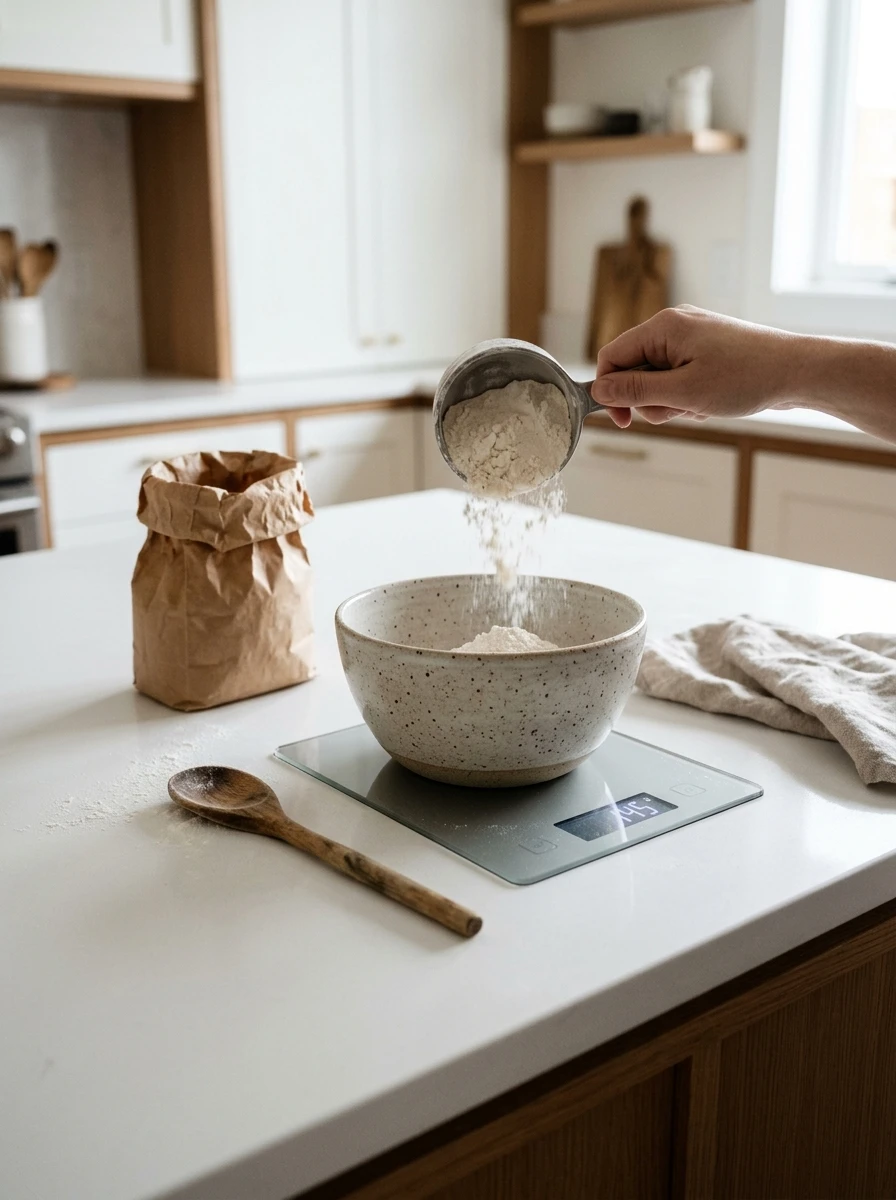
Baking means weighing flour in a bowl, then carrying it to the scale on the counter, then back to the island to mix. A scale set flush into the island top weighs the bowl where you mix it, and these IKEA kitchen hacks work best when the measuring happens at the mixing spot.
Cut a shallow recess into the island top beside the mixing spot, sized for a small digital scale, and set the scale in so its top sits level with the surface. Set the bowl on it, press tare, and pour the flour straight in, then wipe the scale clean when the mixing is done.
Keep the scale dry, and lift it out to change the battery when the display fades.
12. A Warming Drawer in the Island That Holds Dinner While Everyone Sits Down
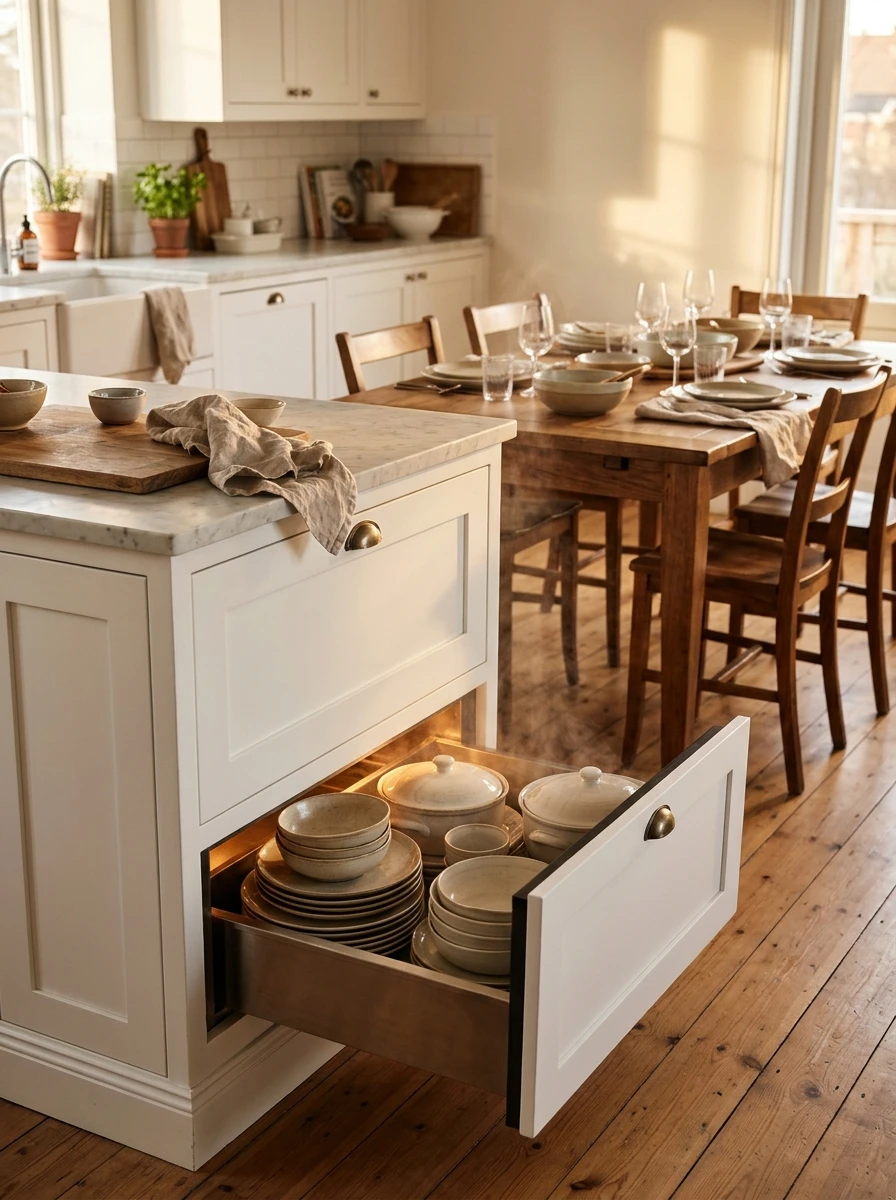
Dinner is ready, but half the family is still washing hands, and the food goes cold on the plates. A warming drawer in the island holds the meal at serving heat while everyone finds a seat, so nobody eats a cold dinner.
Fit a warming drawer into the island near the table end, and set it to low heat before you serve. Slide the plates or the serving dishes inside, shut the drawer, and call everyone to the table. The food stays warm without cooking further, and the drawer switches itself off after an hour. Serve straight from the drawer, so the dishes travel only a few steps.
Never put plastic dishes in the warming drawer, since the heat can warp them.
What to check first
13. A Deep Island Drawer That Files Baking Trays Upright by the Oven End
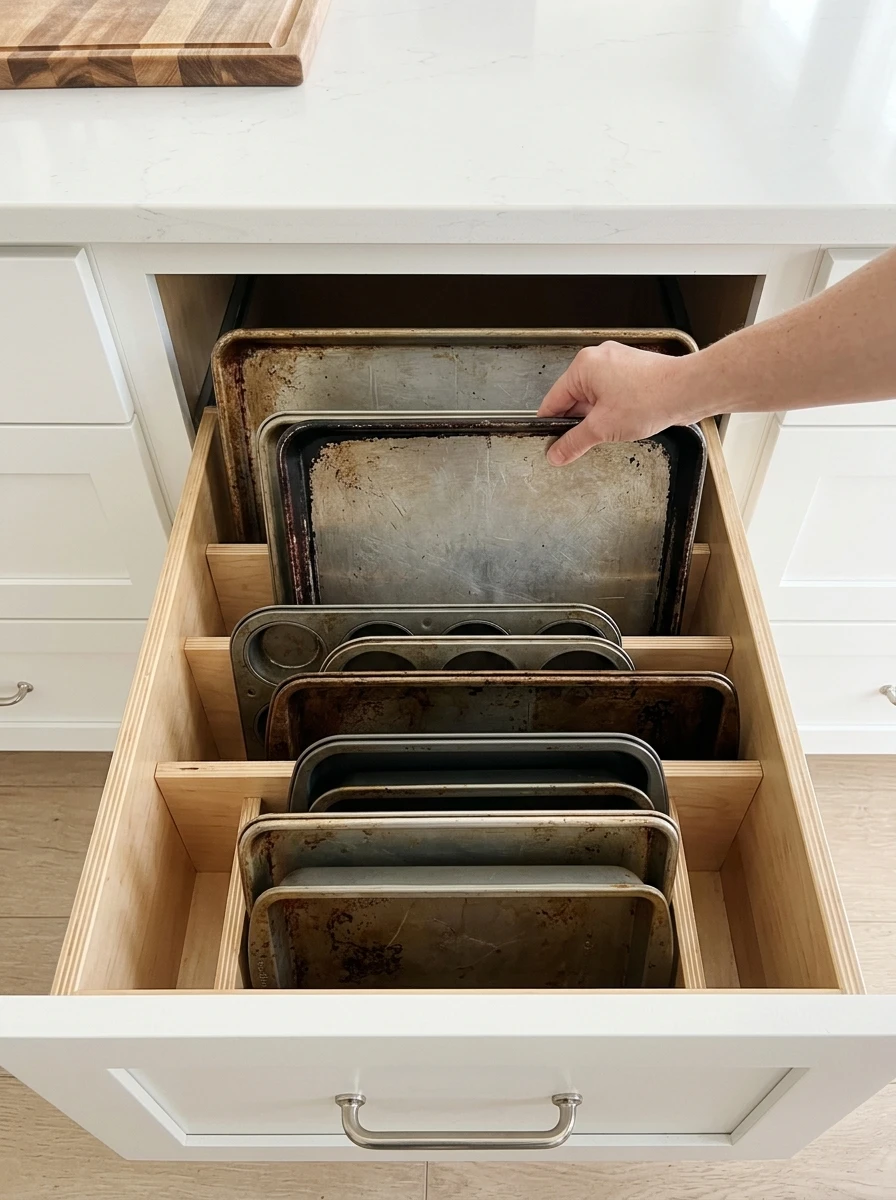
Baking trays stack in a pile in the cupboard, and the one at the bottom is always the one you need. Lifting the whole stack to reach it scratches the trays and takes two hands. A deep drawer in the island files them upright, so the tray you want slides out first time.
Fit a deep drawer into the island at the oven end, and stand a simple wooden file frame inside it with slots for each tray. Slide the trays in upright, biggest at the back and smallest at the front, and pull the drawer open when you bake. Each tray lifts out on its own, with no stack to lift and no scratches.
Wipe the drawer out once a month, so crumbs never build up in the slots.
14. A Small Prep Sink Set Into the Island That Keeps Veggie Washing Out of the Main Sink
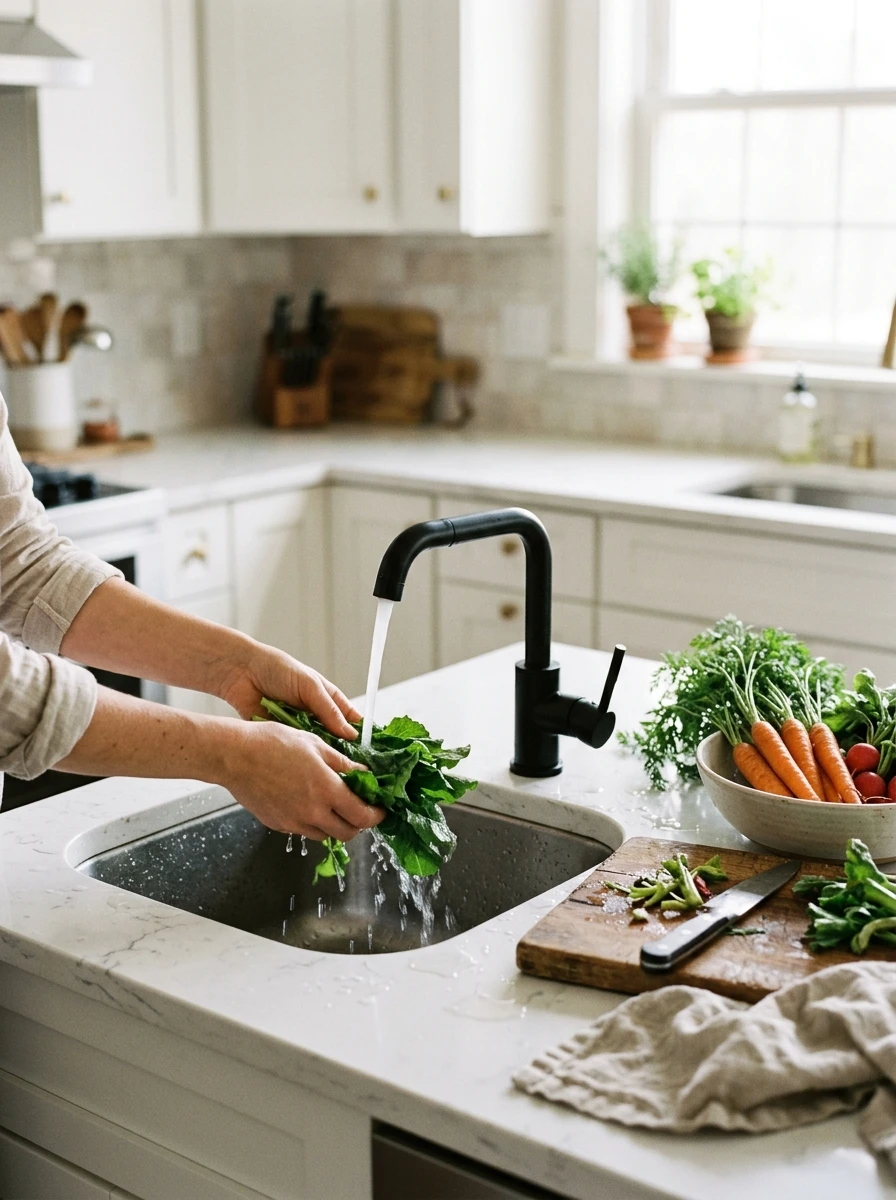
Washing vegetables at the main sink means elbowing past whoever is doing the dishes, and the peelings end up in the wrong basin. A small prep sink set into the island gives the washing its own spot, right beside the chopping board.
Fit a small single basin into the island top at the prep end, with a short tap fed from the main water line. Rinse vegetables over the island, and drop the peelings into a small bowl on the island top. The main sink stays free for dishes, and two people can work in the kitchen without bumping into each other.
Wipe the basin dry after use, so water spots never build up on the steel.
- ▸A small basin at the prep end, beside the chopping board.
- ▸Peelings go into a small bowl on the island top.
- ▸The main sink stays free for dishes.
An Island That Works as Hard as You Do
An island earns its place when every side of it has a job. The cookbooks stand at the end, the spices slide out of the side, and the top itself holds the knives, the scale, and the power you need while you cook.
Nothing here needs a new island or a big shop. Most of these ideas fit into the island you already have, with a drawer, a slot, or a fitting, and the rest cost less than a weekly shop.
Start with the power tower this weekend, then add the produce drawers when you sort the pantry. Save this list for the kitchen tidy, and these IKEA kitchen hacks will be here when the island needs its next job.
Before You Start
✅ The size of your island end panel, so the cookbook slot fits first time
✅ A pop-up power tower and the size of the hole it needs
✅ A narrow pull-out rack and matching spice jars for the island end
✅ The size of your baking trays, so the drawer file fits first time
✅ A small digital scale that sits flush in the island top