14 IKEA Kitchen Hacks for Small Kitchens With Limited Counter Space
The pans live in a cupboard, stacked five high. You need the frying pan, which is at the bottom, so the whole pile comes out and goes back in a clatter. By the time the pan is on the stove, the counter is already full of the things you moved to reach it.
Most small kitchens are not short of space. They are short of places for things to live. A pan with no home ends up on the counter. A lid with no slot ends up in a pile. Give each one a fixed spot and the counter clears itself. It is a small job, and most of these fixes take less than an hour.
That is what these IKEA kitchen hacks do. Each one finds a home for something that keeps landing on the worktop, and most of them cost less than a takeaway dinner. Pick the three that fit your kitchen best and start with the easiest one tonight.
1. A Ceiling Pot Rack That Lifts Pans Off the Counter and the Cabinets

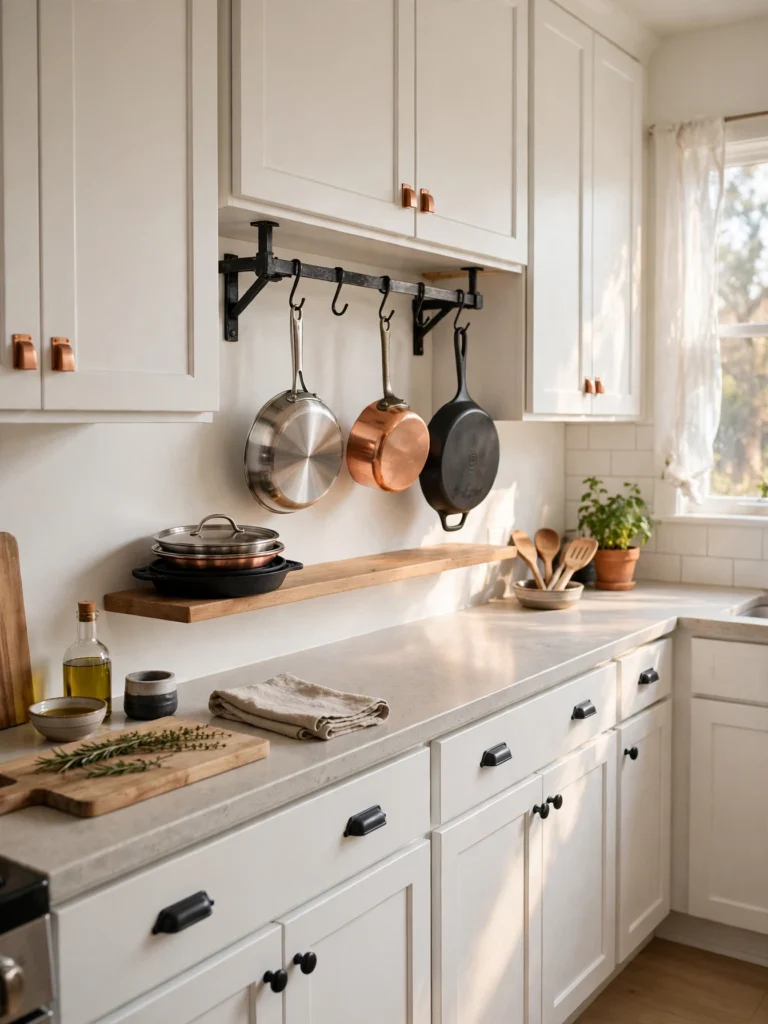
Pans are the bulkiest things in a small kitchen, and they take up the most room wherever they live. A ceiling rack lifts them out of the cupboards and off the counter, and hangs them where you can see every one at a glance.
Find a ceiling joist with a stud finder and fix the rack with strong bolts. Hang the pans by their handles on S-hooks, heaviest in the middle and lightest at the ends. Keep the rack over an island or a clear stretch of floor, never over a walkway where heads pass.
The cupboard the pans came from is free now, and dinner starts with a reach up instead of a dig down.
Also view: 15 IKEA Kallax Makeover Ideas Using Baskets for a Clutter-Free Home
2. A Narrow Ledge Above the Backsplash for Oils and Vinegar
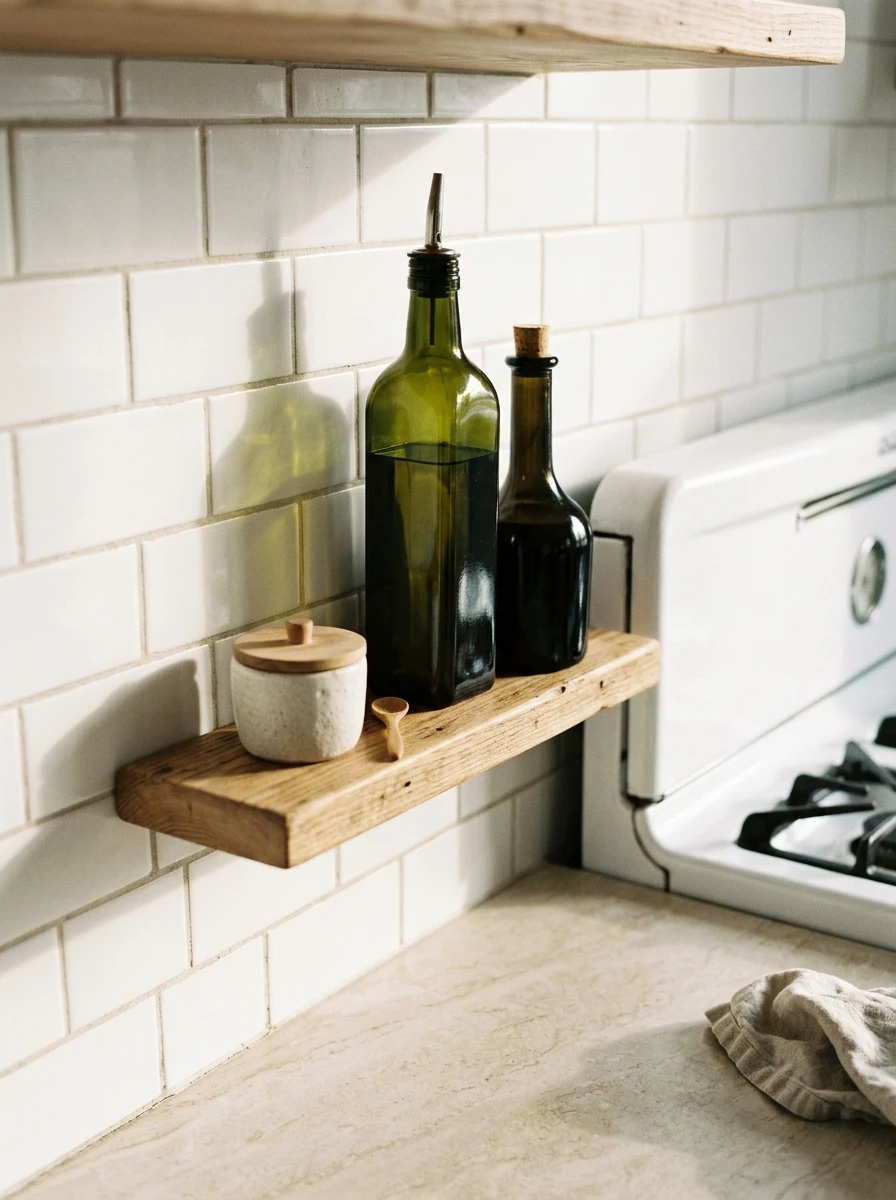
The oils and vinegar live on the counter because there is nowhere else close to the stove. A narrow ledge fixed to the wall above the backsplash moves them up and out of the way, and they stay within reach while you cook.
Pick a ledge about four inches deep, so bottles stand steady without crowding the wall. Fix it at eye level above the splash zone, and keep it clear of the hob so heat never warms the oil. Two or three bottles fit, plus the salt.
The counter below gets a full stretch back, and the bottles are closer to the pan than they ever were on the worktop.
What to grab first
3. Adhesive Hooks Inside a Cabinet Door for Measuring Cups and Spoons
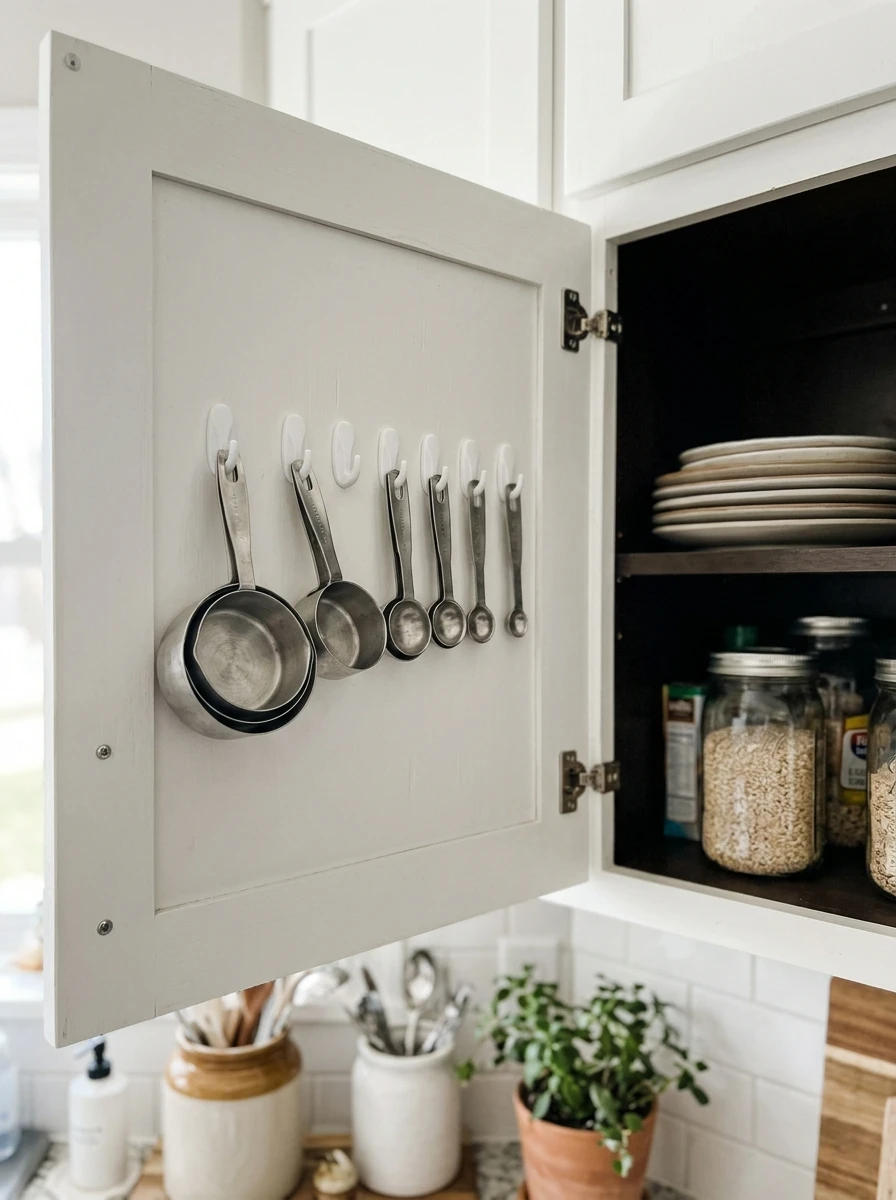
Measuring cups rattle around in a drawer, and the quarter cup is always missing when the recipe needs it. A row of small adhesive hooks inside a cabinet door gives each cup and spoon its own hook, and you can see the full set at a glance.
Stick the hooks in a row down the inside of the door, with the biggest cup at the bottom and the smallest at the top. Clean the door first so the adhesive grips properly, and press each hook firm for thirty seconds. Hang the cups by their handles and the spoons by their loops.
The drawer they came from is free for other tools now, and the cups stop hiding at the back of it.
4. A Slide-Out Shelf That Brings Heavy Pots to You
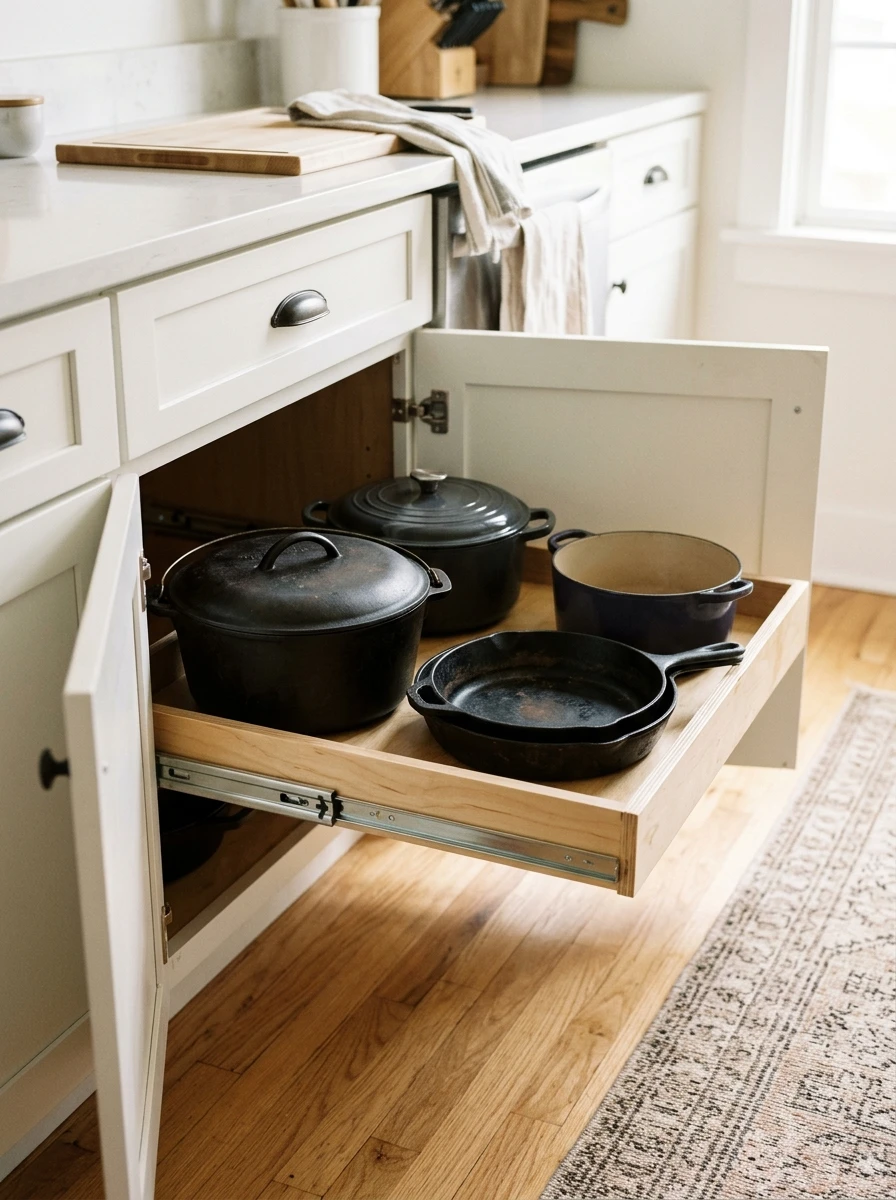
Heavy pots live at the back of a deep base cabinet, and getting one out means kneeling on the floor and reaching past the rest. A slide-out shelf on full extension runners brings the whole shelf to you instead. Pull it out, lift the pot, push it back.
Measure the cabinet opening first and pick a shelf that leaves a finger of space on each side. Keep the heaviest pots at the front of the shelf so the runners carry the weight evenly. A low lip around the edge stops things sliding off.
Your knees will thank you, and the pots stop living in a pile at the back of the cupboard.
Heavy pots piled at the back of a deep cabinet, out of reach without kneeling.
One pull brings the whole shelf out, and the pot you want is right there.
5. A Wall-Mounted Tablet Holder That Keeps Recipes at Eye Level
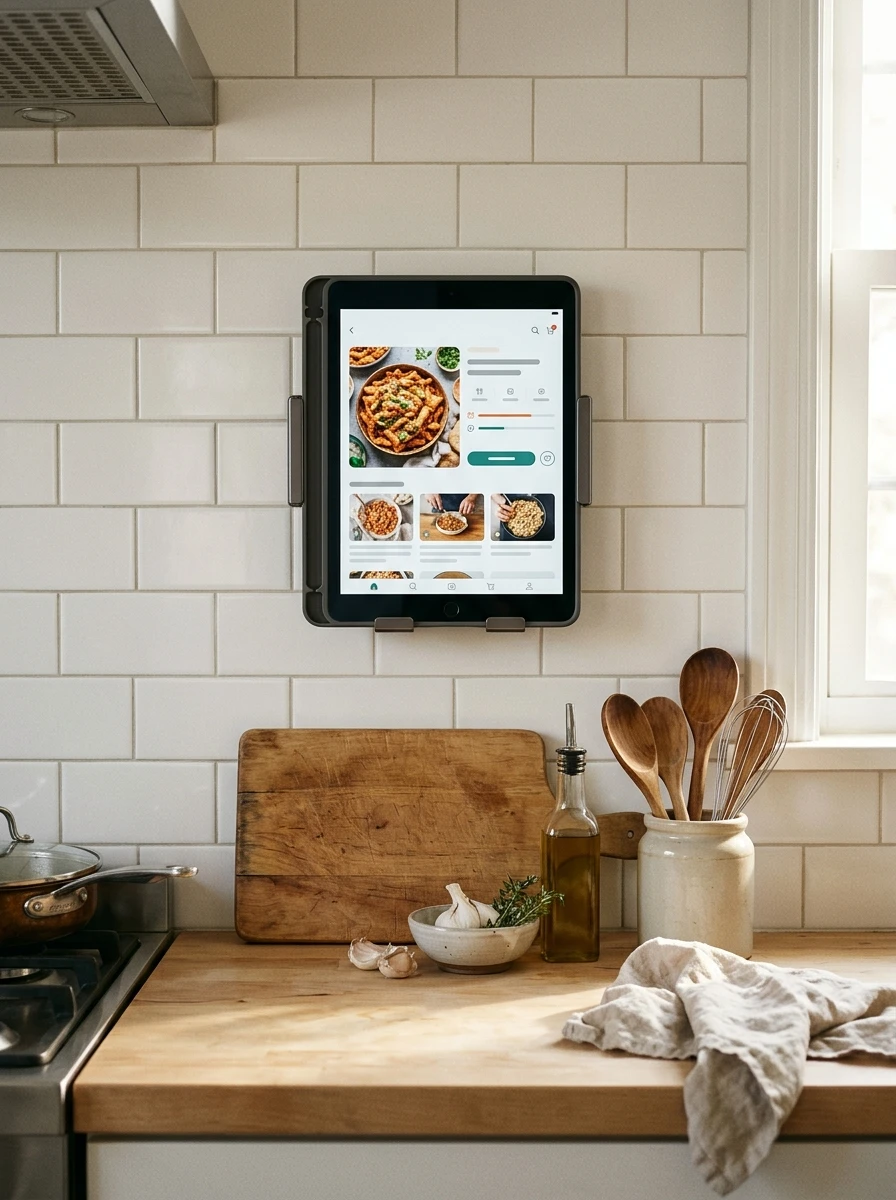
The tablet props against the backsplash, slides down, and gets splashed with sauce. A wall-mounted holder keeps it at eye level, safe from spills, and your hands stay free for cooking. The recipe stays visible while you chop.
Fix the holder on the wall beside the stove, clear of steam and splashes. Most holders tilt, so set the angle before you start cooking and leave it there. A small lip at the bottom stops the tablet slipping out.
The counter below stays clear for the board and the bowls, and the recipe never disappears under a tea towel again. A holder that folds flat is handy too, since it tucks into a drawer when dinner is done.
💡 Quick Tip
Set the tablet to stay awake before you start cooking, so the screen never locks halfway through a recipe.
6. A Roll-Up Dish Mat That Dries Dishes and Slides Into a Drawer

The dish mat never fully dries, and it eats a third of the counter while it tries. A roll-up silicone mat unrolls over the sink when you need it and rolls away into a drawer when you don’t. Dishes drip straight into the sink, and the counter stays dry.
Unroll it across the sink and stand the plates on it, rims down. The silicone ribs hold the plates upright and let air move underneath. When the dishes are dry, rinse the mat, roll it up, and tuck it in a drawer.
It costs very little and stores almost nowhere, which makes it one of the easiest IKEA kitchen hacks to try first.
| Roll-Up Mat | Cloth Dish Mat |
|---|---|
| Storage: rolls into a drawer | Storage: stays out on the counter |
| Drying: drips straight into the sink | Drying: soaks up water and stays damp |
| Cleaning: rinse and roll | Cleaning: machine wash and line dry |
7. Sliders Under the Coffee Maker That Let It Glide Out for Mornings
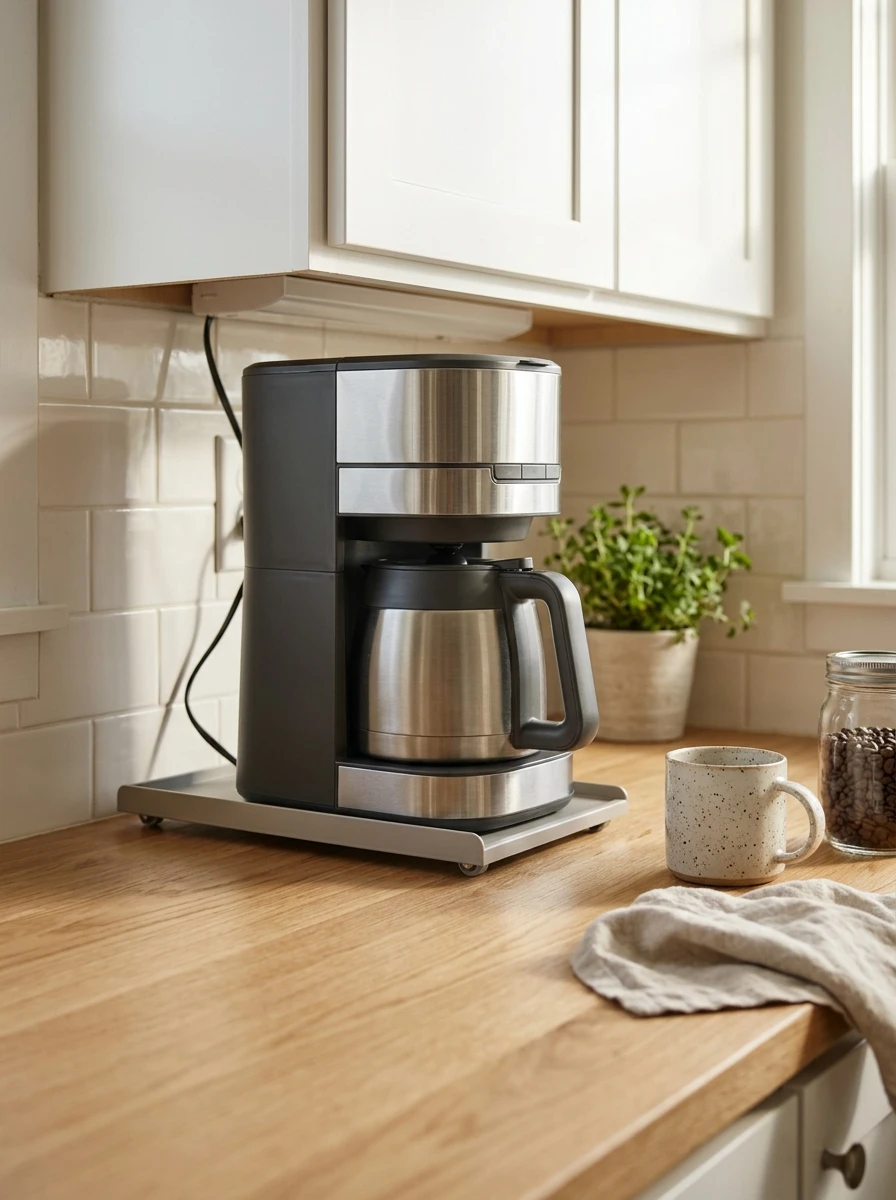
The coffee maker sits under the upper cabinets, and filling it means dragging it across the counter every morning. A pair of small sliders under its feet lets it glide out smoothly and slide back when you are done. No more dragging, no more scratched worktop.
Stick the sliders under the feet and test the glide before you fill the tank. The maker should move with one gentle push and stop where you leave it. Keep the cord long enough to reach the outlet at full stretch.
Mornings get a little easier, and the counter under the maker stops collecting coffee rings and scratches. Wipe the sliders clean once a month so crumbs never slow the glide.
Glide, never drag. Sliders protect the worktop and save the coffee maker feet.
8. A Tea Station Inside One Cabinet With Hooks for Every Mug
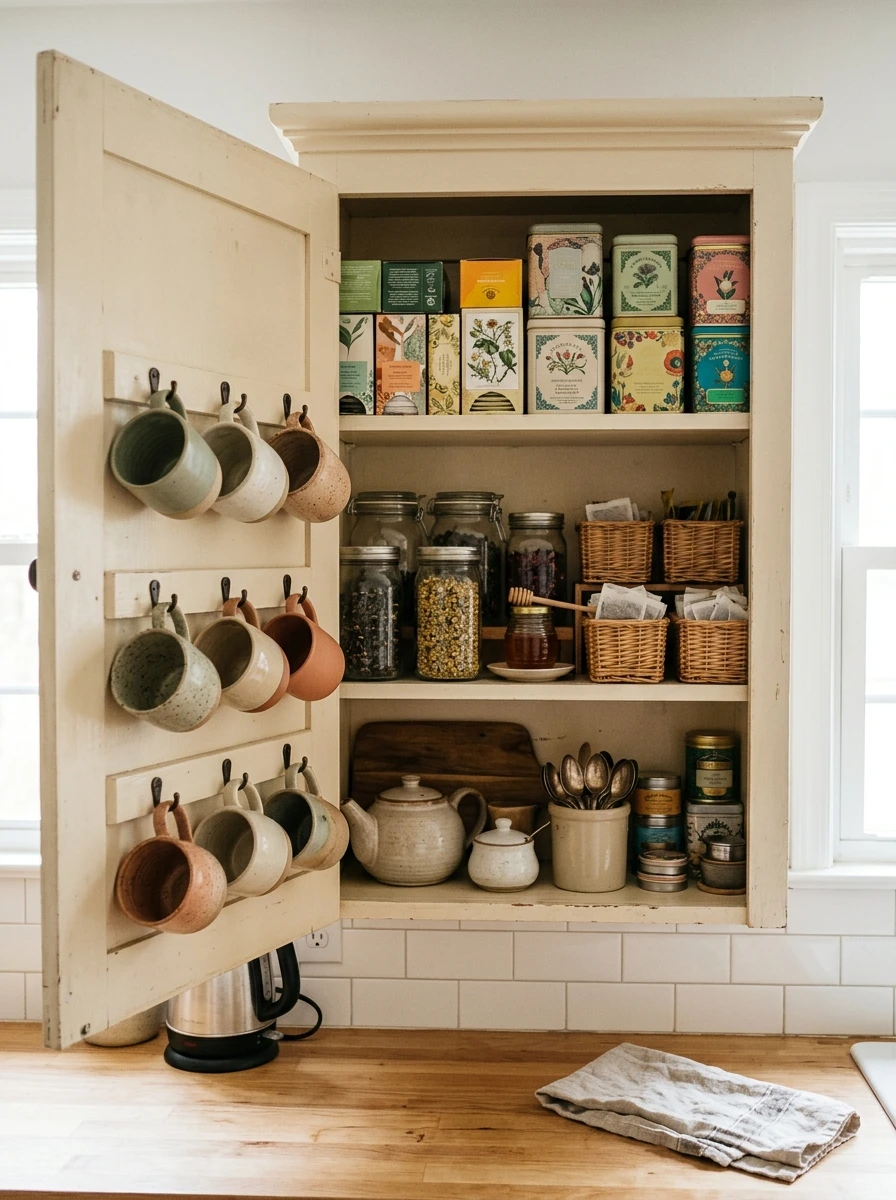
Tea things scatter across the kitchen: mugs in one cupboard, tea bags in another, the kettle on the counter. Give them one cabinet and they stop scattering. A tea station keeps the mugs, the tea and the sugar in a single spot, and the counter stays clear.
Fit small hooks inside the cabinet door for the mugs, and keep the tea bags in a small box on the shelf below. The sugar and honey sit beside them, and the kettle lives on the counter underneath, ready to fill. Everything for a cup of tea is within one reach.
Mornings get simpler, and guests can help themselves without opening every cupboard in the kitchen.
What to grab first
9. A Wall Holder for the Rolling Pin and Long Utensils

The rolling pin never fits in a drawer, so it lives on top of the cupboards or balanced on the counter. A wall holder with two hooks gives it a fixed home, and the long utensils hang beside it. The counter below stays clear.
Fix the holder on a free stretch of wall near the baking area, at a height you can reach without stretching. Hang the rolling pin across the two hooks and add the long handled ladle and the fish slice below it. Keep the holder clear of the hob so handles stay cool.
Baking days start with everything in reach, and the rolling pin stops rolling off the counter onto the floor.
Measure the rolling pin before you space the hooks.
Hang it near the baking area, not over the hob.
Spacing the hooks by eye and hoping it fits.
Hanging heavy pans from the same hooks.
10. A Sponge Caddy on the Sink Cabinet Door That Keeps the Sink Clear
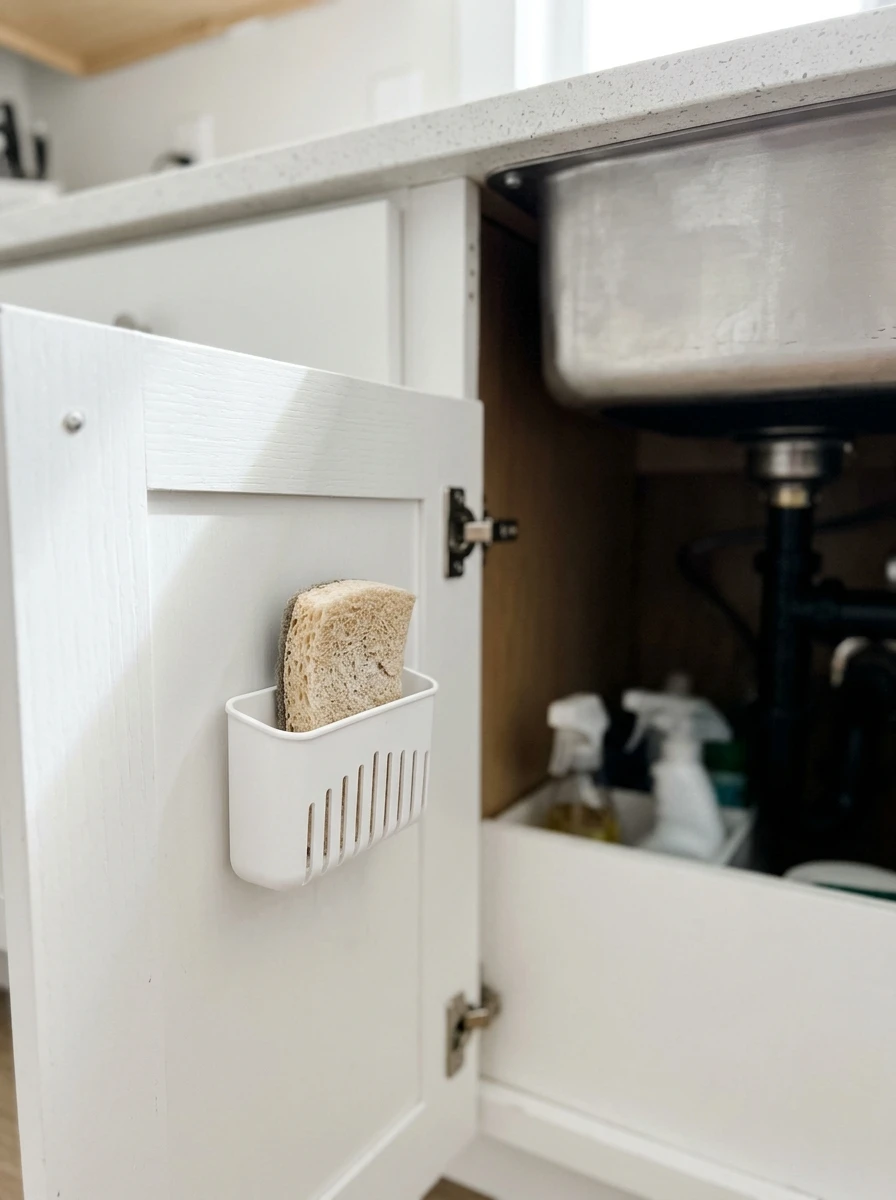
The sponge has no home, so it sits on the edge of the sink, dripping onto the counter. A small caddy fixed to the inside of the sink cabinet door gives it one. Open the door, grab the sponge, close the door, and the sink edge stays clear.
Pick a caddy with drainage holes in the bottom so the sponge dries between uses. Fix it low on the door so it clears the shelf when the door closes, and keep a spare sponge behind it. Rinse the caddy once a week so it never smells.
The sink edge stays dry, and the sponge stops sliding into the washing up water.
Pick a caddy with drainage holes in the bottom.
Fix it low on the door so it clears the shelf.
Rinse the caddy once a week so it never smells.
11. A Tiered Shelf That Turns a Dead Counter Corner Into Storage

The corner of the counter is where things go to be forgotten. A tiered shelf turns that dead corner into two or three levels of storage, and the things on it stay visible instead of buried behind each other.
Pick a shelf that fits the corner without crowding the worktop. Two tiers suit oils and spices, three tiers suit small jars and tins. Keep the tallest items at the back of each tier so nothing hides behind them.
The corner stops being a dumping ground, and the bottles that lived there in a row now stack neatly upward. A shelf with a small lip at the front edge stops jars sliding off when you reach past them.
12. A Step Stool That Folds Flat and Hangs on the Wall
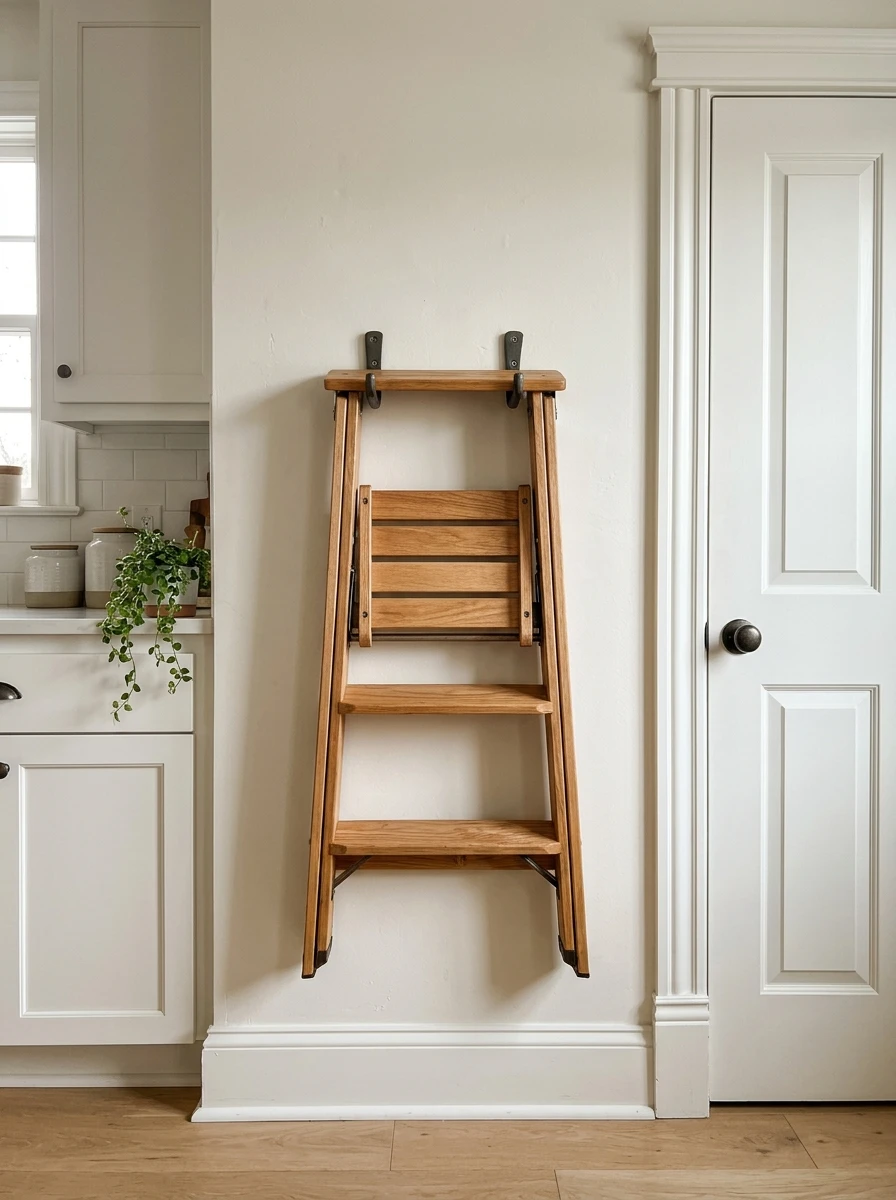
The top shelf is out of reach, so the things on it never get used. A step stool that folds flat solves that, and it hangs on the wall when you are done, so it never takes up floor space.
Pick a stool with a wide top step and rubber feet so it stays put on a smooth floor. Hang it on two hooks near the pantry, where you can grab it with one hand. Fold it flat after use and it hangs like a picture frame.
The top shelf becomes usable storage instead of a place for things you forgot, and the stool is always within reach. Check the hooks hold firm before you hang the stool for the first time.
- ▸Wide top step, so both feet fit safely.
- ▸Rubber feet, so it never slides on smooth floors.
- ▸Two wall hooks near the pantry, at arm height.
13. A Holder That Stores Cutting Boards Upright on the Counter
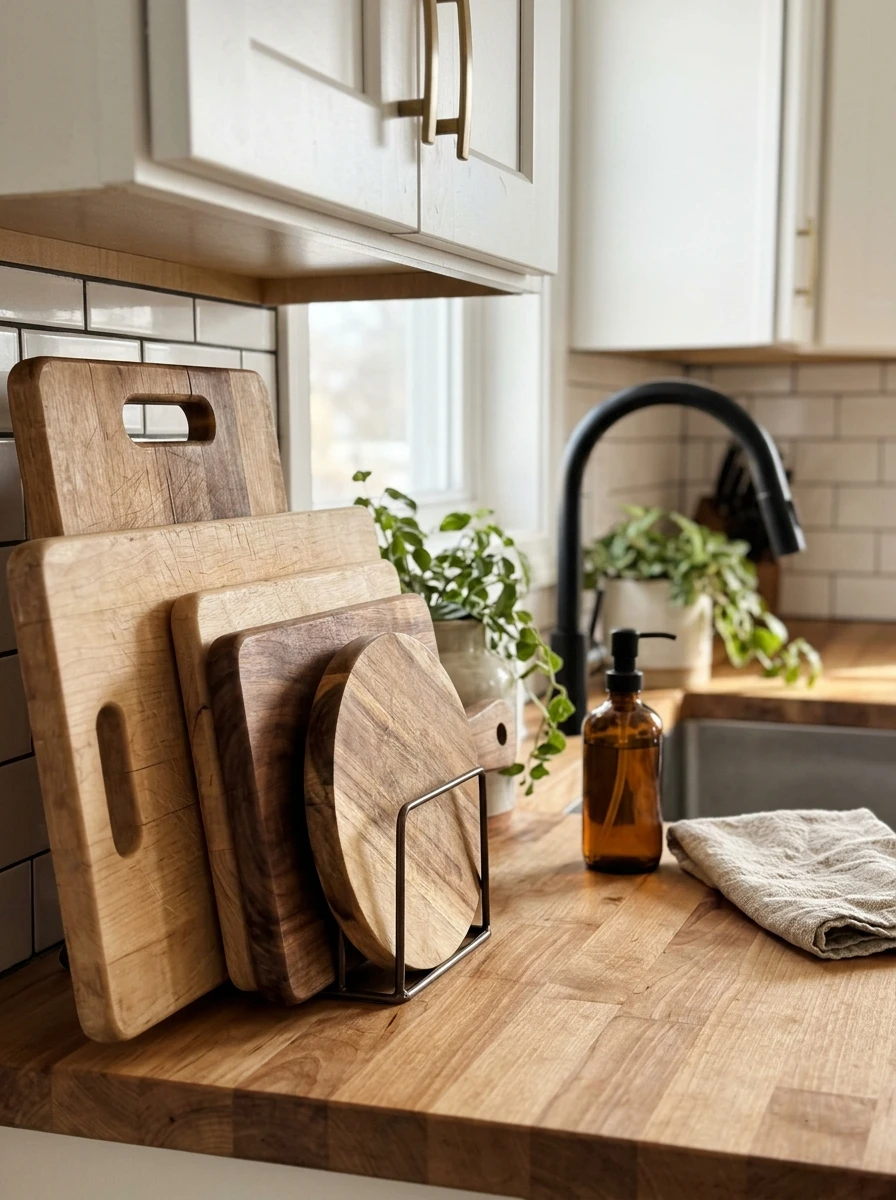
Cutting boards stacked flat slide around and take up a whole stretch of counter. A holder that stores them upright keeps them in one small footprint, and you can pull the one you want without moving the rest.
Pick a holder with slots wide enough for your thickest board. Stand the boards in it with the biggest at the back and the smallest at the front, and keep it near the sink where you rinse them. A holder with a drip tray underneath catches the water.
The boards stop leaning against the backsplash, and the counter they sprawled across is free for chopping again. Dry the boards standing up after washing, so water never pools on the surface.
14. A Cookbook Stand That Folds Flat When Dinner Is Done
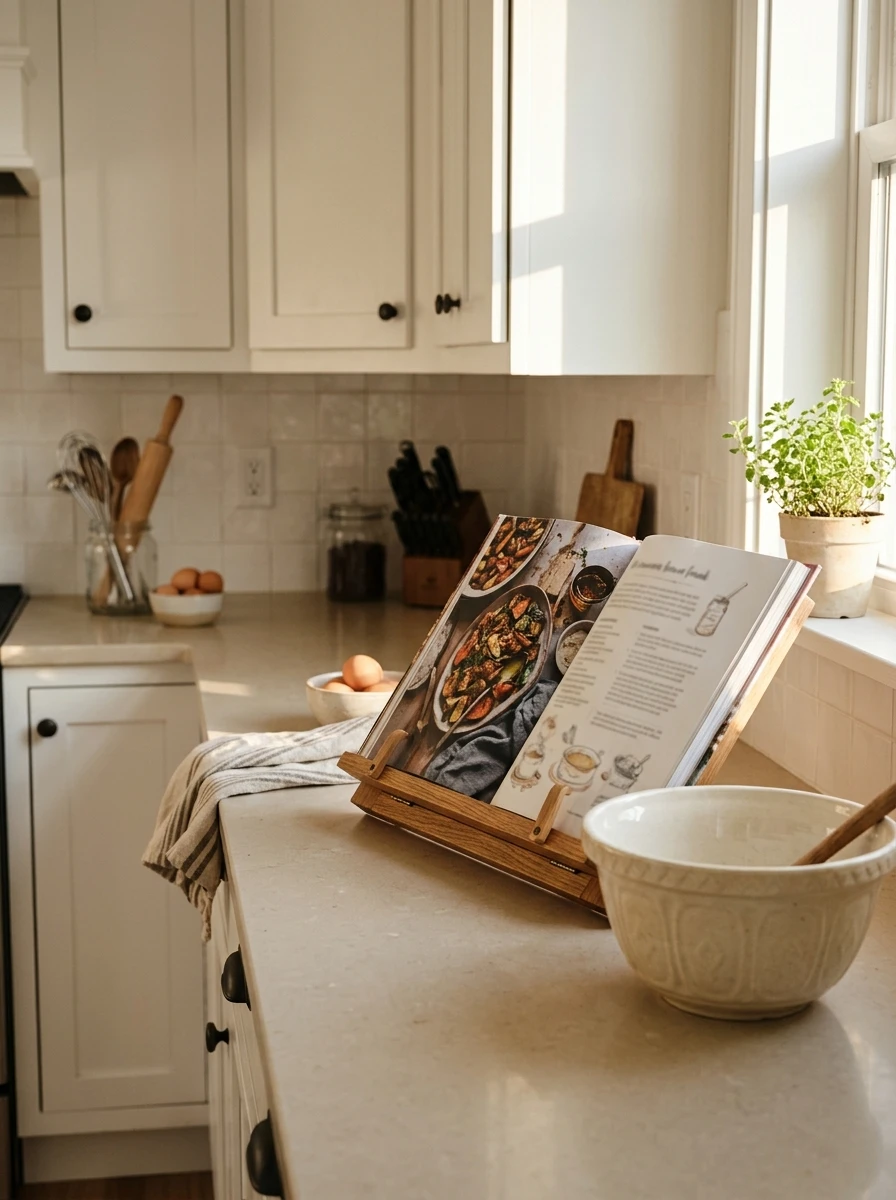
The cookbook props against the backsplash, slides down, and gets splashed. A stand holds it open at a readable angle, and it folds flat when dinner is done, so it tucks into a drawer or leans against the wall.
Pick a stand with a lip at the bottom to hold the pages open and a back that adjusts to different book sizes. Set it on the counter away from the hob, where steam never reaches the pages. Heavy books sit steady, and thin ones stay open with the lip.
Like most IKEA kitchen hacks, this one costs little and changes a daily annoyance into a small pleasure. The book stays clean, and the recipe stays where you can read it.
Also view: 13 IKEA Kitchen Hacks for Small Kitchens With Limited Counter Space
📌 Good To Know
A stand with a clear splash guard keeps the pages safe when the pan spits, and it wipes clean with one pass of a cloth.
A Small Kitchen That Finally Works With You
A small kitchen does not need more counter. It needs fewer things sitting on the counter it already has. The fourteen ideas above all do the same quiet job. They find the wasted spots, the ceiling, the corner, the door, the strip under the cabinets, and put them to work.
Pick the one that fixes your biggest daily annoyance and try it this weekend. One small change is enough to feel the difference the next time you cook. When the counter stays clear for a whole dinner, you will know the system is working.
Save this list for the next time your kitchen feels crowded. These IKEA kitchen hacks are here whenever you are ready for the next one.
Before You Start
- ✅ Tape measure and the height of your ceiling, cabinets, and upper shelves
- ✅ One hack picked, the one that fixes your biggest daily annoyance
- ✅ A note of the exact size before you shop, so nothing comes home wrong
- ✅ A free afternoon to fit it and live with it for a week
- ✅ A clear counter to start from, so you can see the difference right away