10 IKEA Kitchen Hacks for Narrow Galley Kitchens
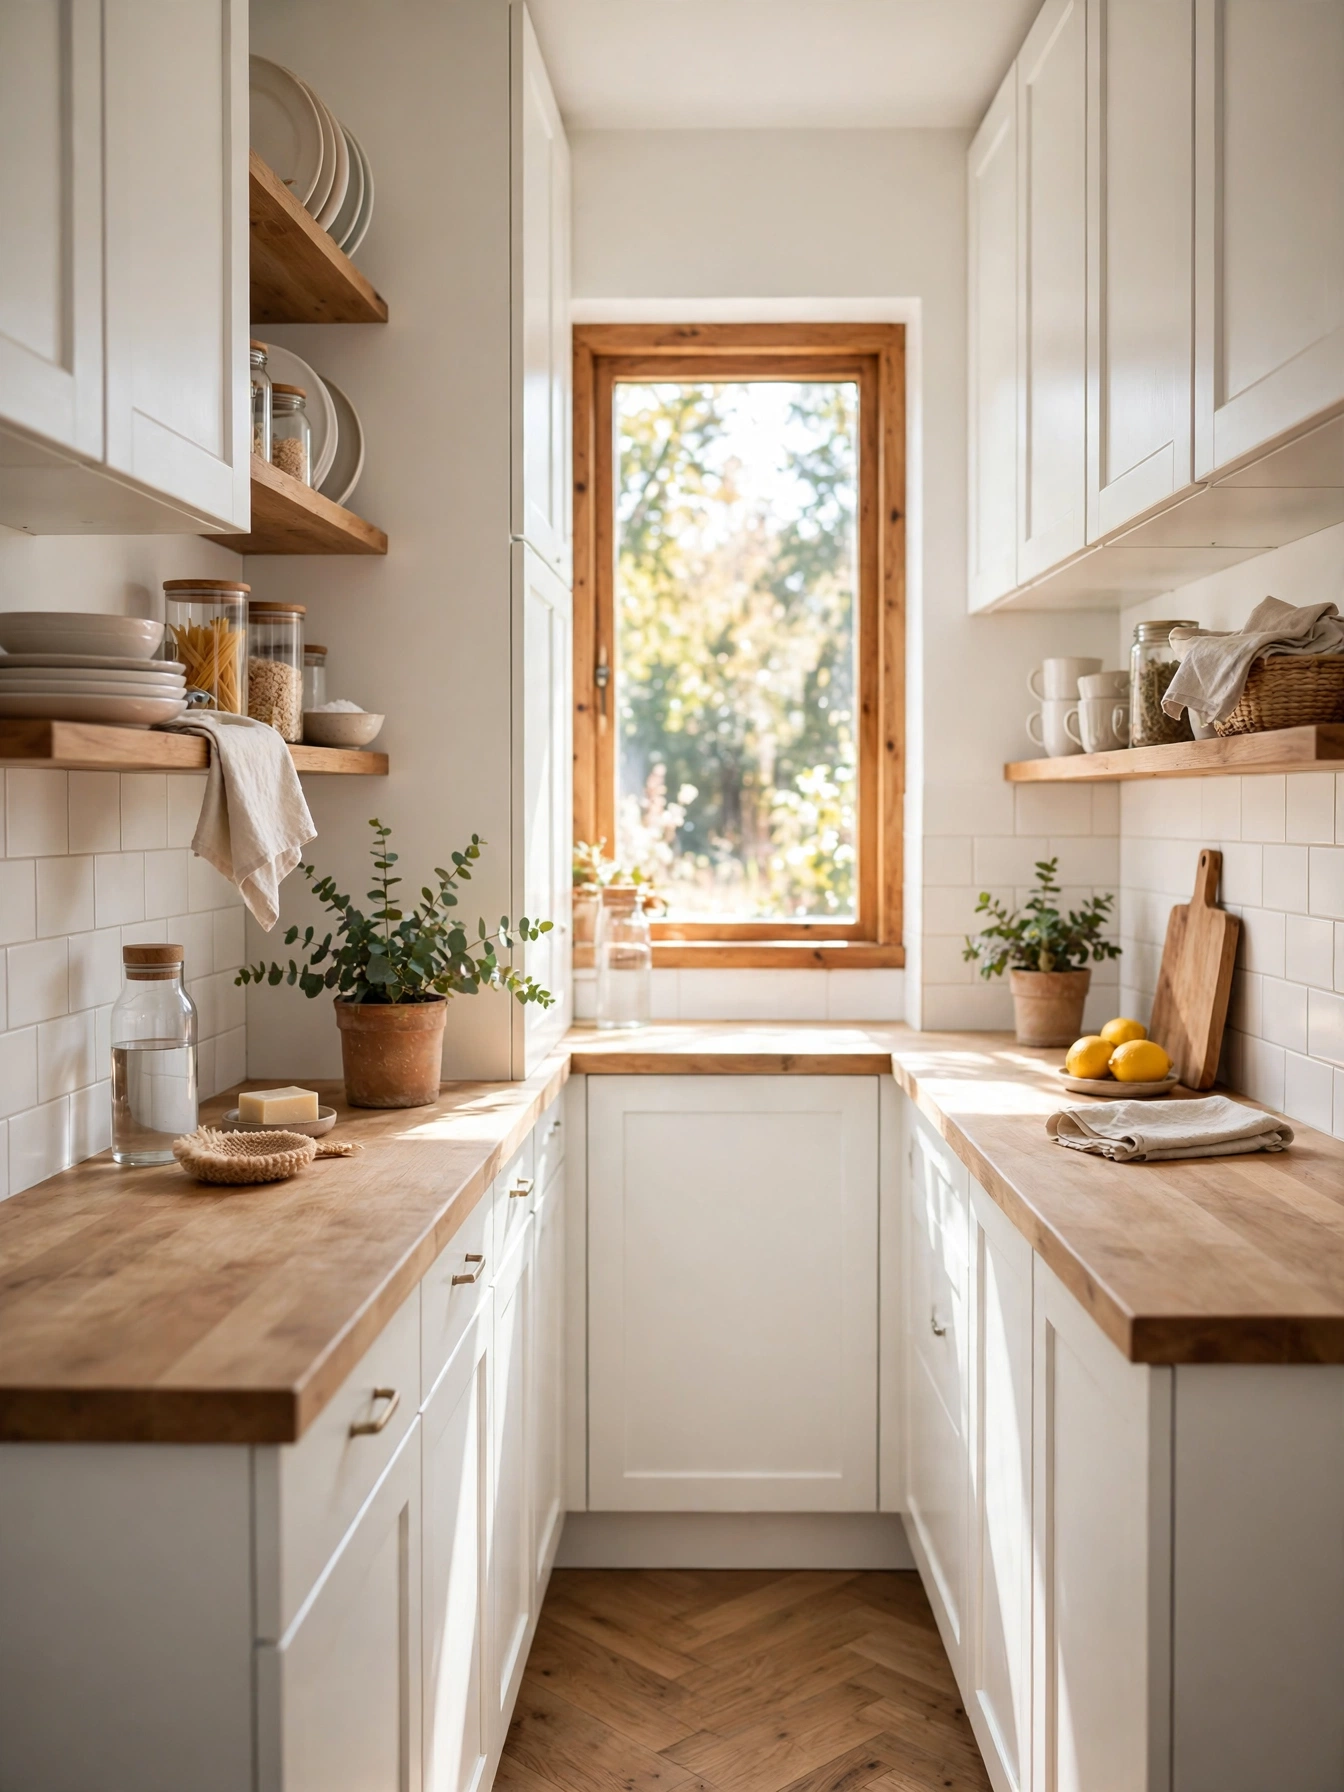
Two people cannot pass in a galley kitchen without turning sideways. The counters run down both sides, the walkway is barely wider than your shoulders, and every pan and bottle fights for the same thin strip of worktop.
The trouble is not a lack of storage. The trouble is that the storage sits in the wrong places, so the trays live at the back of a deep cupboard and the crumbs fall into a gap you cannot reach.
These IKEA kitchen hacks use the surfaces a galley kitchen wastes: the end wall, the side of a cabinet, the ceiling above the sink, and the dead space at the far end. A pulley rack frees the counter, a filler seals the gap by the hob, and a step that slides out of the plinth puts the top shelf in reach.
Pick three ideas from the list and set them up this weekend. Your galley will still be narrow, but it will stop getting in your way.
1. A Pulley-Lowered Dish Rack Above the Sink That Lifts Dishes Out of the Way
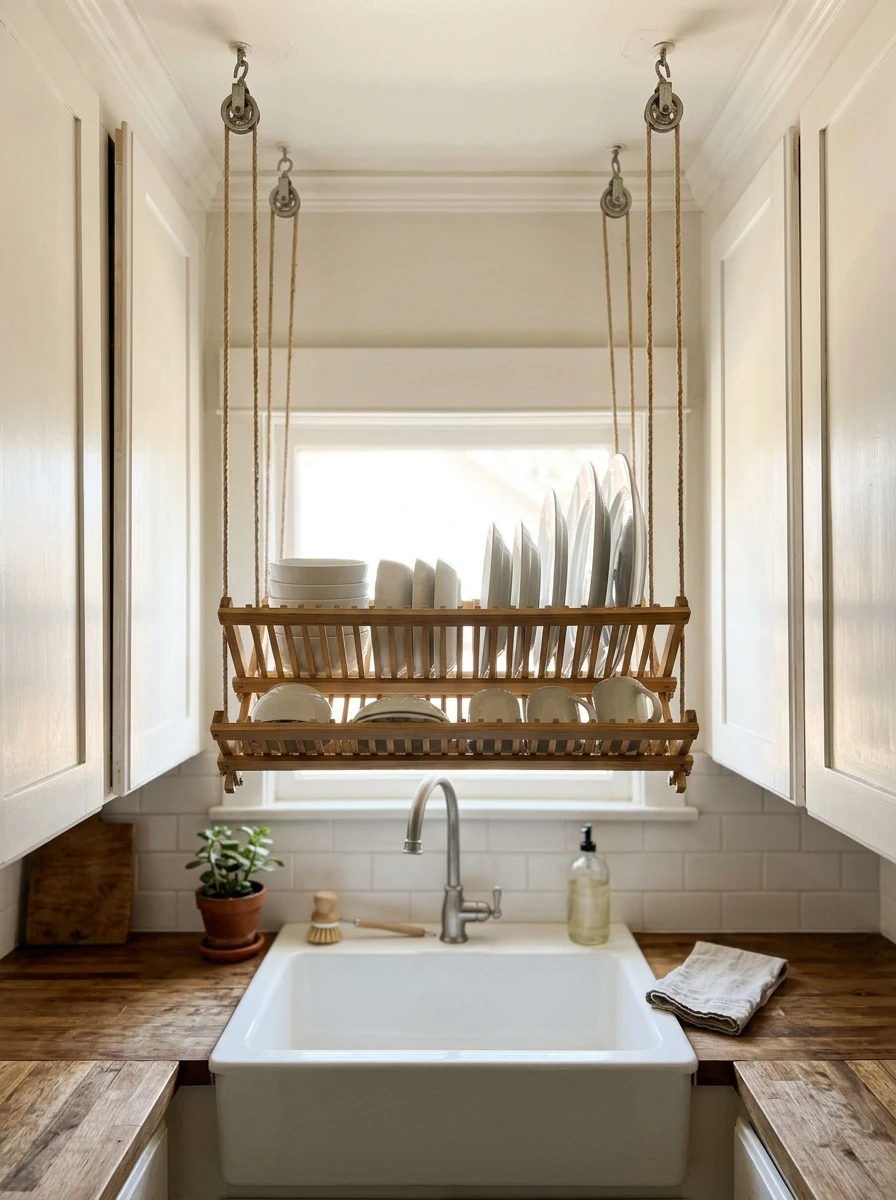
The drying rack is the first thing to eat the counter in a galley kitchen. Plates stand in it all day, the glasses drip beside it, and the one clear stretch of worktop disappears. A rack that hangs above the sink on two cords takes that whole job off the counter.
Fix two small pulleys to the ceiling above the sink and run the cords to a cleat on the wall. Load the plates and cups into the rack, pull the cords to lift it clear of the tap, and tie them off. To unload, lower it back to counter height, dry the dishes, and lift it away again.
Keep the rack light, with slats wide enough for water to drip straight into the sink below.
Also view: 11 IKEA Kallax Makeover Ideas for a Cozy Reading Corner
2. A Silicone Gap Filler Between the Hob and the Counter That Stops Crumbs Falling Through

The hob never sits flush against the counter, and the thin gap between them swallows crumbs, rice and splashes of sauce. They sit there out of reach, and the gap slowly turns dark. A silicone filler strip closes that gap in one move.
Measure the gap from the front of the hob to the wall, then cut the strip to length with scissors. Press it into the gap so it sits flat against both edges, and wipe it clean with a damp cloth when you wipe the hob. The strip is heat resistant, so it can sit beside the hob without melting or curling.
Lift it out once a month and wash it in hot soapy water, then press it back in.
💡 Quick Tip
Measure the gap twice before you cut, and check the strip is heat resistant before it goes beside the hob.
3. A Pull-Out Step Hidden in the Plinth That Puts the Top Shelf in Reach
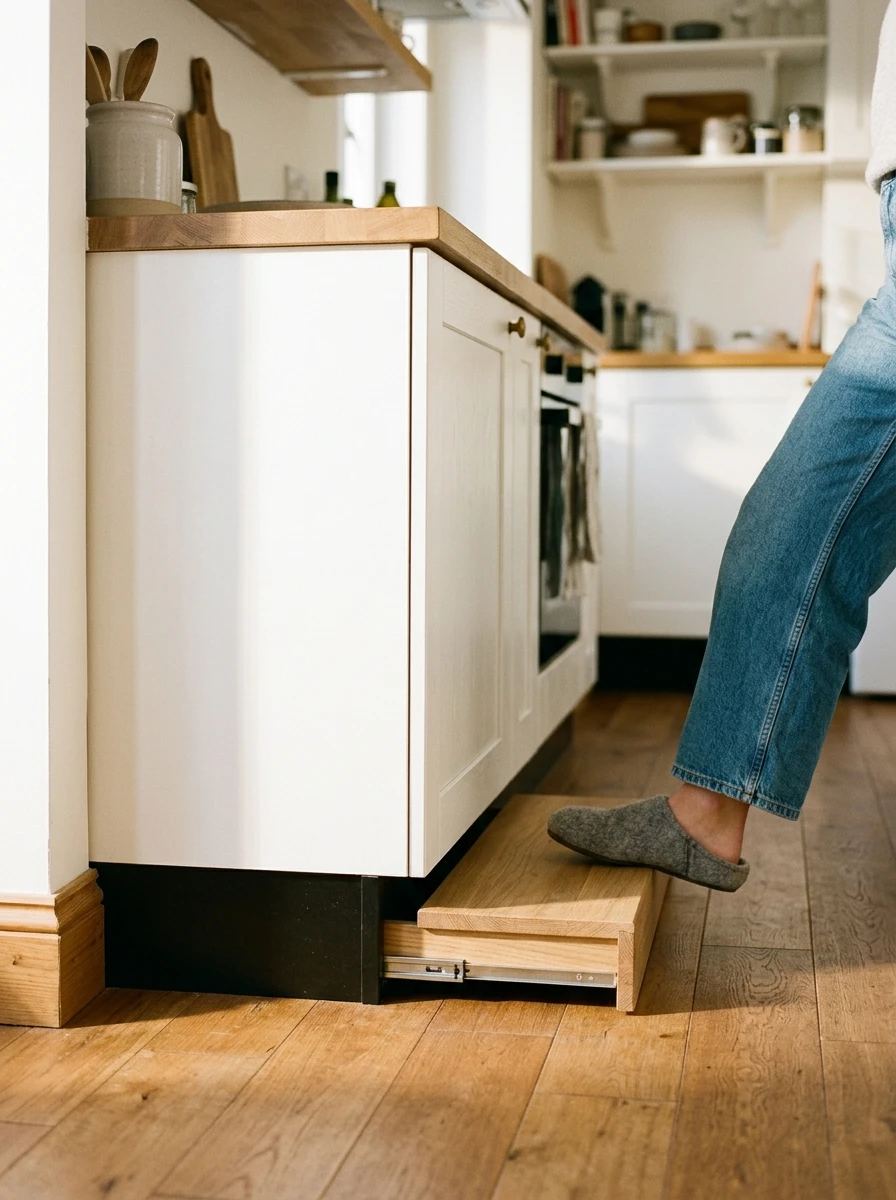
The top shelf of a galley kitchen is a dead shelf for most people. You stand on a chair to reach it, or you leave it empty and lose a whole shelf of storage. A step that slides out of the plinth puts that shelf back in daily use.
Fit a pull-out step into the plinth under the base cabinet at the galley end. Pull it out with your foot, step up to reach the top shelf, and push it back with a toe when you are done. It holds your weight, locks in place, and hides away flat when the kitchen is in use.
These IKEA kitchen hacks work best when the fix disappears after use, and this step is gone the moment you push it home.
The top shelf sits empty, or you climb a chair to reach it.
The step slides out, you reach the shelf, and it pushes away flat.
4. A Fold-Down Ironing Board on the Inside of the Galley-End Door
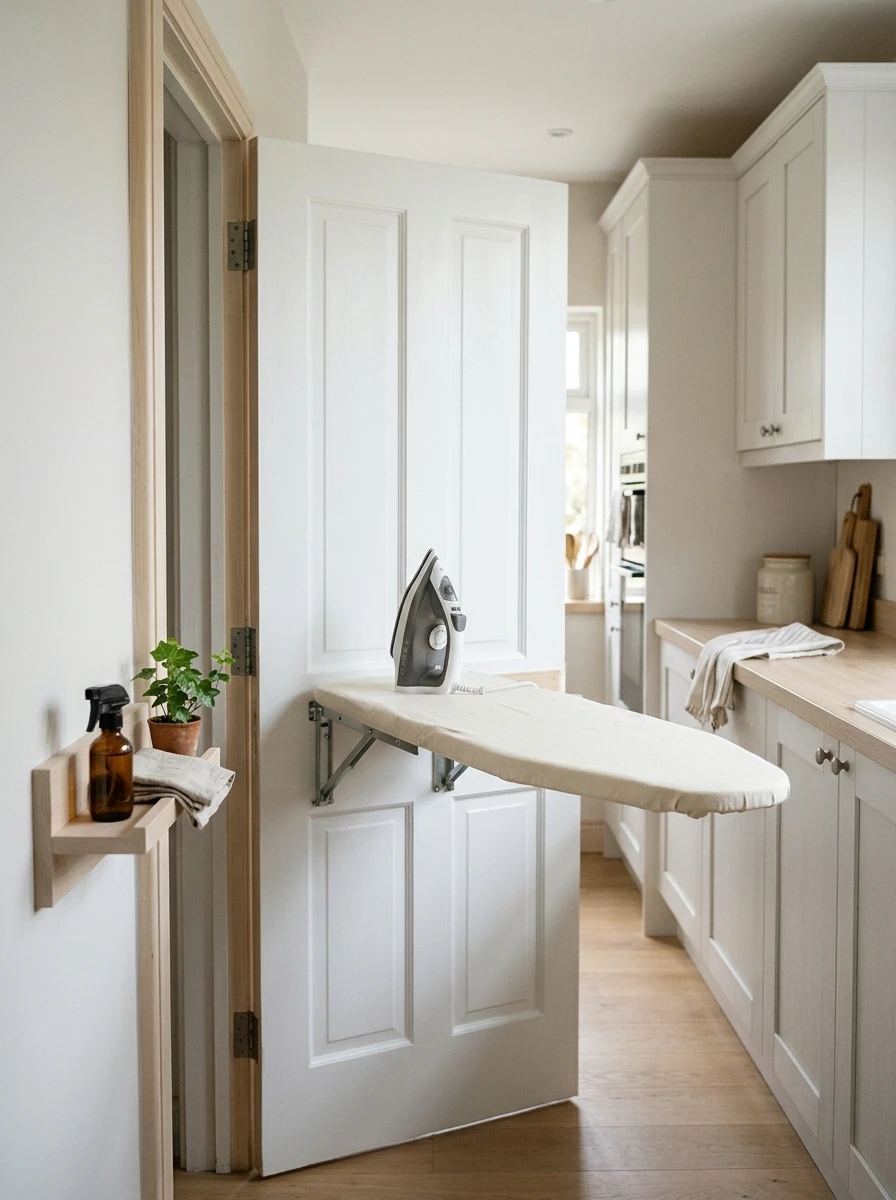
In a small home the ironing board has no good home. It leans behind a door, slides down when you open it, and takes up a whole corner of the galley. A board that folds down from the inside of the galley-end door is out of sight until you need it.
Fix the board to the inside of the door with its bracket, so it folds flat against the door when it is shut. Open the door, pull the board down until it locks level, and iron straight from the door. Fold it back up when you finish, and the door shuts over it.
Keep the iron and a small spray bottle on the shelf beside the door, so the whole job starts in one spot.
What to fit first
5. A Charging Dock on the Galley End Wall for the Handheld Vacuum
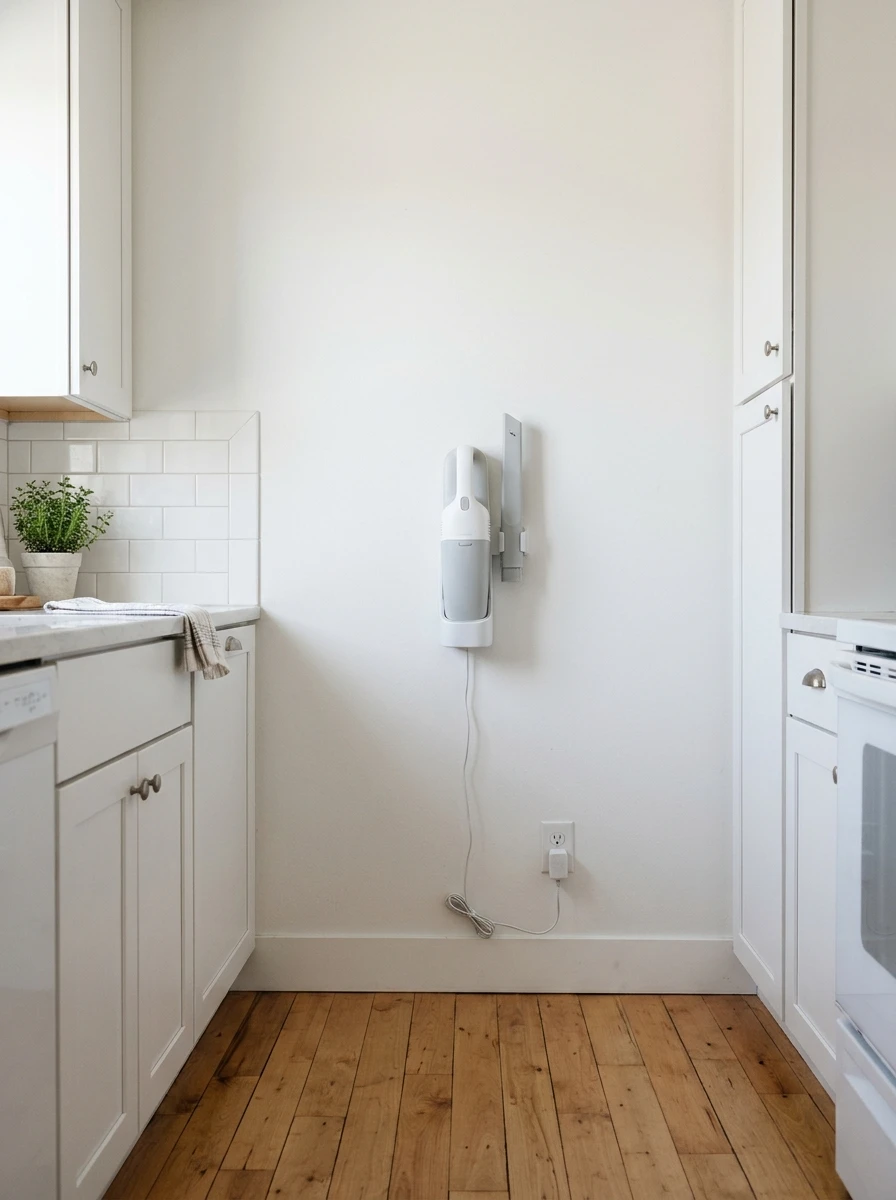
Crumbs on a galley floor are hard to chase with a full size vacuum, and the upright vacuum lives in a cupboard where it never comes out. A handheld vacuum on a charging dock at the end of the galley gets used every day, because it is always charged and always in reach.
Fix the dock to the end wall at shoulder height, near a socket, and slide the vacuum into it after every use. A quick pass over the floor after dinner takes a minute, and the dust cup empties into the bin in seconds. The dock holds the crevice tool too, so the gap between the counters gets cleaned as well.
Charge it overnight, and it is ready for the morning crumbs.
6. A Tall Slim Column at the Dead End of the Galley That Files Trays and Boards Upright
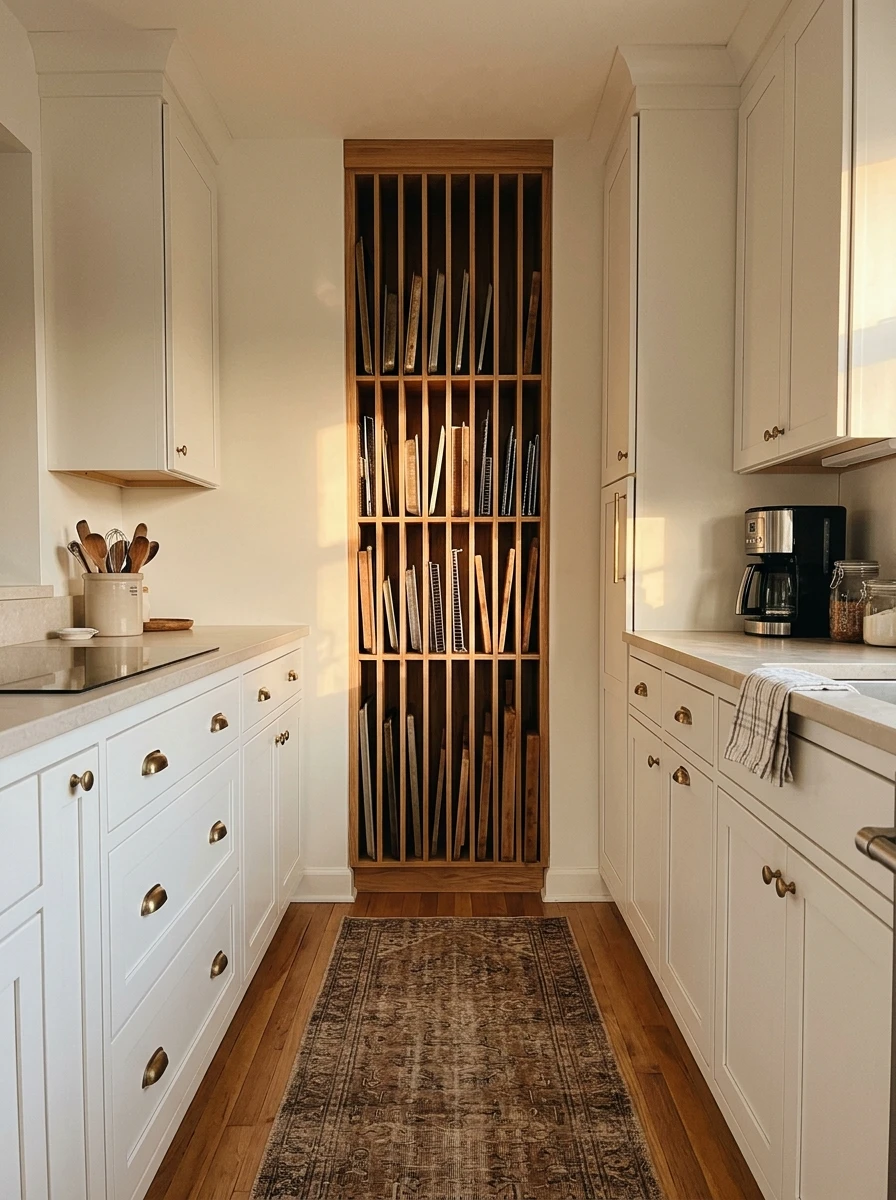
Baking trays, chopping boards and cooling racks are flat, awkward and always in the way. Stacked in a cupboard they jam, and leaning against the wall they slide onto the floor. A tall slim column at the dead end of the galley files them upright, like books on a shelf.
Choose a column no wider than a baking tray, with slots spaced a finger width apart. Stand it at the far end of the galley, where the walkway stops, and slide each tray into its own slot. The biggest tray goes at the back, the boards in front, and the cooling racks on top.
These IKEA kitchen hacks earn their keep by using dead space, and this column turns the end of the galley into storage that costs no counter.
Measure the dead end and pick a column no wider than a baking tray.
Stand it at the far end and slide each tray into its own slot.
Put the biggest tray at the back and the cooling racks on top.
7. A Fold-Flat Drying Rack on the Side of the Base Cabinet That Airs Tea Towels
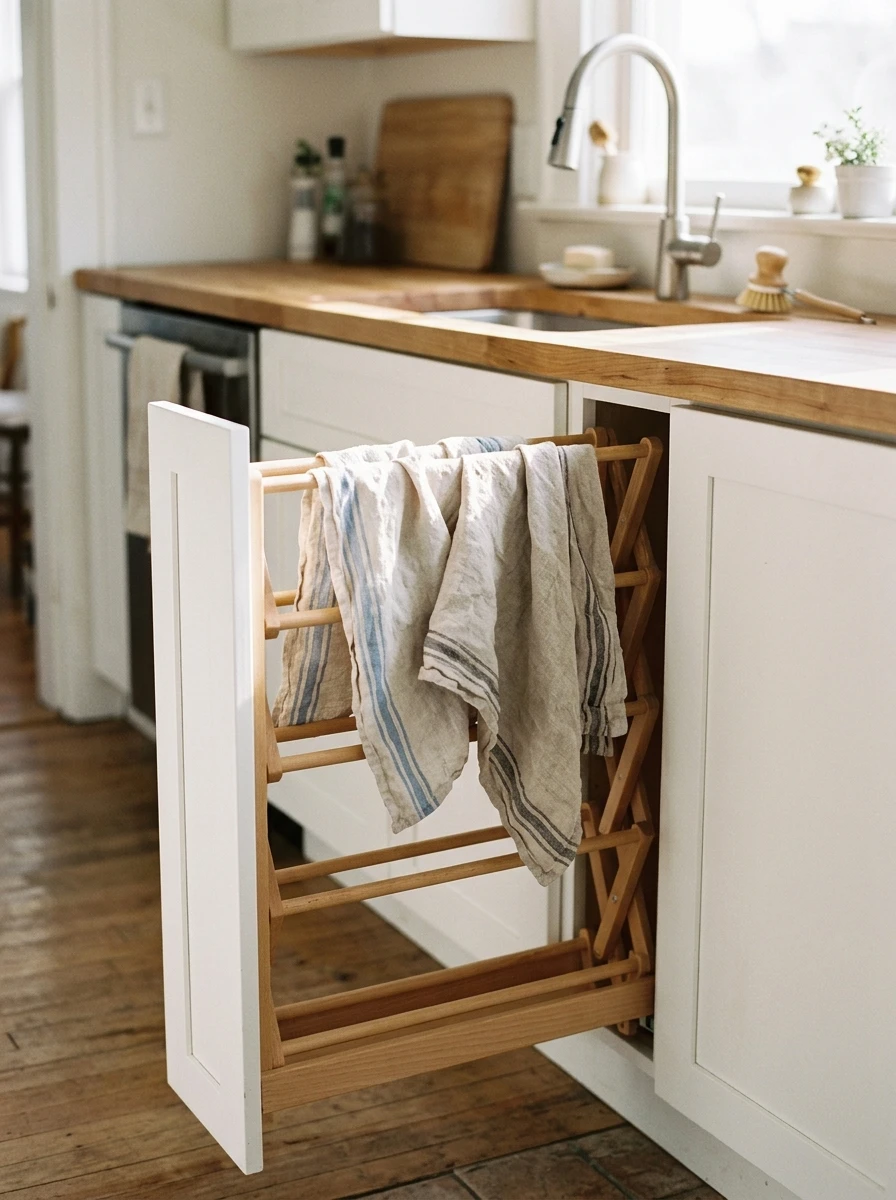
Tea towels in a galley kitchen end up draped over the oven door or bunched on the counter, because there is nowhere to air them. They stay damp, and the counter stays cluttered. A rack that folds flat against the side of the base cabinet gives them a proper airing spot.
Fix the rack to the side panel of the base cabinet, at the end nearest the sink. Pull it out to air two or three towels after washing up, and fold it flat against the cabinet when they are dry. The bars hold the towels apart, so air moves round them and they dry fast.
Hang the dampest towel on the outer bar, where the air reaches it first.
Pull the rack out to air the towels, and fold it flat when they are dry. A dry towel never clutters the counter.
8. A Foil and Wrap Dispenser on the Side of the Upper Cabinet
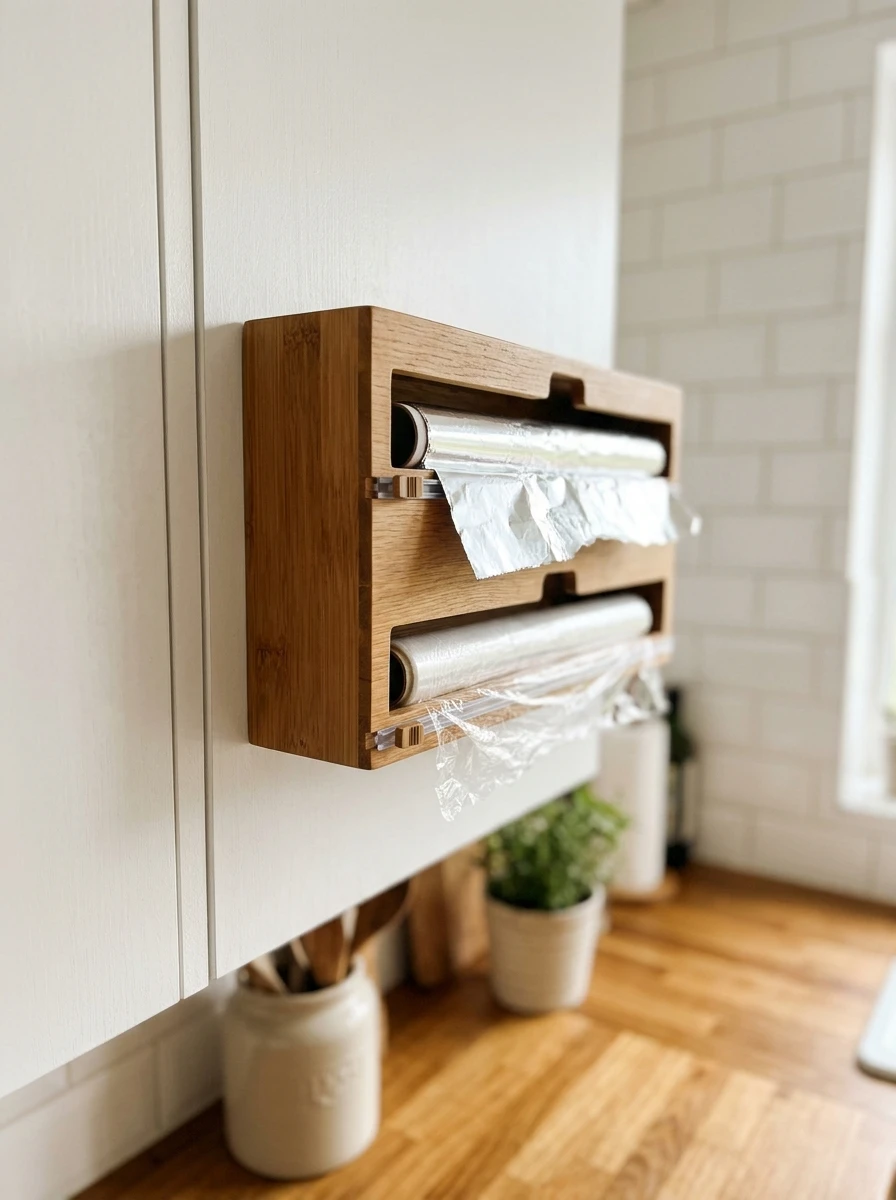
Foil and cling film live in a drawer in most kitchens, where the boxes slide about and the roll ends tear badly. You pull the drawer open, the box tips, and the film sticks to itself. A dispenser on the side of the upper cabinet keeps both rolls in one fixed spot.
Fix the dispenser to the side panel of the upper cabinet, at the end nearest the hob. Slide the foil roll into one slot and the cling film into the other, and tear each sheet against the cutter edge. The boxes stay put, the ends stay clean, and the drawer is free for something else.
Refill the dispenser when a roll runs out, and keep a spare roll on the shelf above.
| On the Cabinet Side | In a Drawer |
|---|---|
| The rolls: fixed in place, and they tear clean | The rolls: slide about, and they tear badly |
| Finding them: one reach, no drawer to open | Finding them: open the drawer and dig around |
| The drawer: free for something else | The drawer: full of sliding boxes |
9. A Peg Rail on the Galley End Wall That Holds Aprons and Oven Gloves

Aprons and oven gloves live on the back of a chair in a galley kitchen, because the hooks are always full. They slide off, land on the floor, and get stepped on. A wooden peg rail on the end wall gives each one its own peg, in plain sight.
Fix the rail to the end wall at shoulder height, where you can reach it with wet hands. Hang the apron on the first peg, the oven gloves on the next two, and the tea towel on the last. Everything hangs straight, dries fast, and is back on its peg after use.
These IKEA kitchen hacks stay useful when the storage is in sight, and a peg rail keeps the daily tools where hands reach first.
Hang the apron on the first peg, where it is easy to grab.
Keep the oven gloves on the next two pegs.
Hanging everything on one hook, where it slides off.
Draping the gloves over a chair back.
10. A Pet Feeding Drawer That Slides Out From Under the Galley-End Counter
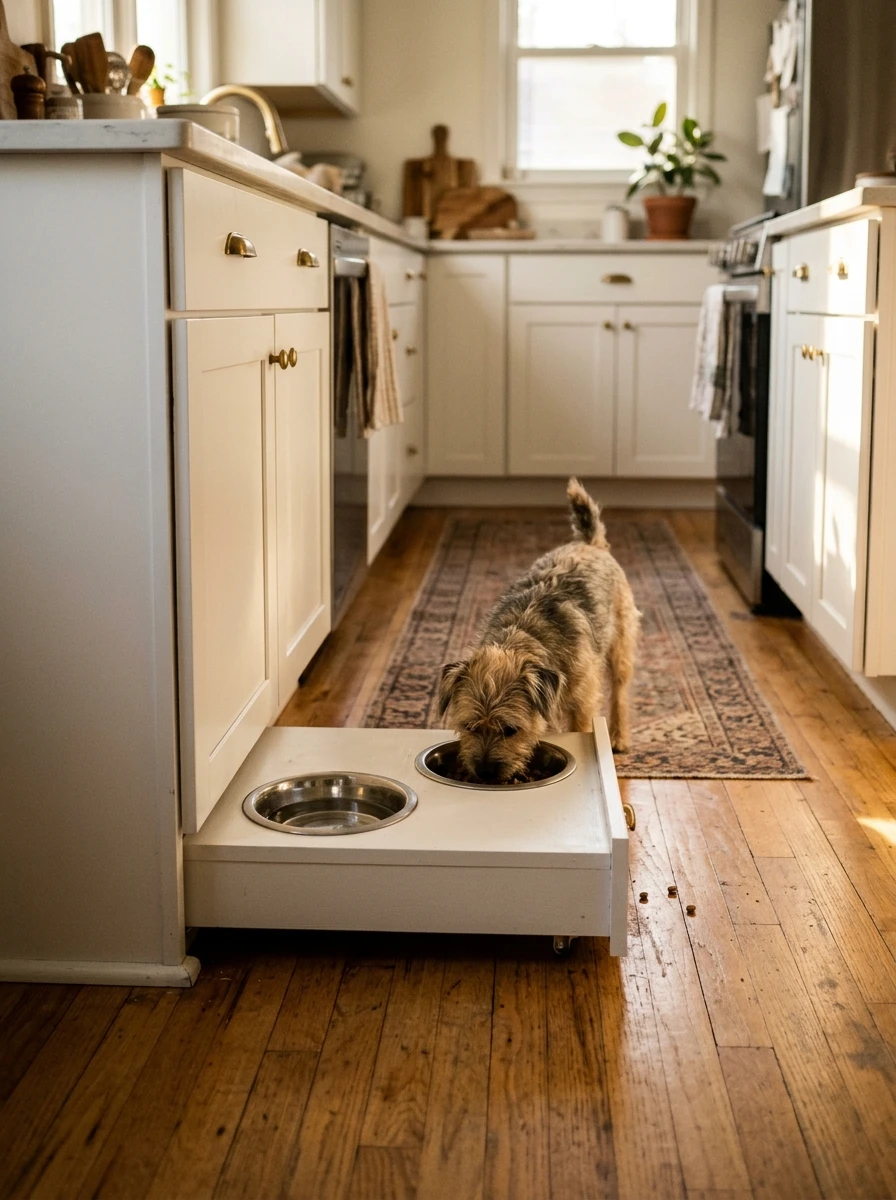
The dog waits by the counter at dinner time, and the food bowls slide across the galley floor every time someone walks past. The bowls end up under the fridge, the water spills, and the walkway is blocked. A feeding drawer under the galley-end counter keeps the bowls in one safe spot.
Fit a shallow drawer into the base cabinet at the galley end, with two steel bowls set into its top. Pull it out at feeding time, fill the bowls, and push it back when the dog has finished. The bowls cannot slide, the water stays in the drawer, and the floor stays clear.
Wash the bowls each night, and wipe the drawer out with a damp cloth.
At a glance
A Narrow Kitchen That Finally Works With You
A galley kitchen works when every surface earns its place. The pulley rack, the gap filler and the plinth step all do the same quiet work: they take the reaching, the hunting and the bending out of cooking in a narrow space.
Nothing here needs a new cupboard or a big shop. Most of these ideas use a rail, a rack or a board you can fit in an afternoon, and the rest cost less than a takeaway.
Start with the gap filler tonight, then hang the small peg rail on Saturday. Save this list for the next tidy up, and these IKEA kitchen hacks will be here when the next small job comes along.
Before You Start
✅ A pulley rack, two ceiling pulleys and a wall cleat for the dish rack
✅ A silicone gap filler measured to fit the gap beside the hob
✅ A pull-out step fitted into the plinth under the base cabinet
✅ A fold-down ironing board and its bracket for the galley-end door
✅ Two steel bowls set into the feeding drawer at the galley end