15 IKEA Kitchen Hacks for Organizing Pots, Pans, and Lids
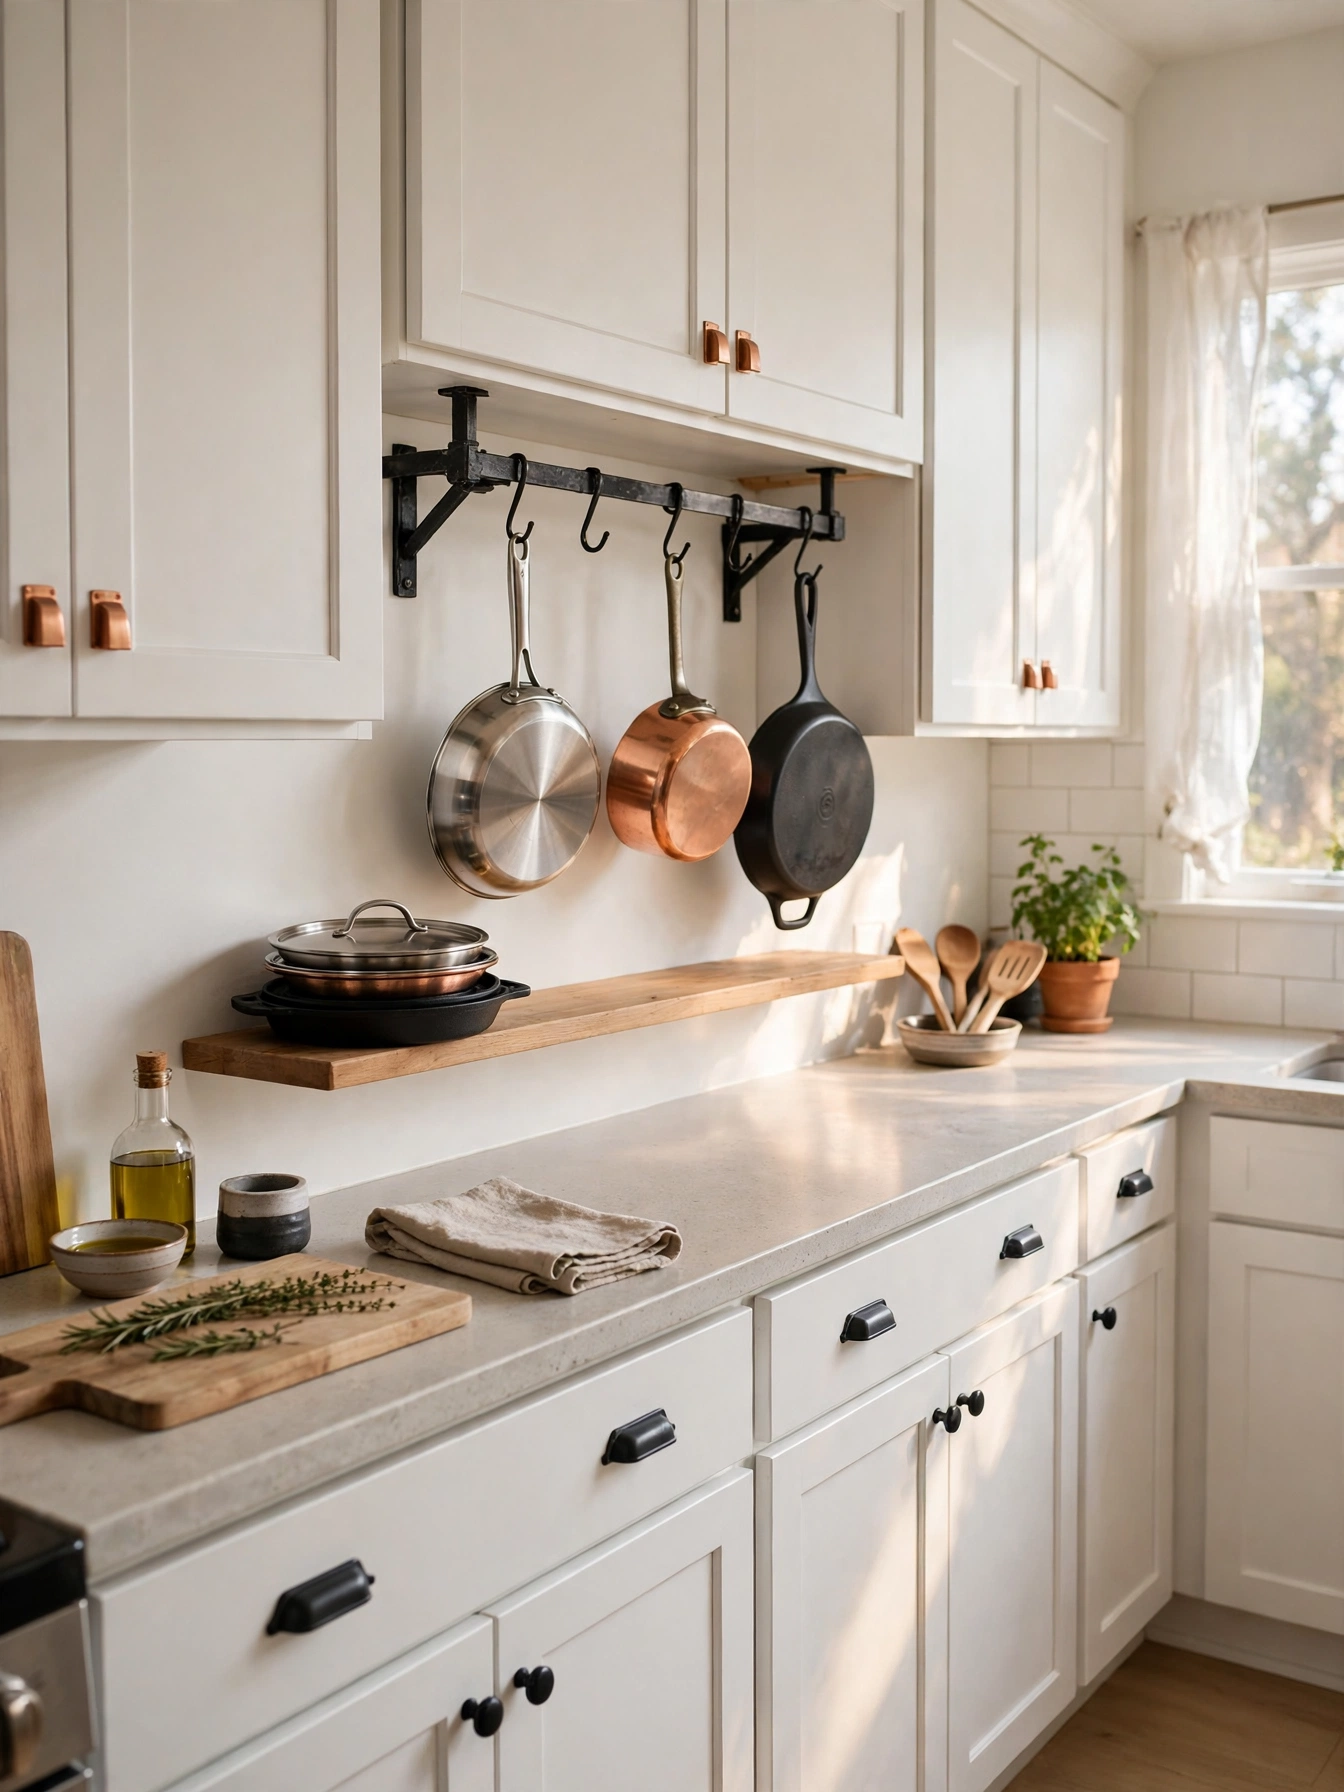
You open the cabinet to grab the frying pan, and the whole stack shifts. A lid slides down behind the pots. You pull one pan out and two more come with it. Dinner has not started, and the cabinet feels like a fight.
Pots and pans are the hardest things to store because they are big, heavy, and all different shapes. Lids are worse. They have no flat side, they slide around, and they never match the pan you want. Stack them and they scratch. File them loose and they fall.
That is what these IKEA kitchen hacks do. Each one gives pots, pans, and lids a fixed spot, on a hook, on a peg, in a drawer, or on a rack, so you can grab one piece without moving five others. Most need one afternoon, a few screws, and less than a takeaway dinner.
Work through the list, pick the three that fit your kitchen best, and start with the easiest one tonight.
1. A Pot Rack That Mounts Under the Upper Cabinet and Holds Pans by Hooks
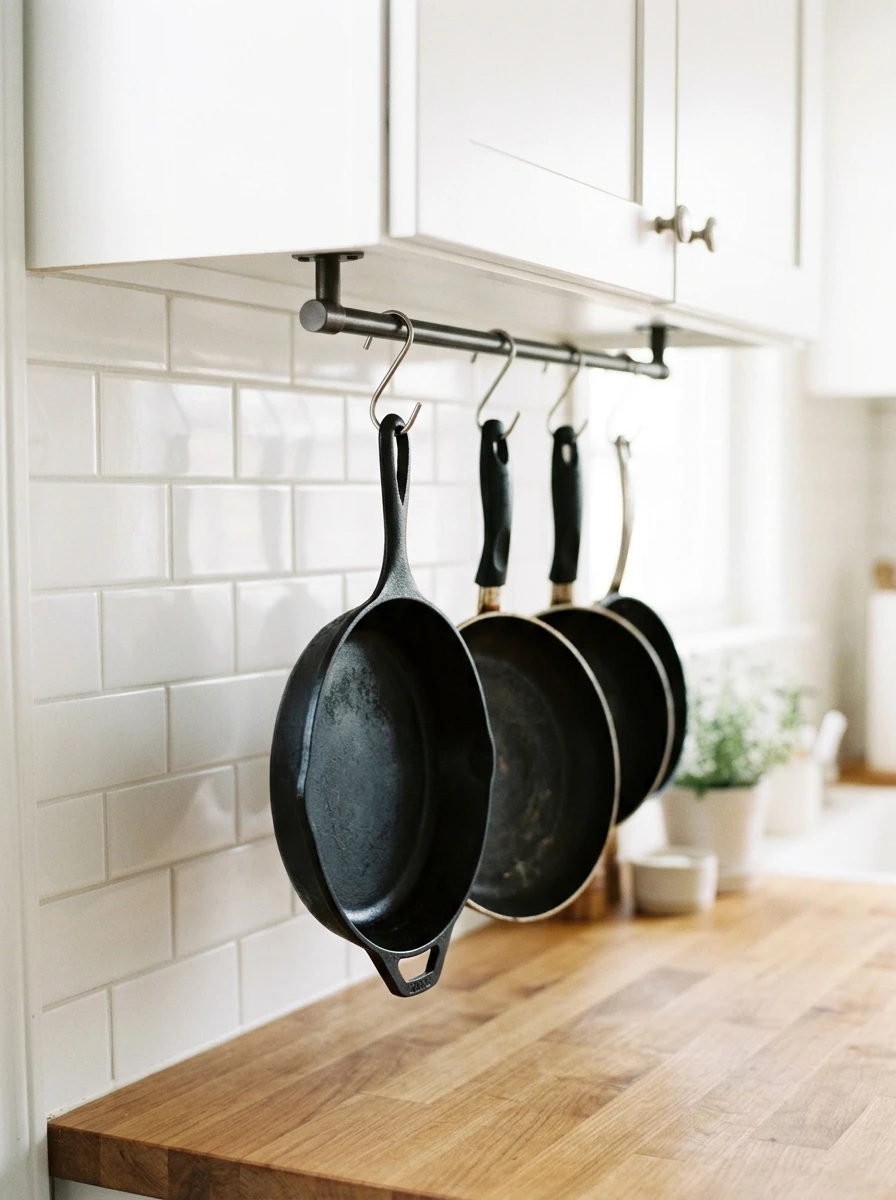
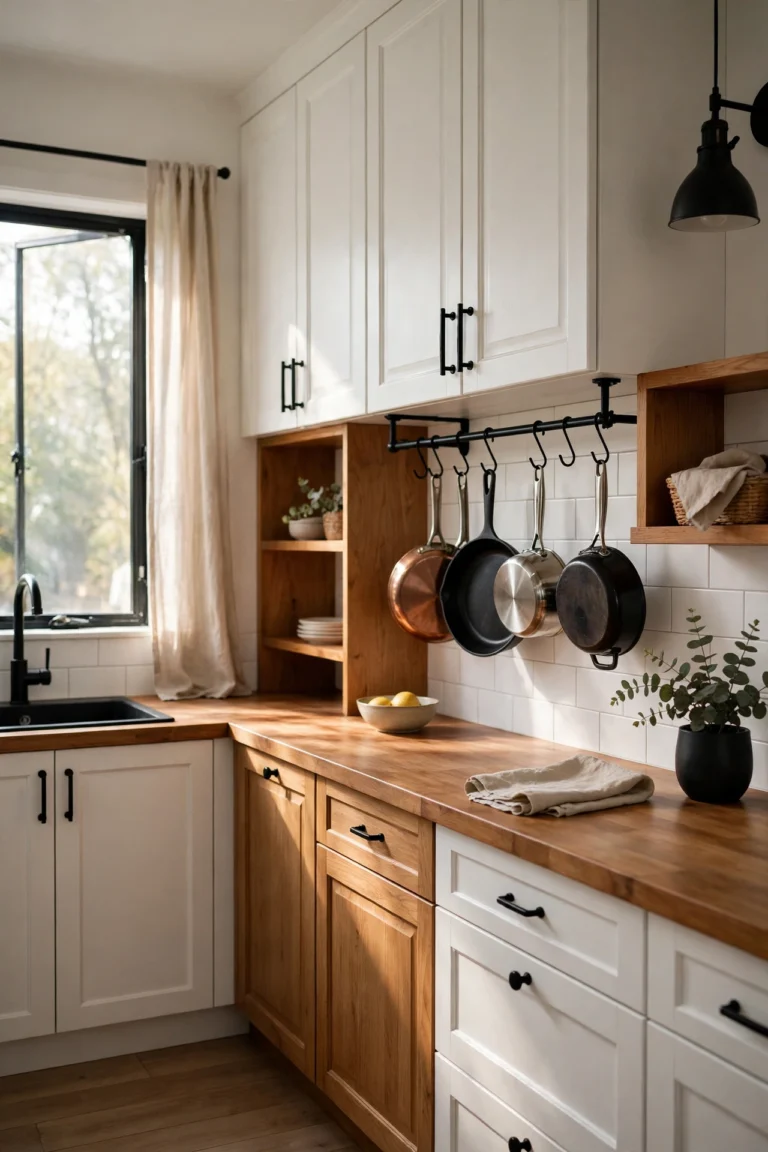
The space under the upper cabinet is empty air, and it sits right above your worktop. A short rail fixed under that cabinet turns it into a pot rack. Screw the rail into the cabinet base, add S-hooks, and hang your most used pans by their handles. The pans hang flat against the wall, clear of the counter, and you can see every size at a glance.
Keep the heaviest pan nearest the wall stud, and the lightest at the end. Leave a finger of space between handles so pans never knock together when you lift one off.
Two or three pans is enough for one rail. The rest can stay in the cabinet, and the ones you cook with daily stay within reach.
Also view: 12 IKEA Kallax Makeover Ideas for a Minimalist Scandinavian Interior
2. A Deep Drawer Fitted With Adjustable Pegs That Cradles Pots and Lids
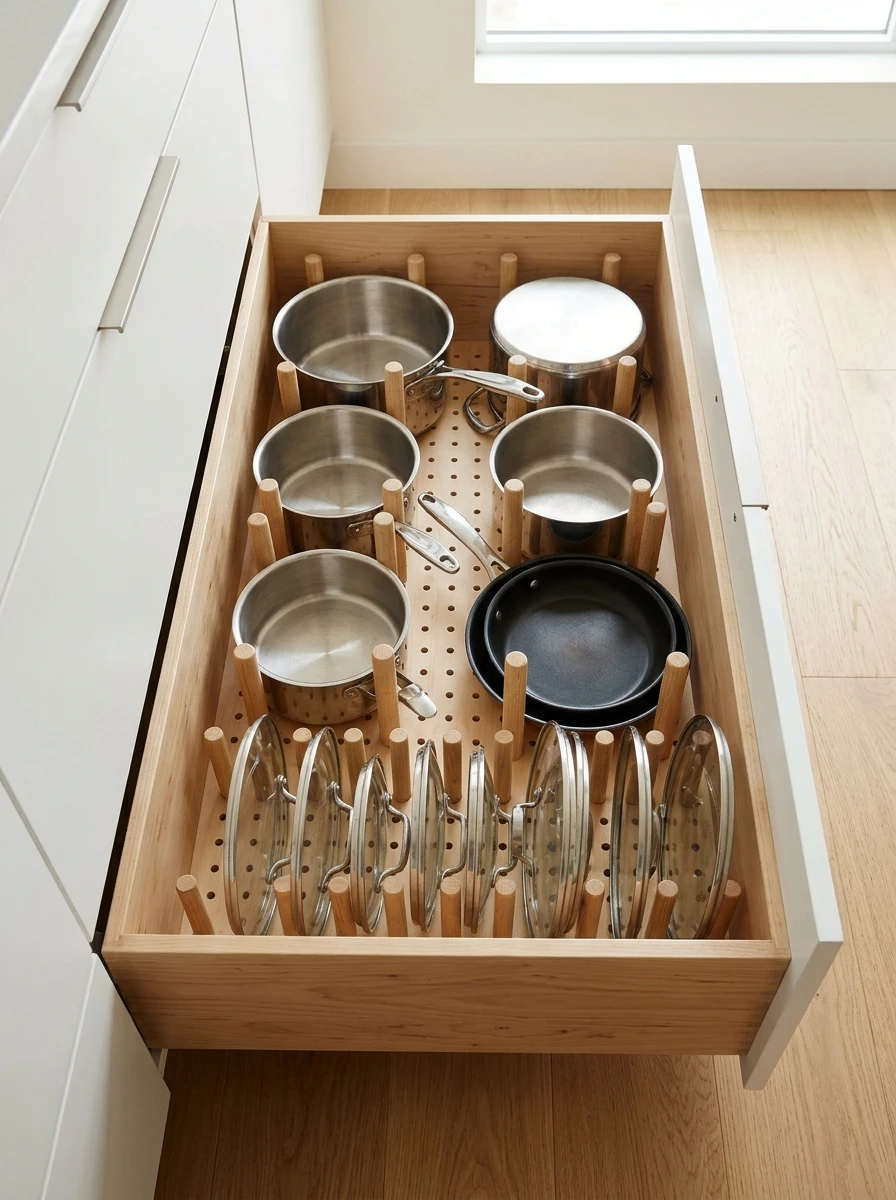
A deep drawer is the best home for pots because it pulls out to you, and nothing hides at the back. The problem is that round pots slide around in a square drawer. A pegboard base with short wooden pegs fixes that. The pegs sit in holes across the base, and you move them to cradle each pot and lid.
Set two pegs on each side of a pot, so it sits snug and cannot roll. Stand lids upright between pegs at the front of the drawer, sorted by size, so the one you want is always on top.
When you buy a new pan, move the pegs in a minute. Nothing is fixed, so the drawer changes with your pans.
What to grab first
3. A Deep Drawer Divider That Files Frying Pans Upright Like Books
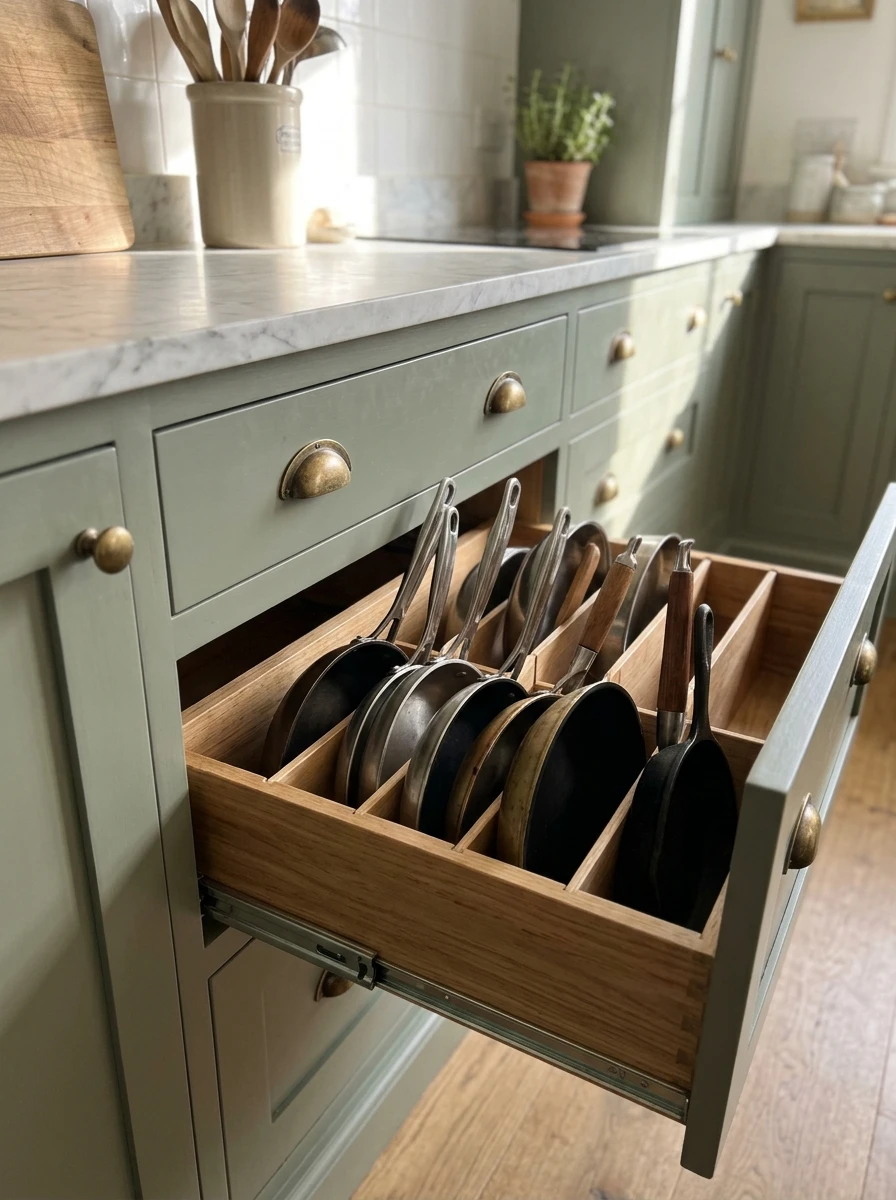
Frying pans stacked flat are a daily wrestle. The one at the bottom is always the one you want, and lifting the stack scratches the coating. A tall divider in a deep drawer files them upright instead, like books on a shelf. Each pan gets its own slot, handle up, and you slide one out without touching the rest.
Measure the tallest pan first, then pick a divider that clears it by an inch. Sort the pans by size, biggest at the back, smallest at the front, so every handle is easy to grip.
Lids can file upright in the same drawer, at the front, with a second divider keeping them in line.
4. A Wall-Mounted Lid Rack That Files Lids by Size Beside the Stove
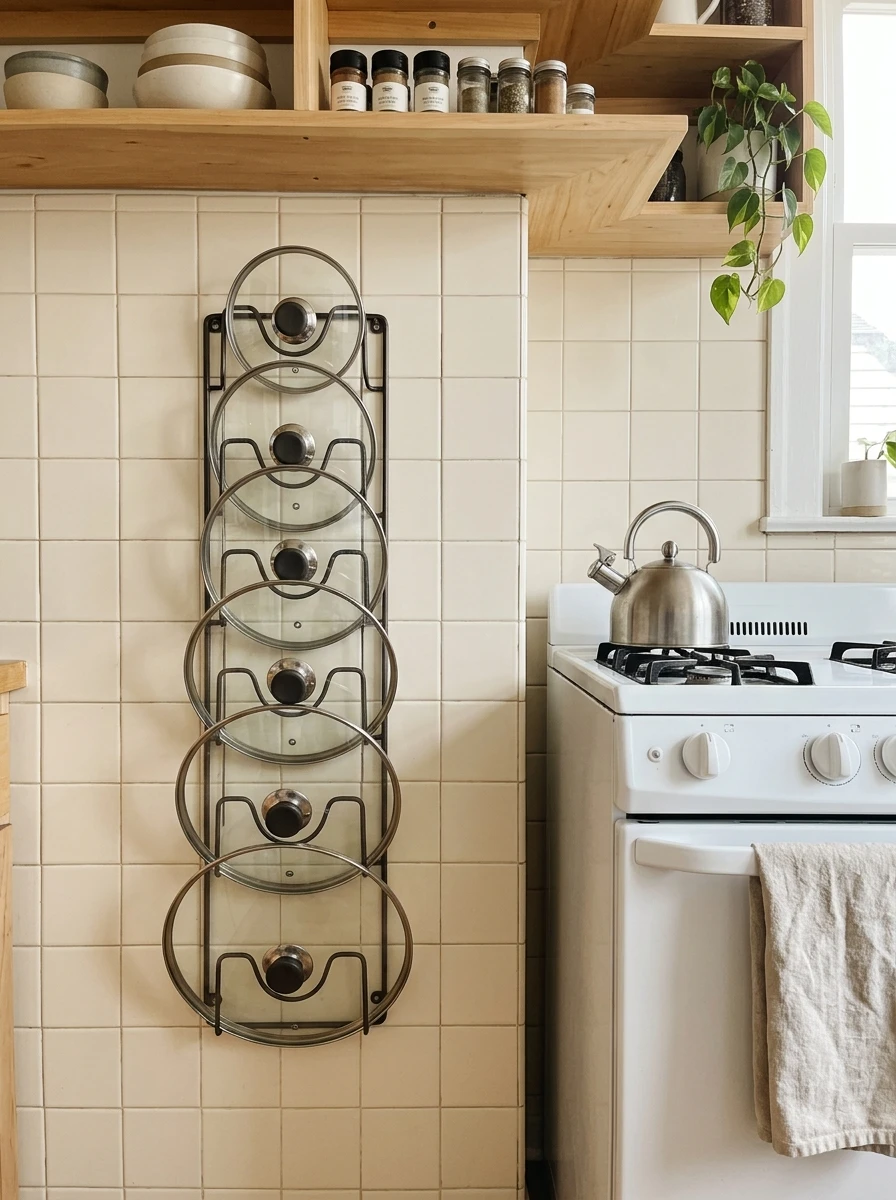
Lids live in a pile because they have no good home. A wall rack beside the stove files them by size, smallest at the top, largest at the bottom, and you can read the sizes at a glance. The rack is a row of short slots or rails fixed to the wall, and each lid slides in edge first.
Keep it beside the stove, not above the burners, so handles stay cool and lids are in reach while a pot simmers. Glass lids go in the top slots, where a knock cannot send them far.
This is one of those IKEA kitchen hacks that costs little and saves a daily hunt, since the right lid is always the first one you touch.
| Wall Lid Rack | Pile in a Drawer |
|---|---|
| Finding the right lid: in view, sorted by size | Finding the right lid: digging through a pile |
| Counter space: none used | Counter space: lids spill onto the counter |
| Lids stay: upright and safe | Lids stay: scratched and sliding |
5. A Tiered Stand Inside a Cabinet That Stacks Saucepans in Layers
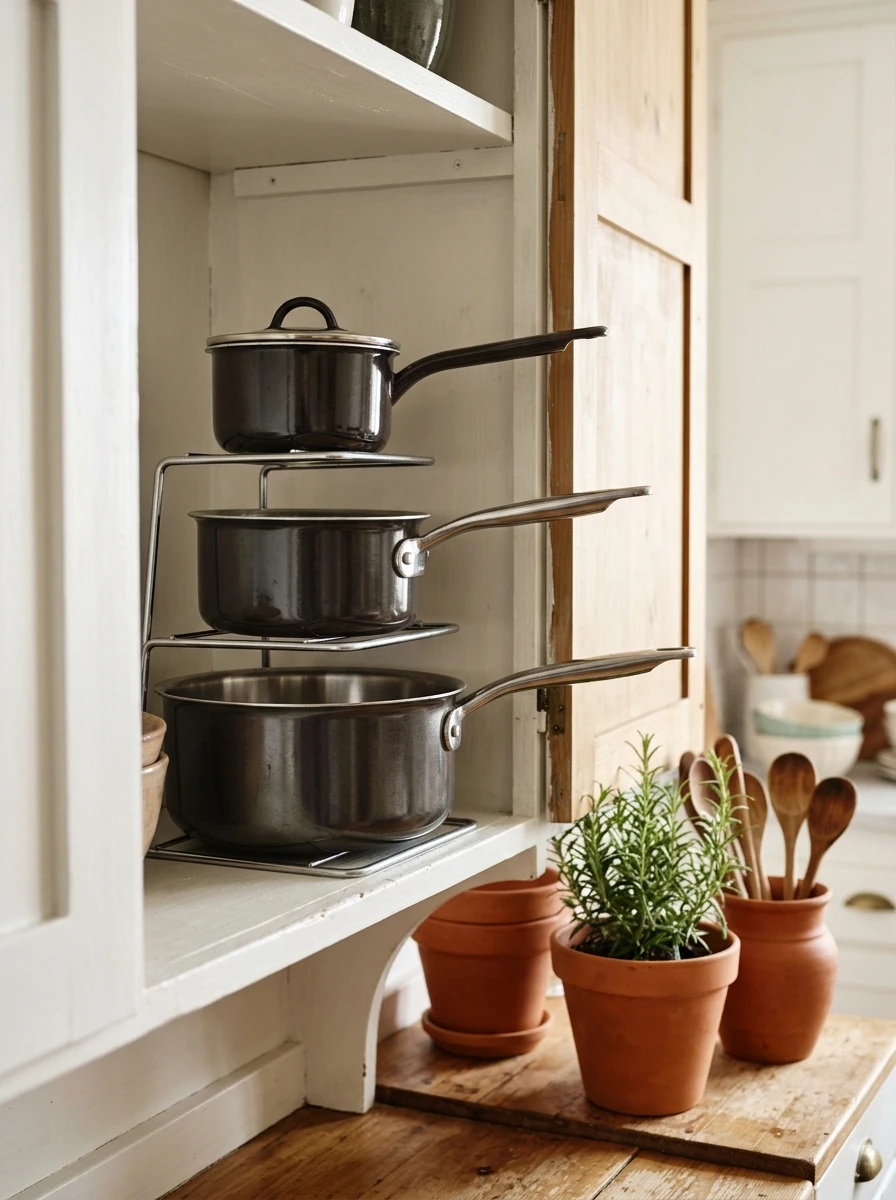
A cabinet shelf holds one layer of saucepans, and the air above them is wasted. A tiered stand adds two more layers inside the same cabinet, like steps, so each pan sits on its own level. The smallest pan goes on the top step, the largest on the bottom, and every handle points the same way.
Measure the shelf height first. The stand must leave an inch above the tallest pan, or the shelf above will not close. Pick a stand with a solid base, so it never wobbles when you pull a pan out.
Lids stack on the top step, upside down, so the whole set lives in one place.
One layer of saucepans on the shelf, air above wasted.
Three stepped layers, every pan in view, handles in line.
6. A Lid Rack That Mounts Under a Shelf and Holds Lids by Their Knobs
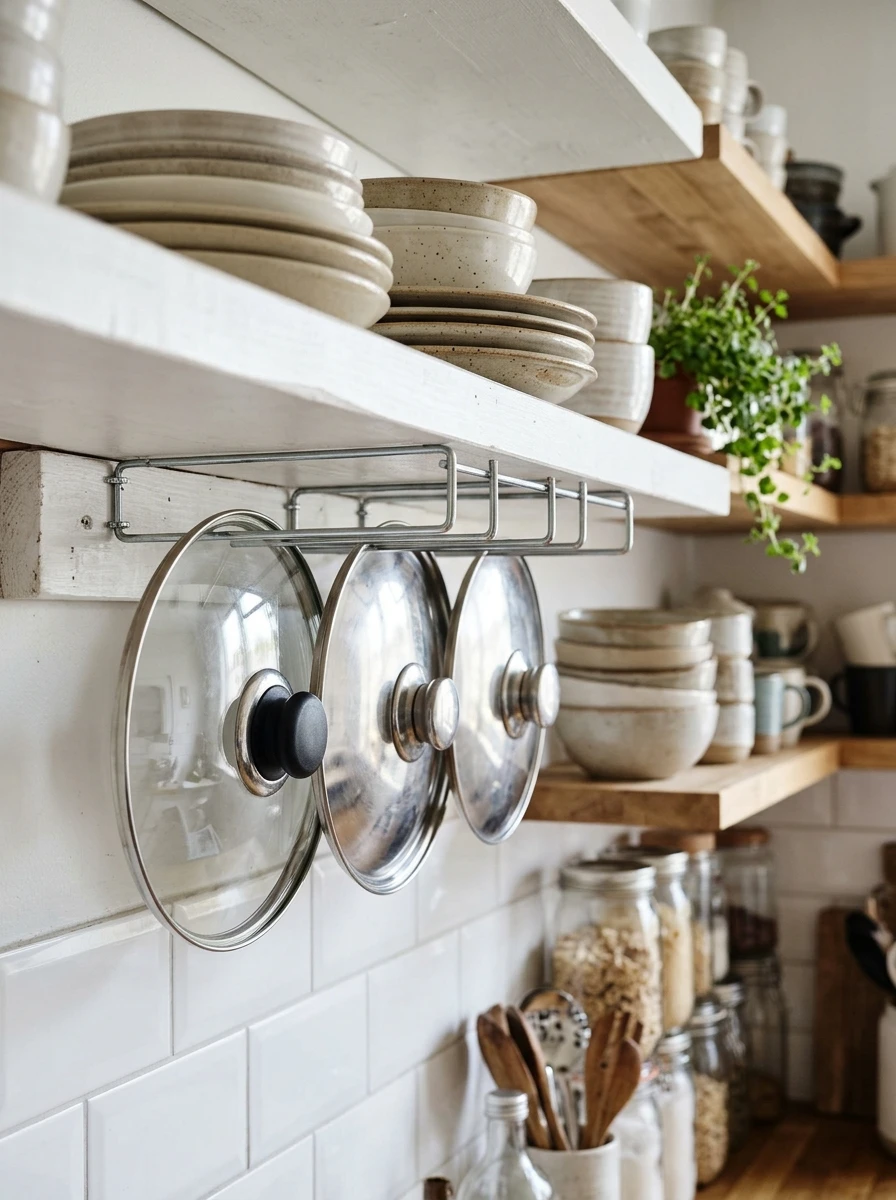
The underside of a cabinet shelf is dead space, and lid knobs are made to hang from it. A short rack fixed under the shelf holds each lid by its knob, so the lids hang flat underneath, out of the way. The shelf above still holds plates, and the lids never slide around in a drawer again.
Space the hooks an inch wider than your biggest lid, so lids never clink together when you lift one down. Hang the most used lid nearest the front edge, where your hand reaches first.
If you rent, fix the rack with heavy duty adhesive strips and check the weight limit before you load it.
💡 Quick Tip
Hang the most used lid nearest the front edge, and space the hooks an inch wider than your biggest lid so lids never clink together.
7. A Rack Over the Sink That Dries Pot Lids After Washing
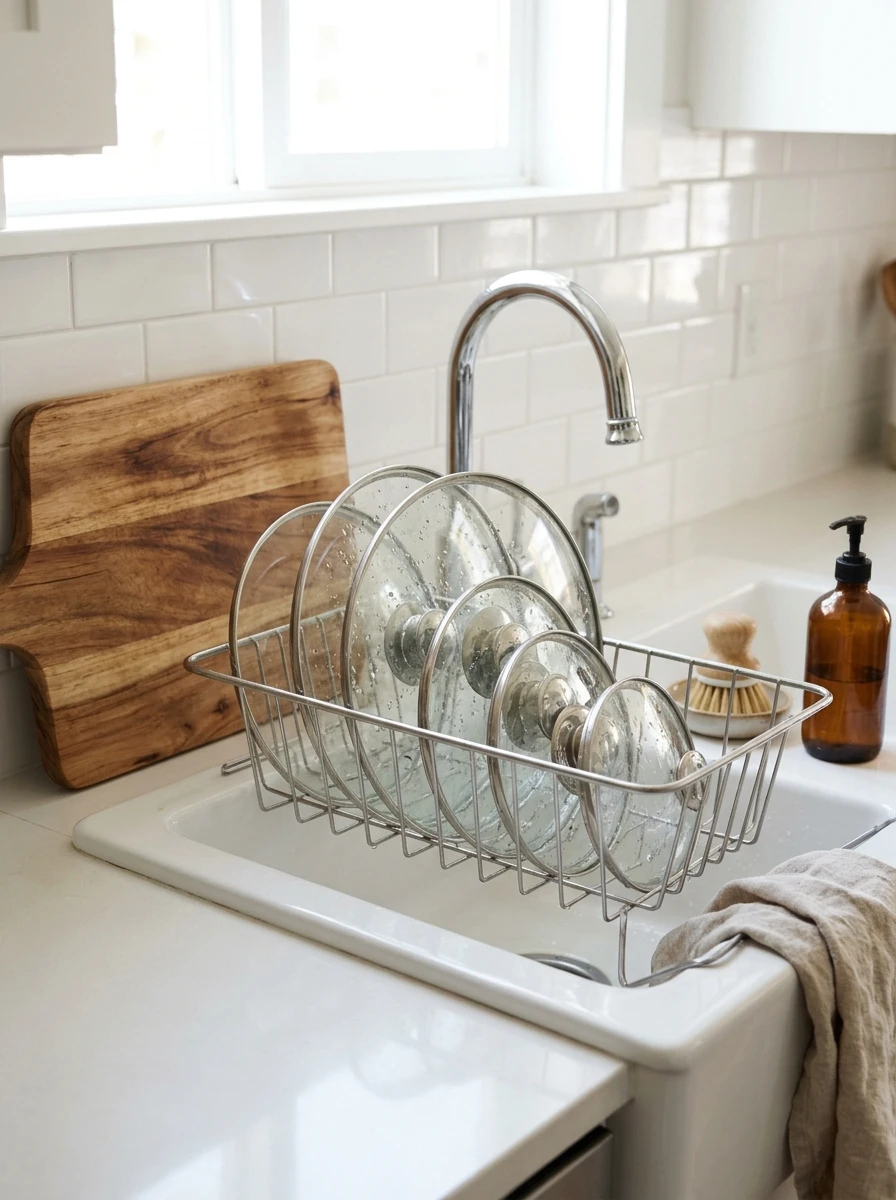
Washed lids have nowhere to dry. They lean against the backsplash, slide into the sink, and drip across the counter. A small rack that sits over the sink holds them upright while they drip straight into the basin. The rack is a row of slots on a frame that spans the sink, and the water goes where it belongs.
Pick a rack that spans your sink with a lip on each side, so it cannot slip in. Glass lids go in the middle slots, where they are held on both sides, and metal lids go at the ends.
When the lids are dry, lift the rack off and stand it behind the tap. The sink is clear again.
Pick a rack that spans the sink with a lip on each side.
Put glass lids in the middle slots, where they are held on both sides.
Leaning wet lids against the backsplash to dry.
Leaving the rack in the sink after the lids are dry.
8. A Cabinet Divided by Tension Rods That Keeps Pans Standing Upright
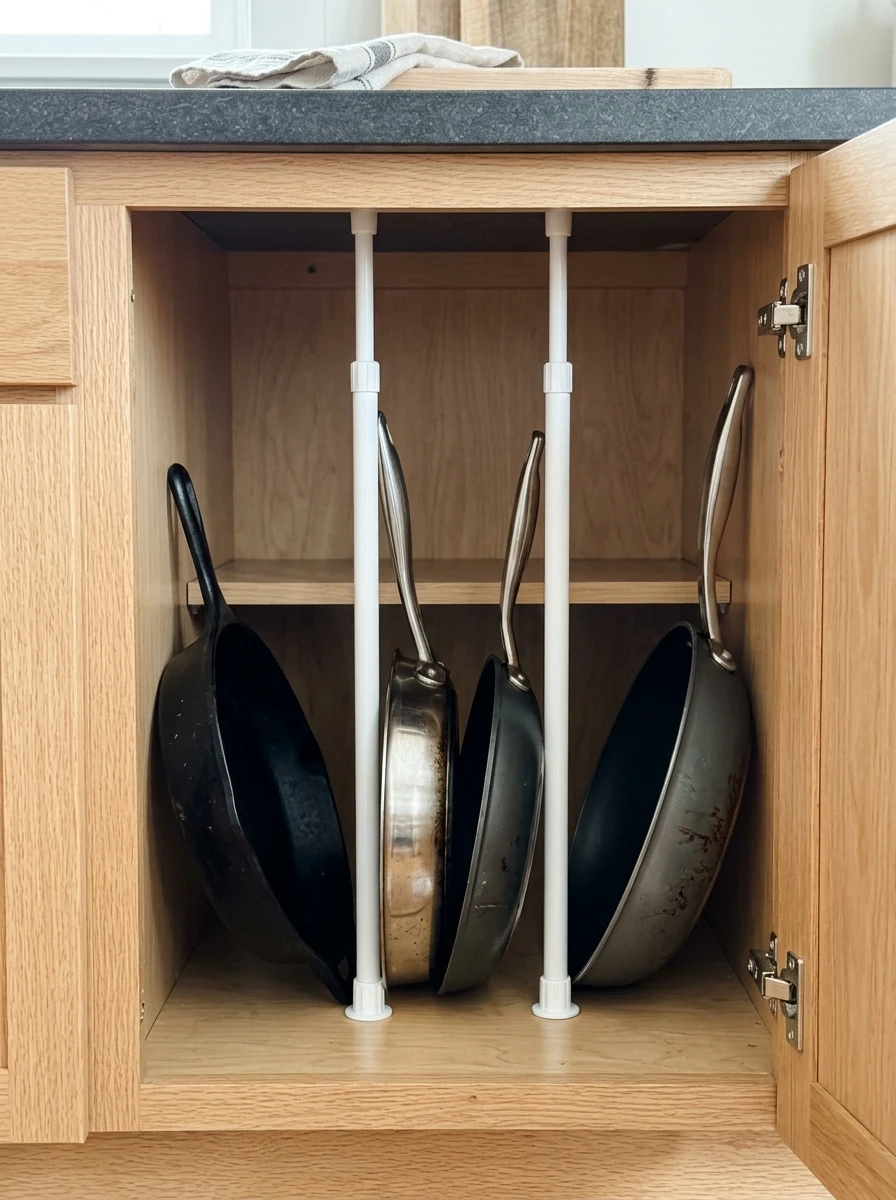
A wide cabinet swallows pans whole. They lean, slide, and end up in a heap at the back. Two tension rods fixed upright inside the cabinet split it into narrow bays, and each pan stands in its own bay, handle up. No screws, no drilling, and the rods come out in seconds if you change your mind.
Wedge the rods between the shelf above and the cabinet floor, tight enough that they cannot move. Sort the pans by size, biggest bay at the back, smallest at the front, so every handle is easy to reach.
Lids stand in the last bay, edge first, sorted by size. The whole cabinet becomes a filing cabinet for pans.
Fix two tension rods upright between the shelf and the cabinet floor.
Sort the pans by size, biggest bay at the back.
Stand the lids in the last bay, edge first.
9. A Rack in the Oven Drawer That Organizes Flat Pans and Lids
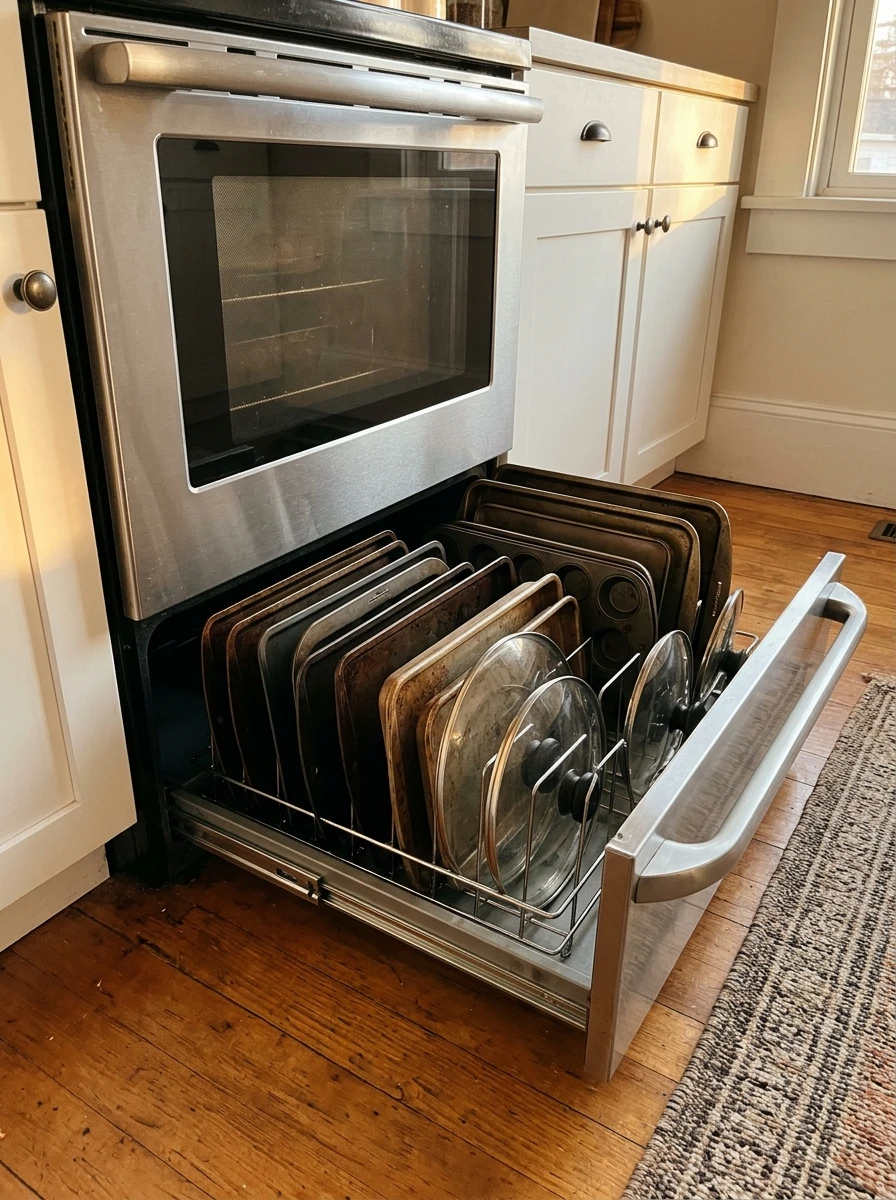
The drawer under the oven is the most forgotten storage in the kitchen. It holds one warped tray and a tangle of lids, nothing else. A low rack inside it files flat pans and lids upright, like records in a crate. Each piece slides into its own slot, and you can pull one out without moving the rest.
Measure the drawer height first. The rack must sit low enough that the drawer still closes, with an inch to spare above the tallest lid. Keep the heaviest tray at the back, so the drawer never tips forward when it opens.
This is one of those IKEA kitchen hacks that turns dead space into daily storage, and it needs no tools at all.
Measure the drawer height first. The rack must leave an inch above the tallest lid, or the drawer will not close.
10. A Freestanding Pot Tower That Stands in a Corner of the Kitchen
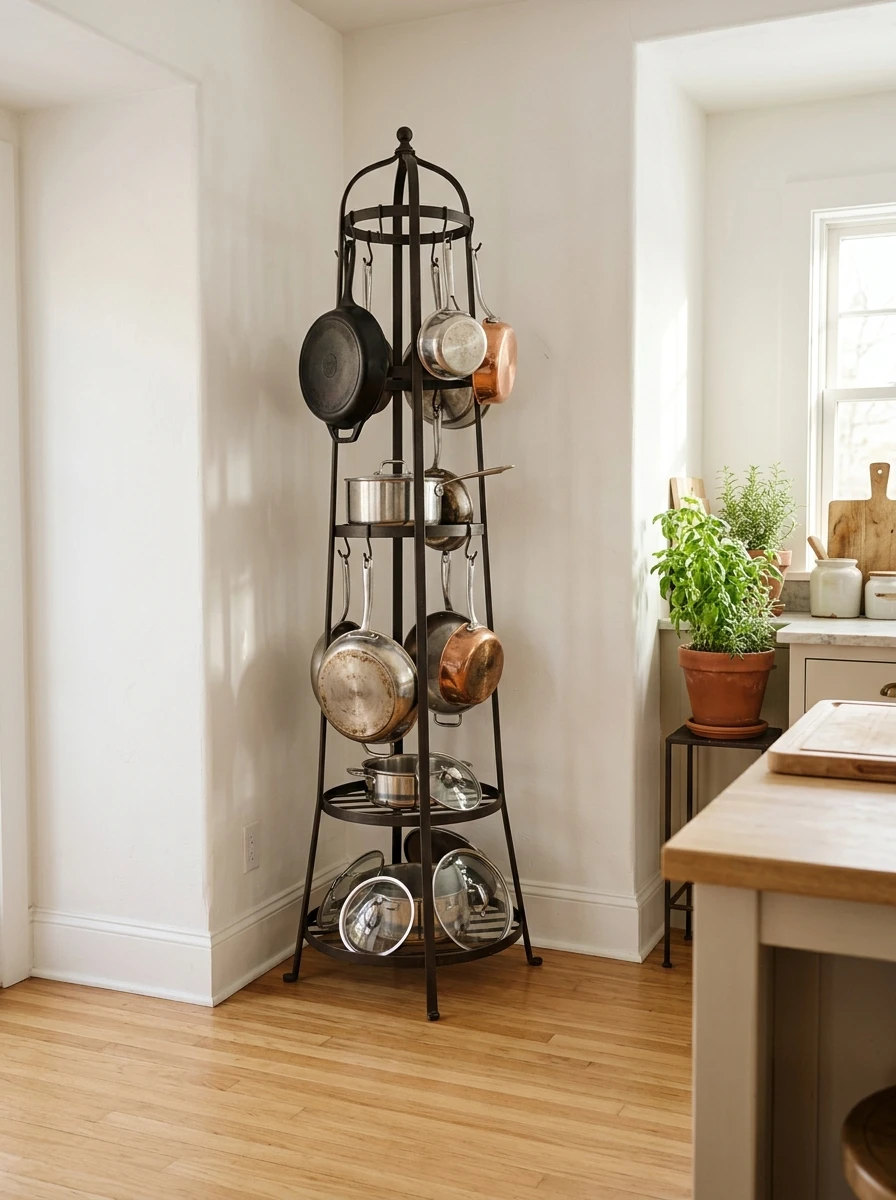
A dead corner is the worst spot for pots because nothing fits there except the pans you never use. A freestanding pot tower stands in that corner and holds pans on stacked hooks, one above the other. The tower needs no screws, so you can move it when the kitchen changes, and it turns wasted floor space into storage.
Put the heaviest pan on the lowest hook, so the tower stays steady. Hang the lightest pan at the top, and keep the tower a hand away from the wall, so handles never scrape the paint.
Lids hang from the top hooks by their knobs, or stack on the base, where they stay out of the way.
What to grab first
11. A Folding Pot Rack That Flattens Against the Wall When Not in Use
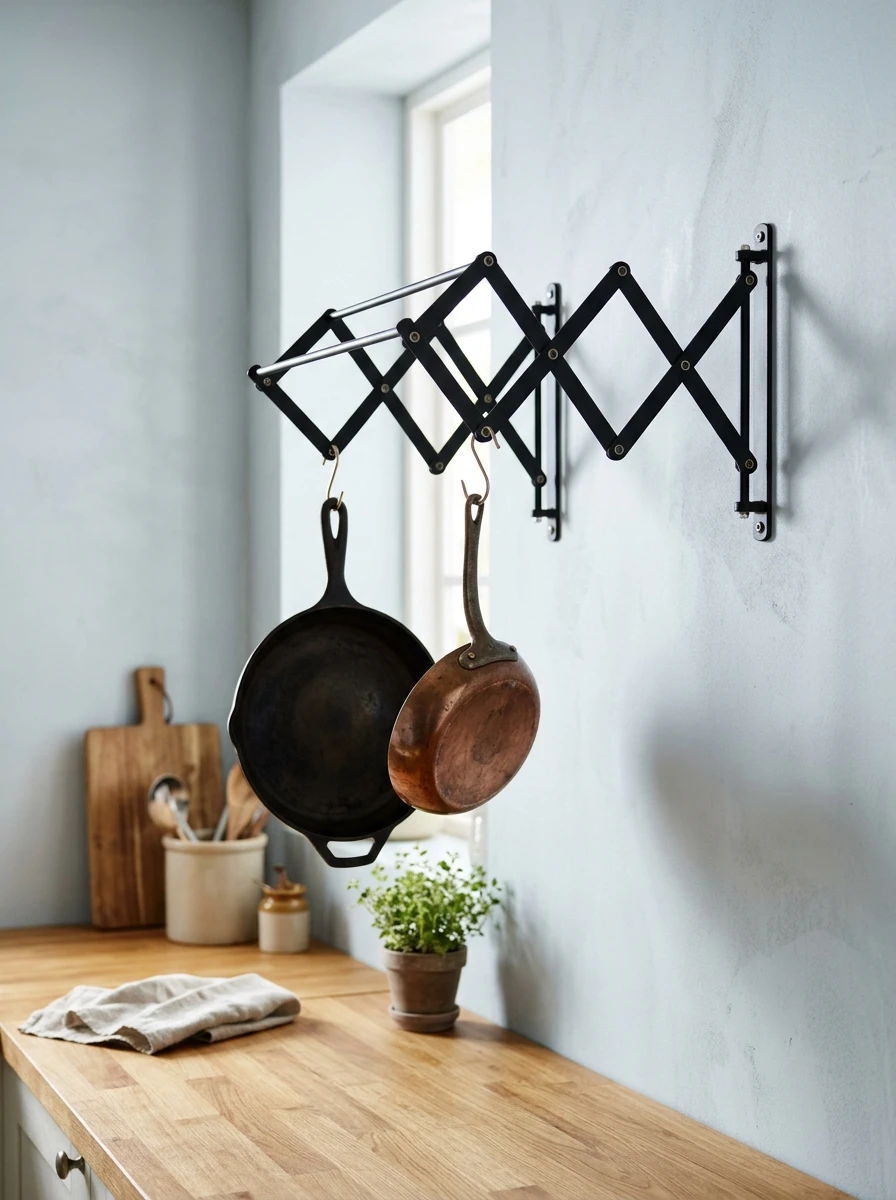
A fixed pot rack is always in the way when you are not cooking, and it always looks full. A folding rack fixes that. It mounts on the wall with hinges, swings out when you need it, and folds flat when dinner is done. The pans hang on hooks along its arms, and the whole rack sits a hand deep when it is closed.
Fix it to a wall stud, not just plaster, because a full rack of pans is heavy. Open it only as far as you need, and close it flat after every meal, so it becomes a habit.
Two pans on the rack is plenty. The rest stay in the cabinet, ready for the next meal.
12. A Pull-Down Shelf That Brings Pots Down From the Upper Cabinet
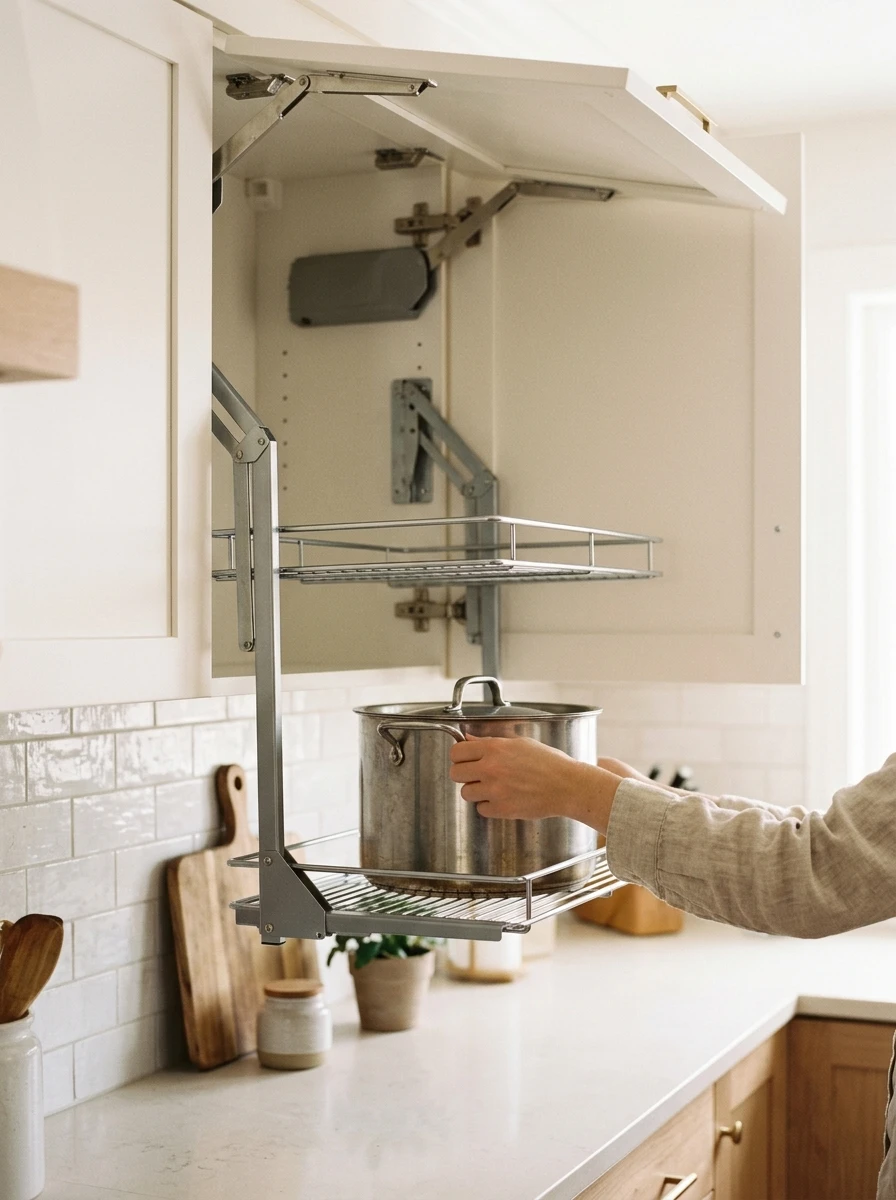
Upper cabinets are the hardest place to store pots because the heavy ones sit above your head. A pull-down shelf inside the cabinet brings them down to you. Pull the handle, and the shelf swings down and out to chest height. Lift the pot off, cook, and push the shelf back up when you are done.
Check the weight limit before you buy. Most pull-down shelves hold about ten kilos, which covers a stockpot and two saucepans, but not a full set of cast iron. Keep the heaviest pot at the front, so it is the first one you reach.
Among all the IKEA kitchen hacks for heavy pots, this one saves your shoulders most, since the shelf does the lifting.
- ▸Pull the handle and the shelf swings down to chest height.
- ▸Keep the heaviest pot at the front, so it is the first one you reach.
- ▸Push the shelf back up when you are done, and it locks in place.
13. A File Organizer on a Shelf That Files Pot Lids Like Papers
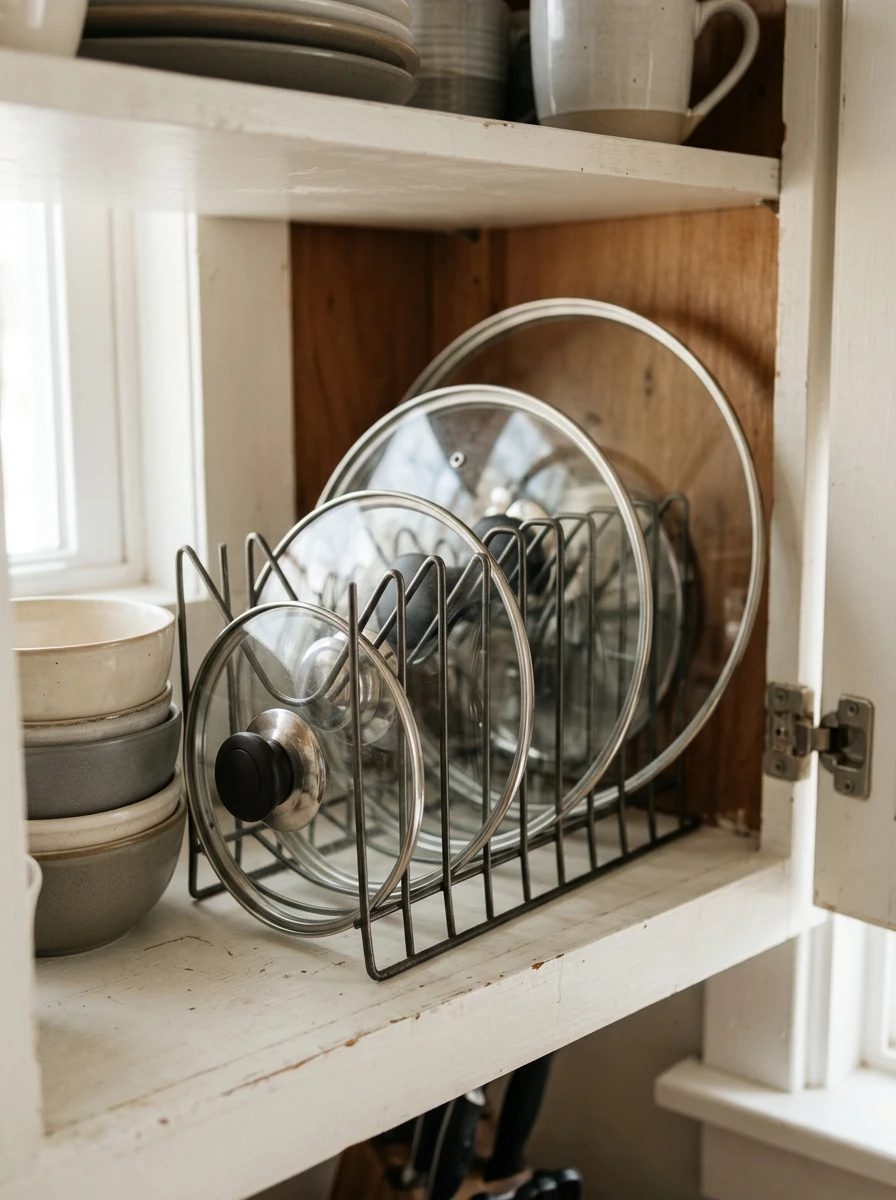
Lids are flat, thin, and always sliding, which makes them perfect for a file organizer. A metal file organizer on a cabinet shelf holds each lid upright in its own slot, like papers in a tray. You flick through them by size, pull the one you want, and the rest stay standing in line.
Pick an organizer with slots wider than your thickest lid, glass lids included, and check that it fits the shelf height with the lid standing tall. A heavy base keeps it steady when you pull a lid out fast.
Sort the lids smallest at the front, largest at the back, and label the shelf edge if two lids look alike.
14. A Hanging Basket for Lids That Hooks Over a Cabinet Door
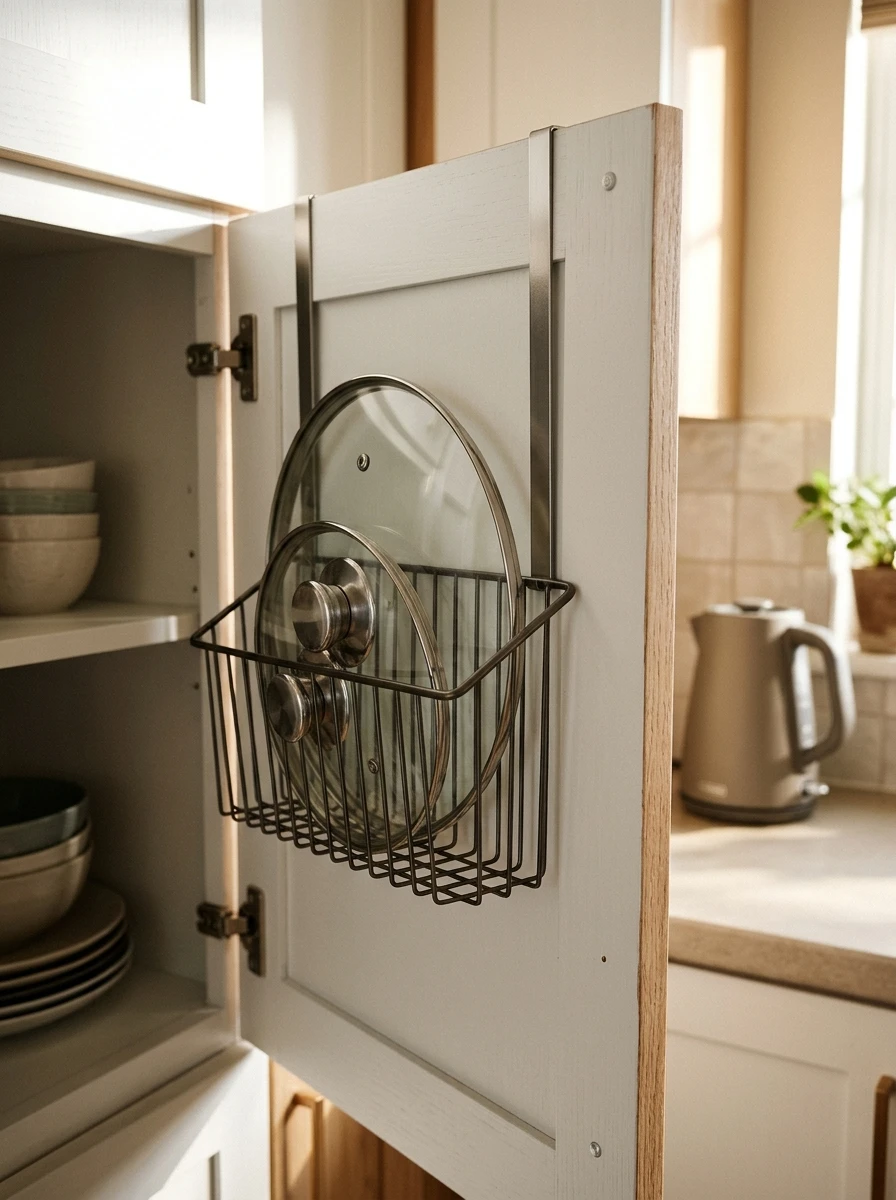
The inside of a cabinet door is empty, and it is right where you stand when you cook. A wire basket that hooks over the top of the door turns it into a lid holder. The lids slide in upright, handles up, and the door still closes because the basket is slim enough to clear the shelf inside.
Measure the door thickness first, so the hook grips tight and never slips. Keep only two or three lids in the basket, so the door never feels heavy or swings open on its own.
If the door has a soft close hinge, test it with the basket full before you load it for good.
💡 Quick Tip
Measure the door thickness first, so the hook grips tight, and keep only two or three lids in the basket so the door never feels heavy.
15. A Lid Rest on the Counter That Holds a Hot Lid While You Cook
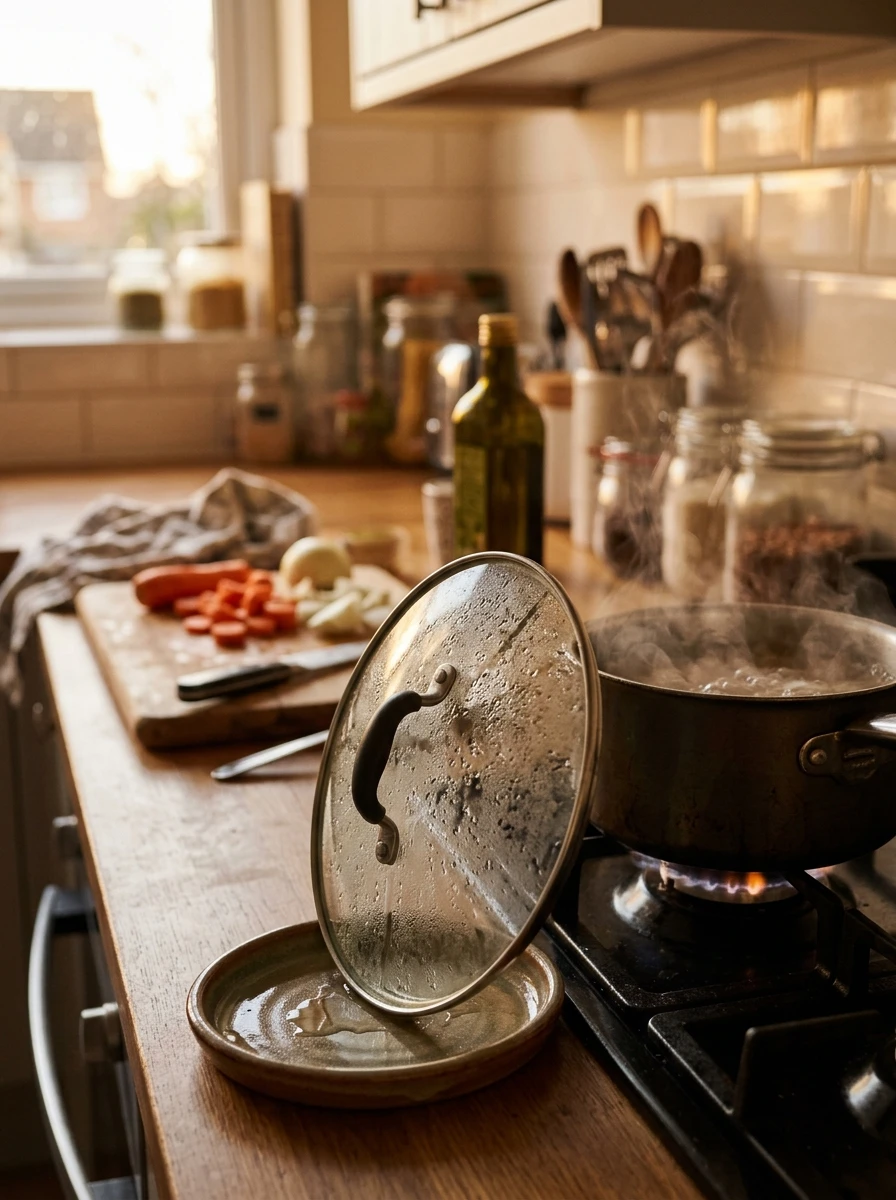
A hot lid has nowhere safe to go while you stir. It lands on the counter, drips, and leaves a wet ring, or it balances on the pan edge and slides off. A lid rest is a small heatproof stand that sits on the counter beside the stove. Lift the lid off, set it on the rest, and the drips collect in its tray.
Pick a rest with a raised edge, so the drips stay in the tray and never reach the counter. A rest that holds the lid upright takes less space than one that holds it flat, and it keeps the hot side away from your hand.
Rinse the rest after dinner, and it is ready for the next pot. Small, simple, and used every day.
Also view: 17 IKEA Kitchen Hacks for Small Kitchens With Limited Counter Space
Hot lid on the counter, drips and a wet ring.
Lid upright on its rest, drips caught in the tray.
Pots, Pans and Lids, All in Their Place
Pots, pans, and lids do not need a bigger kitchen. They need a fixed spot each, a hook, a slot, or a shelf, so you can grab one piece without moving five others. The fifteen ideas above all do that one job.
Pick the under-cabinet pot rack and try it this weekend. It takes under an hour, it costs little, and it frees the cabinet for the pans you use less. When you cook on Sunday and the right pan is already in your hand, you will feel the change.
Save this list and pin it for the next time your cabinet fights back. These IKEA kitchen hacks will be here when you are ready for the next one.
Before You Start
- ✅ Tape measure and the width of your cabinets, drawers, and shelves
- ✅ One hack picked, the one that fixes your biggest daily annoyance
- ✅ A note of the exact size before you shop, so nothing comes home wrong
- ✅ A free evening to fit it and live with it for a week
- ✅ A clear cabinet to start from, so you can see the difference right away