13 IKEA Kitchen Hacks for Budget-Friendly Kitchen Makeovers
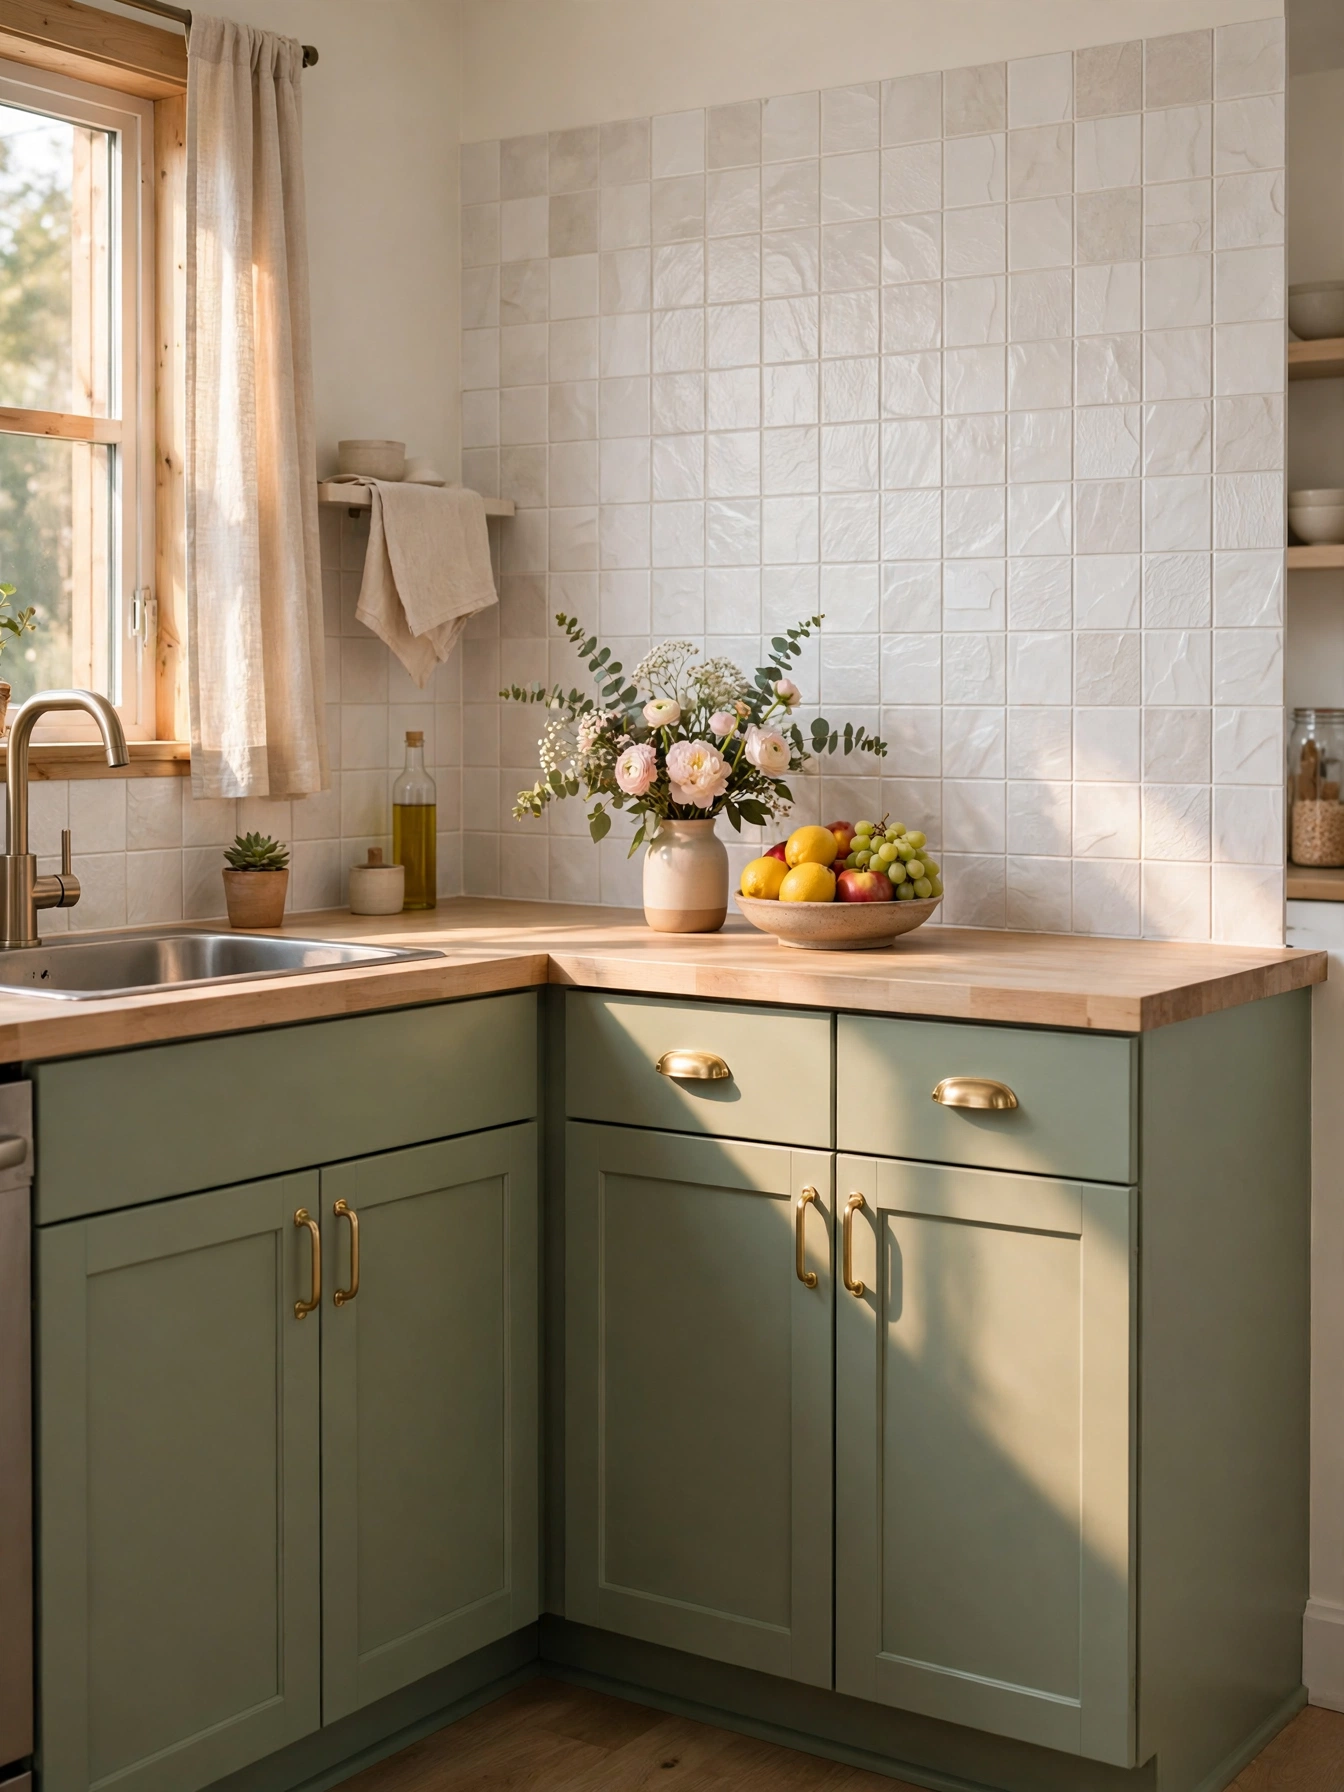
A kitchen makeover sounds like a month of dust and a bill that makes your eyes water. The quote comes back, the number runs into four figures, and the dream quietly goes back on the shelf for another year.
The truth is that most tired kitchens do not need new cabinets or a new layout. They need a few surfaces refreshed, a few tired details swapped, and a little colour in the places your eye lands first.
These IKEA kitchen hacks work on a small budget because they change what you notice first. A cane door front, a painted ceiling, a fresh shade on the pendant, and the room reads as new, even though not one cabinet has moved.
Pick three ideas, set one weekend aside, and spend less than a weekly shop on each one. The kitchen will look like a makeover, and your bank balance will barely notice this month.
1. Cabinet Door Centres Swapped for Cane or Glass That Lighten the Whole Kitchen
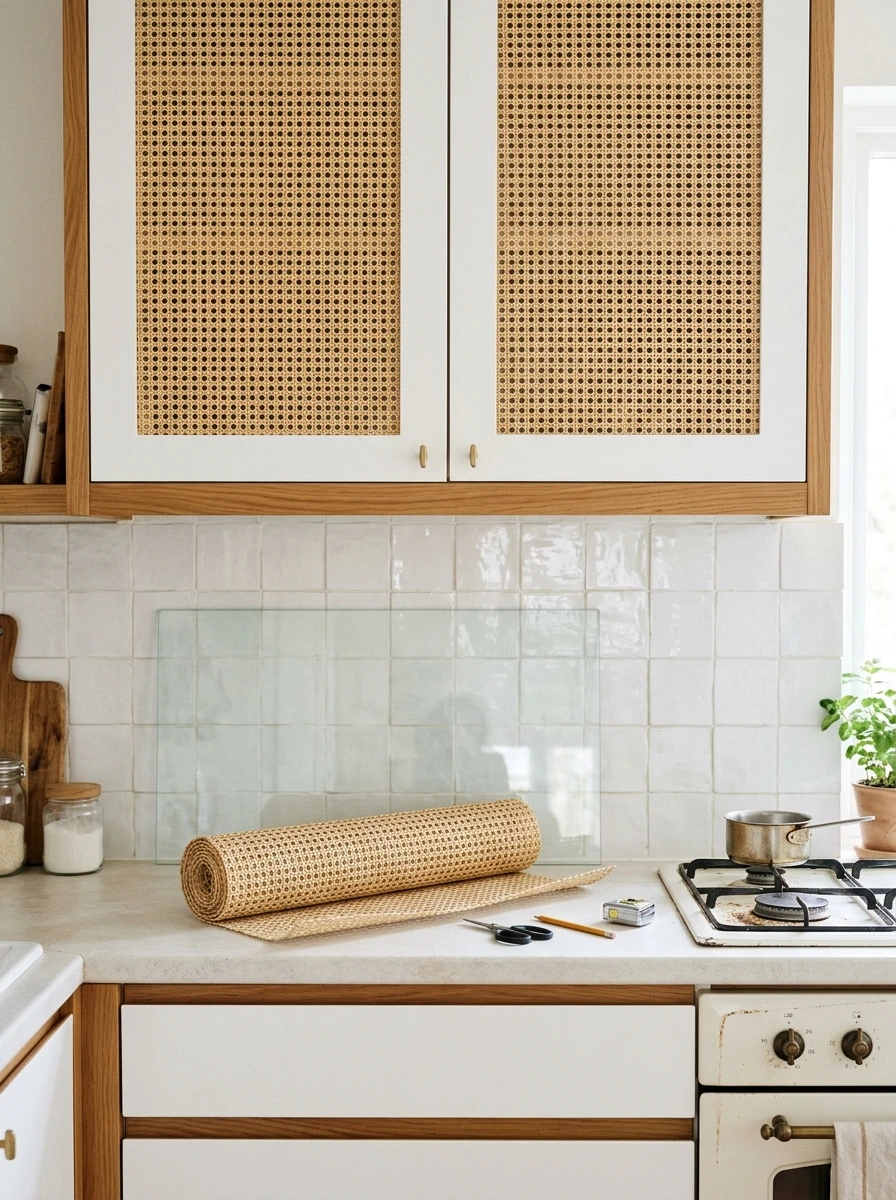
Solid cabinet doors can make a kitchen feel heavy, and replacing the run costs more than most budgets allow. Swapping just the centre panel of a few doors changes the look for a fraction of the price, and the frames stay exactly where they are.
Ask a joiner to cut out the centre of two or three upper doors, then fit cane webbing or a pane of glass into the opening. Cane warms the room and hides the clutter behind it, while glass shows off stacks of plates and bowls.
Start with the doors beside the hob, and keep the rest plain so the new fronts stand out. A roll of cane webbing and a few panes of glass cost less than one new cabinet door.
Also view: 10 IKEA Kallax Makeover Ideas Using Paint for a Fresh New Look
Solid doors that hide everything and make the whole run feel heavy and closed in.
Cane or glass centres that lighten the doors and show off neat shelves behind them.
2. Contact Paper Over the Tired Countertop That Fakes a Stone Finish for Pennies

Countertops set the tone of a kitchen, and a scratched laminate top drags the room down. A new worktop means a bill that eats the budget, so a contact paper refresh is the cheaper way to fake the same change.
A roll of marble effect contact paper costs less than a takeaway, and it sticks onto a clean, dry counter. Smooth it down with a credit card to push out air bubbles, and trim the edges with a sharp craft knife for a clean line.
Pick a light marble print, and keep the pattern soft so the seams disappear. Seal the edges with clear silicone where the counter meets the sink, and wipe spills up quickly, so the paper lasts a year or more.
What to measure first
3. Stick-On Moulding Trim That Turns Flat Cabinet Doors Into Framed Panels
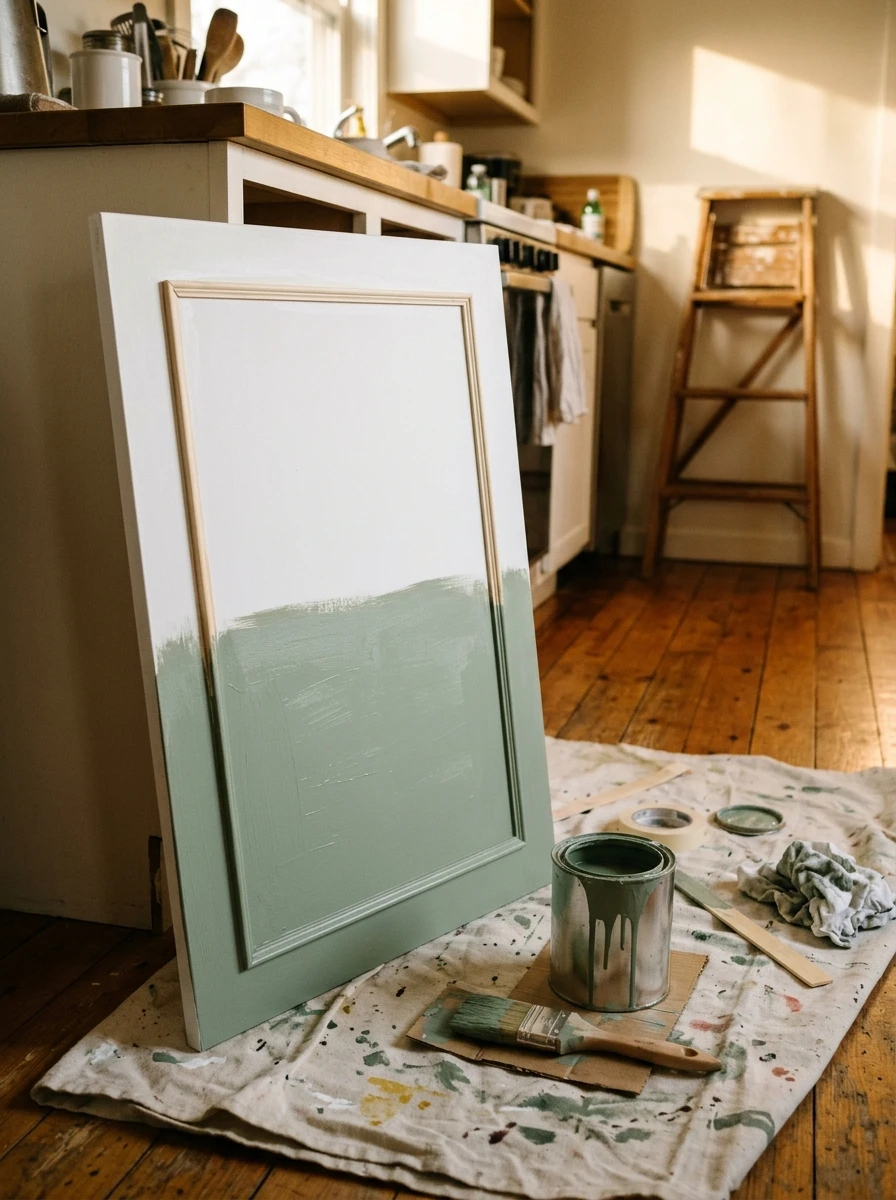
Flat doors look plain because nothing breaks up the surface, and new shaker doors cost a fortune. Thin strips of stick-on moulding trim give the same framed look for a few pounds a door, and the change shows once the paint dries.
Cut the trim to make a rectangle on each door front, and fix it with a grab adhesive. Paint the door and the trim the same colour, so the frame reads as part of the door. These IKEA kitchen hacks work best when the finish looks built in, not added on.
Keep the rectangles the same size on every door, and leave a neat gap from each edge. One afternoon covers a whole run of doors, and a tin of paint finishes the job.
4. A Soft Colour on the Ceiling That Makes the Whole Kitchen Feel New
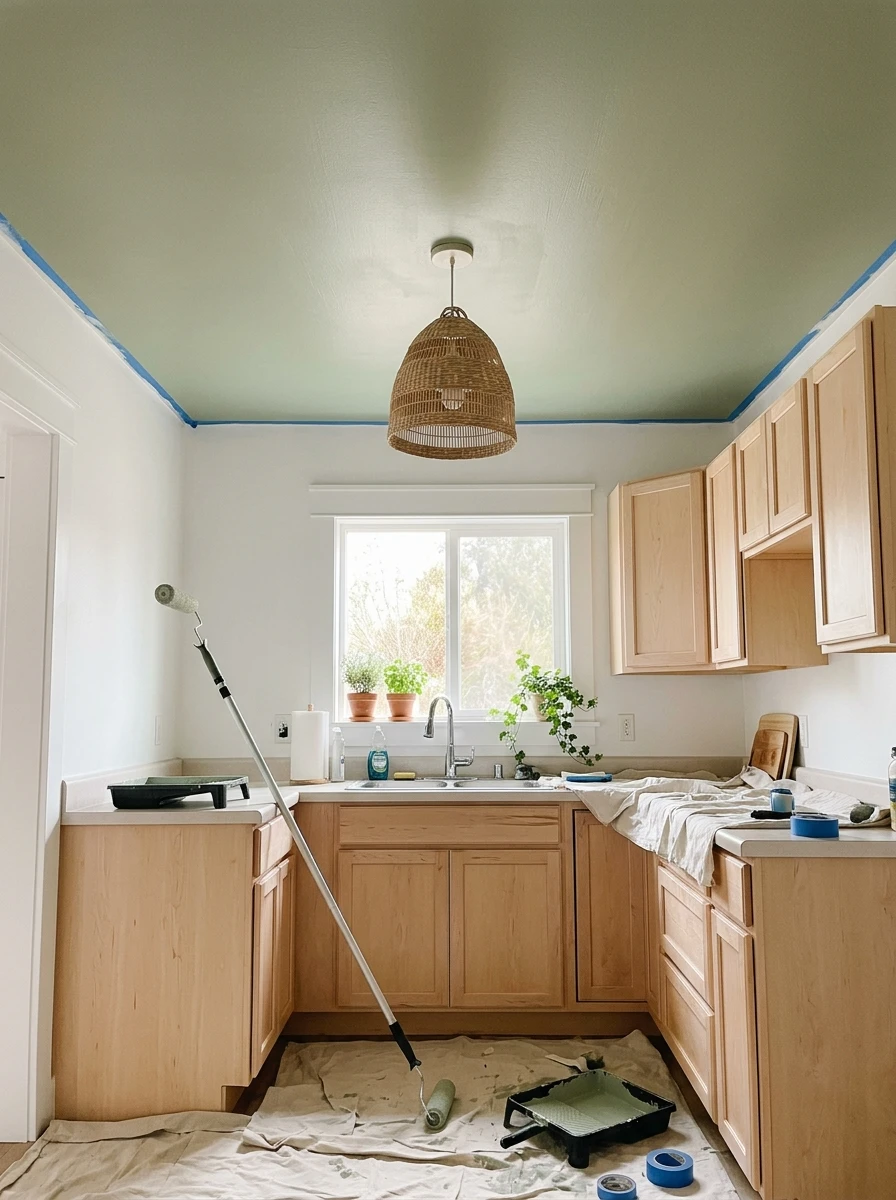
Nobody looks at the ceiling on purpose, which is exactly why painting it changes the room. A flat white ceiling disappears, while a soft sage, pale blue, or warm cream ceiling pulls the eye up and makes the walls feel taller.
Pick a colour two shades lighter than the wall, so the ceiling feels bright rather than heavy. A single tin of matt emulsion covers most kitchen ceilings, and a roller on a pole keeps you off the ladder for most of the job.
Paint the ceiling before you touch anything else, since drips land on the floor and not on fresh paint. The room will feel taller, warmer, and finished, for the price of one tin.
💡 Quick Tip
Paint the ceiling before anything else, so drips land on the floor and not on fresh paint below.
5. A New Shade on the Old Pendant That Changes the Light Without Changing the Fitting
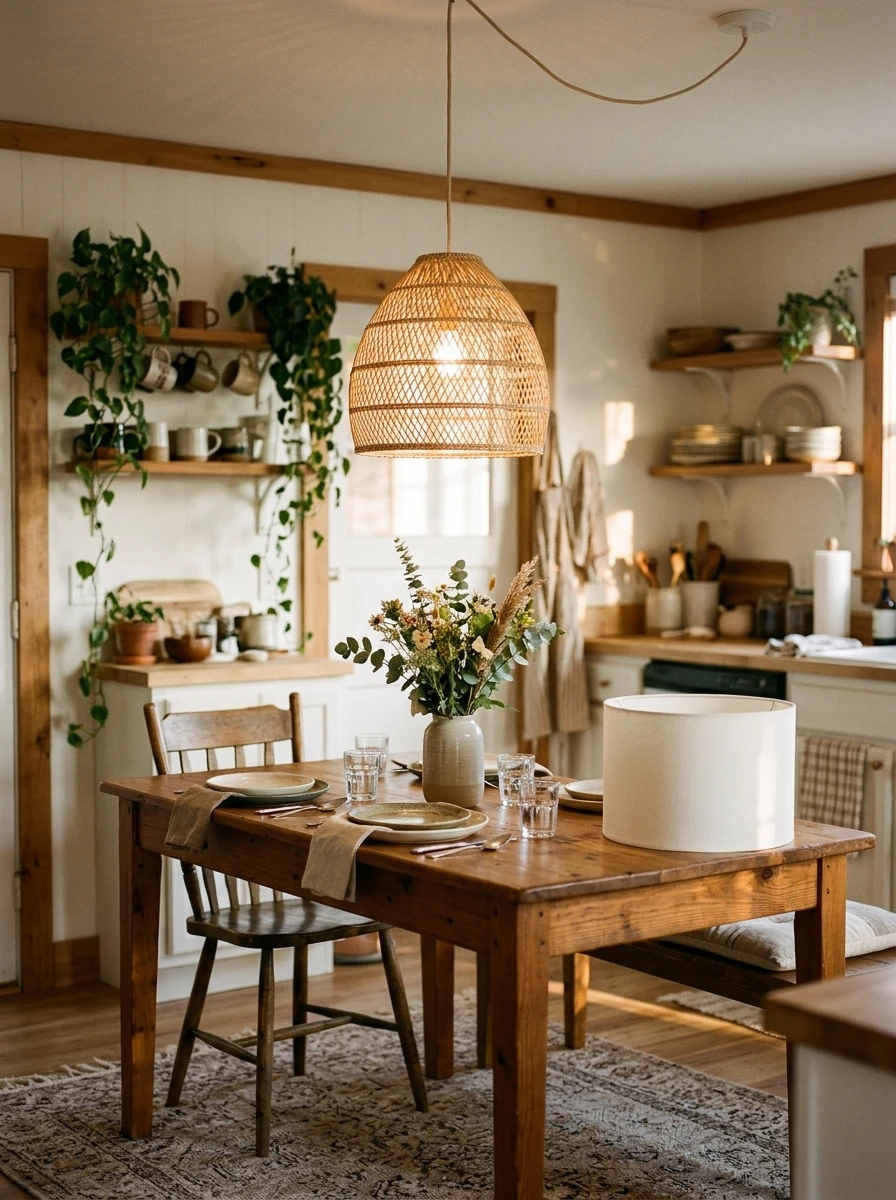
The pendant over the table sets the mood of the whole kitchen, yet most people live with the shade that came with the house. Swapping only the shade, and keeping the fitting and the wiring untouched, changes the light for the price of one new shade.
Unscrew the old shade, note the fitting size, and pick a new one in rattan, smoked glass, or painted metal. A wider shade spreads the light over the table, while a darker shade throws a warm pool of light downwards.
Hang the new shade at the same height as the old one, and try a warm bulb if the room feels cold at night. The fitting stays, the wiring stays, and the kitchen gets a new centrepiece in ten minutes.
6. A Spray-Painted Range Hood That Looks Like a Brand New One
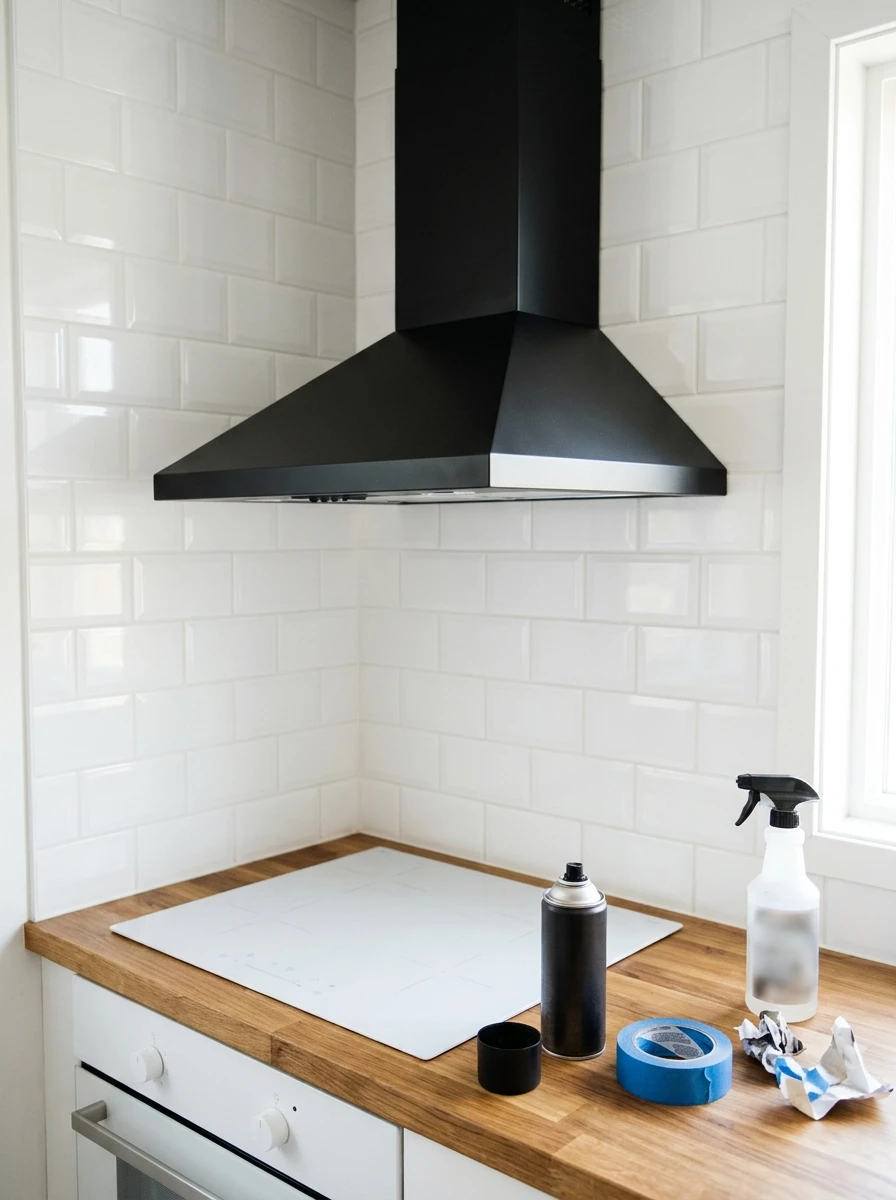
A stained range hood dates a kitchen faster than almost anything else, and a new hood costs hundreds. A can of heat resistant spray paint gives the old one a clean new skin, and the job takes less time than a weekly shop.
Take the filters out, wash the hood with a degreasing spray, and mask off the wall and the hob below. Spray in light coats from about a hand span away, and let each coat dry before the next, so the finish stays smooth.
Matt black suits a modern kitchen, while soft white blends into a pale room. Put the filters back once the paint has cured, and the hood will look like it arrived with the makeover.
| Old Hood | Spray-Painted Hood |
|---|---|
| Stained and yellowed, the first thing the eye catches | A clean new skin in matt black or soft white |
| A new hood costs hundreds, plus fitting | One can of heat resistant spray paint |
| A whole day of work and a fitter booked in | Less time than a weekly shop, no fitter needed |
7. A Slim Shelf Above the Window That Holds Plants and Jars in Dead Space
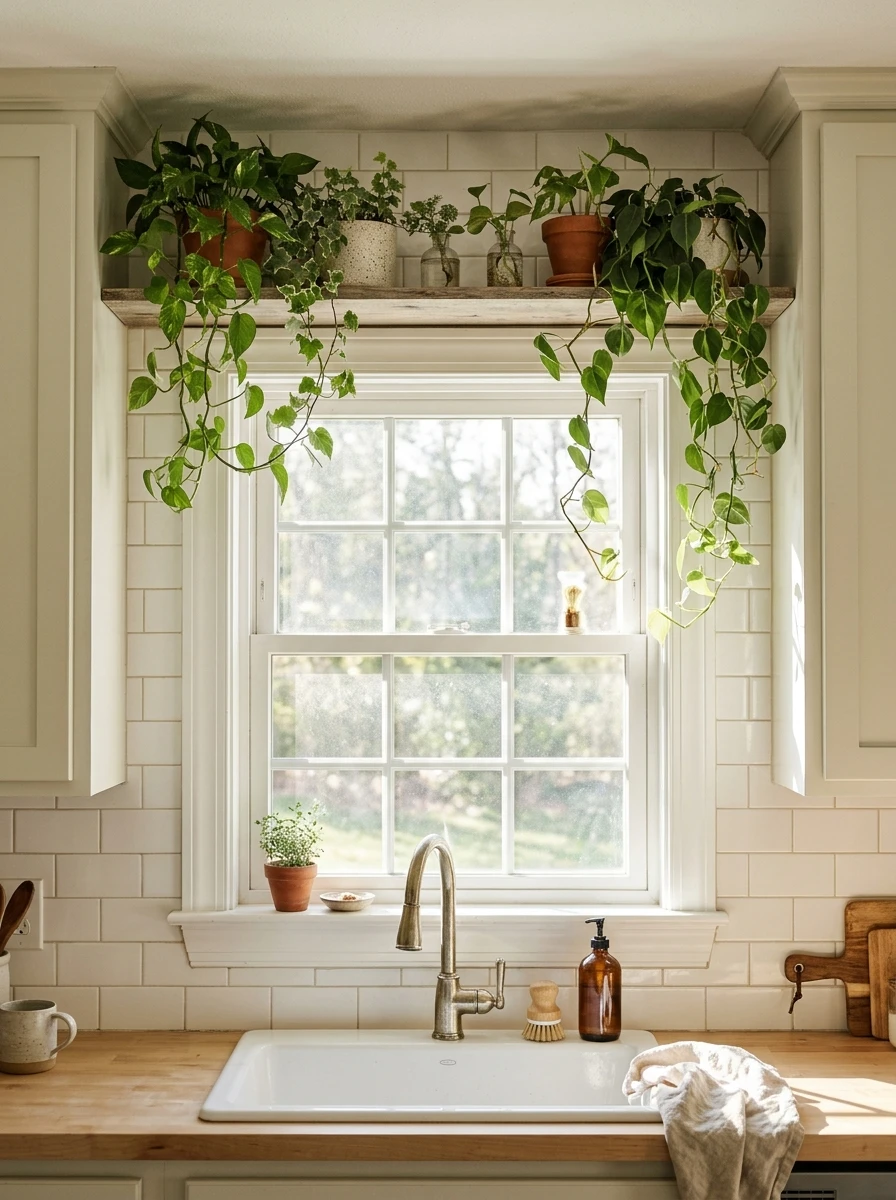
The wall above the window is dead space in most kitchens, a strip of plaster nobody uses. A slim shelf up there holds trailing plants, a row of jars, or the pretty bowls that never fit in the cupboard, and it costs less than a takeaway.
Fix the shelf with two small brackets, level it carefully, and keep it shallow so it never blocks the light. These IKEA kitchen hacks shine in dead space like this, where a small change adds storage without taking a single inch of counter.
Keep the shelf light and airy, with three or four items and plenty of gaps between them. Water the plants from a small jug kept on the sill, and the window becomes the prettiest corner of the room.
Keep the shelf shallow and light, so it never blocks the window light or crowds the frame.
8. Stool Seats Reupholstered in Wipe-Clean Fabric That Look Brand New
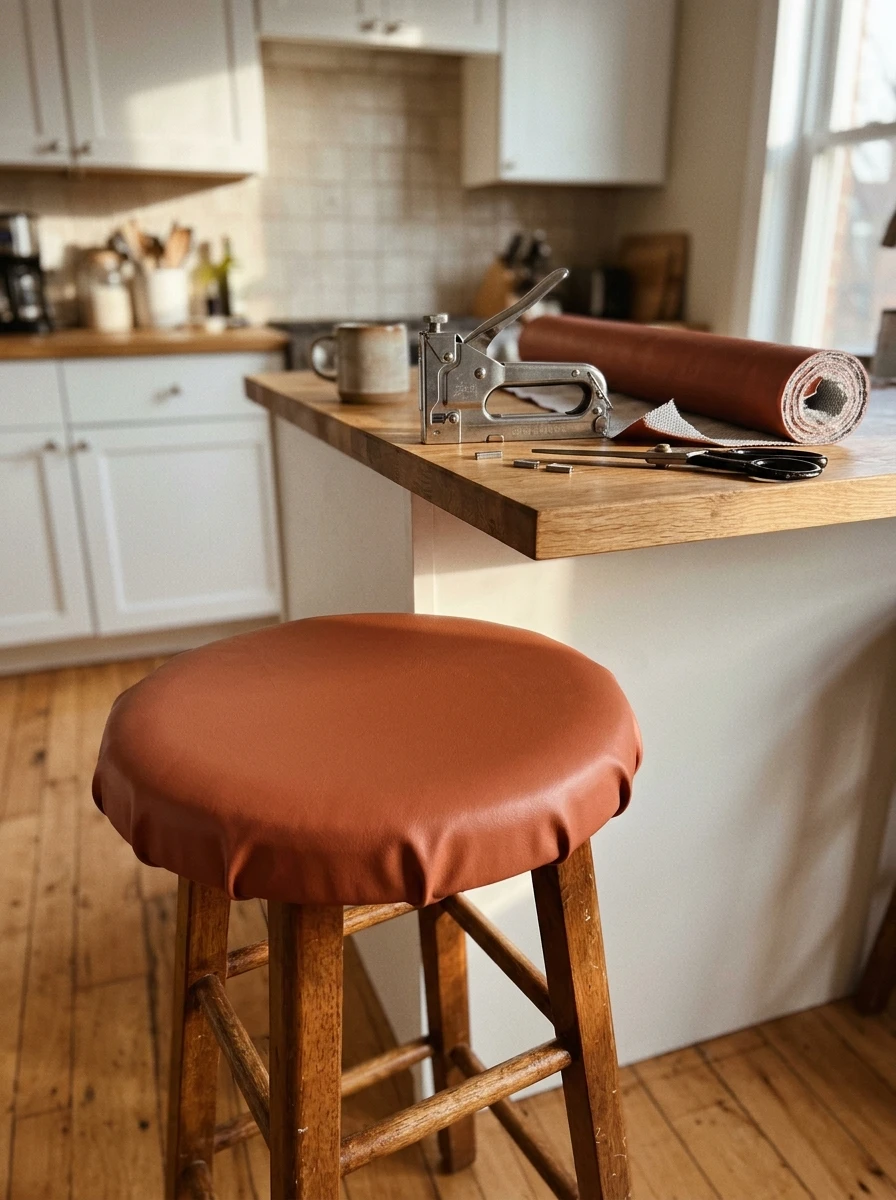
Bar stools take a beating, and torn or stained seats make the whole breakfast bar look tired. New stools cost a fortune, but a fresh seat cover costs a few pounds of fabric and half an hour with a staple gun.
Unscrew the seat from the stool base, lay it on a piece of wipe-clean vinyl or oilcloth, and pull the fabric tight as you staple it underneath. Trim the extra fabric, screw the seat back on, and the stool looks shop bought.
Pick a vinyl in a colour that matches the kitchen, and wipe it clean with a damp cloth after breakfast. The stools will survive sticky fingers, spilled juice, and another five years of mornings.
Unscrew the seat from the stool base and lay it face down.
Pull the wipe-clean vinyl tight and staple it underneath.
Trim the extra fabric and screw the seat back on.
9. A Bold Colour Painted Inside the Cabinets That Shows Every Time You Open a Door

The inside of a cabinet is the one place you see every single day, yet it stays plain white in almost every kitchen. A bold colour on the back panel turns an ordinary cupboard into a small surprise, and a tester pot is all it costs.
Empty one cabinet, wash the back panel, and paint it in a deep teal, warm terracotta, or soft mustard. The colour shows every time you open the door, and it makes the plates and glasses in front of it look styled rather than stored.
Start with the glass fronted cabinet or the one beside the kettle, where the colour gets seen most. The rest of the kitchen stays calm, and one small pop of colour does all the talking.
Paint the back panel of the glass fronted cabinet first.
Match the colour to a small detail already in the room.
Painting the inside of every cabinet at once.
A colour so dark the cabinet feels smaller.
10. Stick-On Panelling on the Island Base That Gives It a Fitted Look
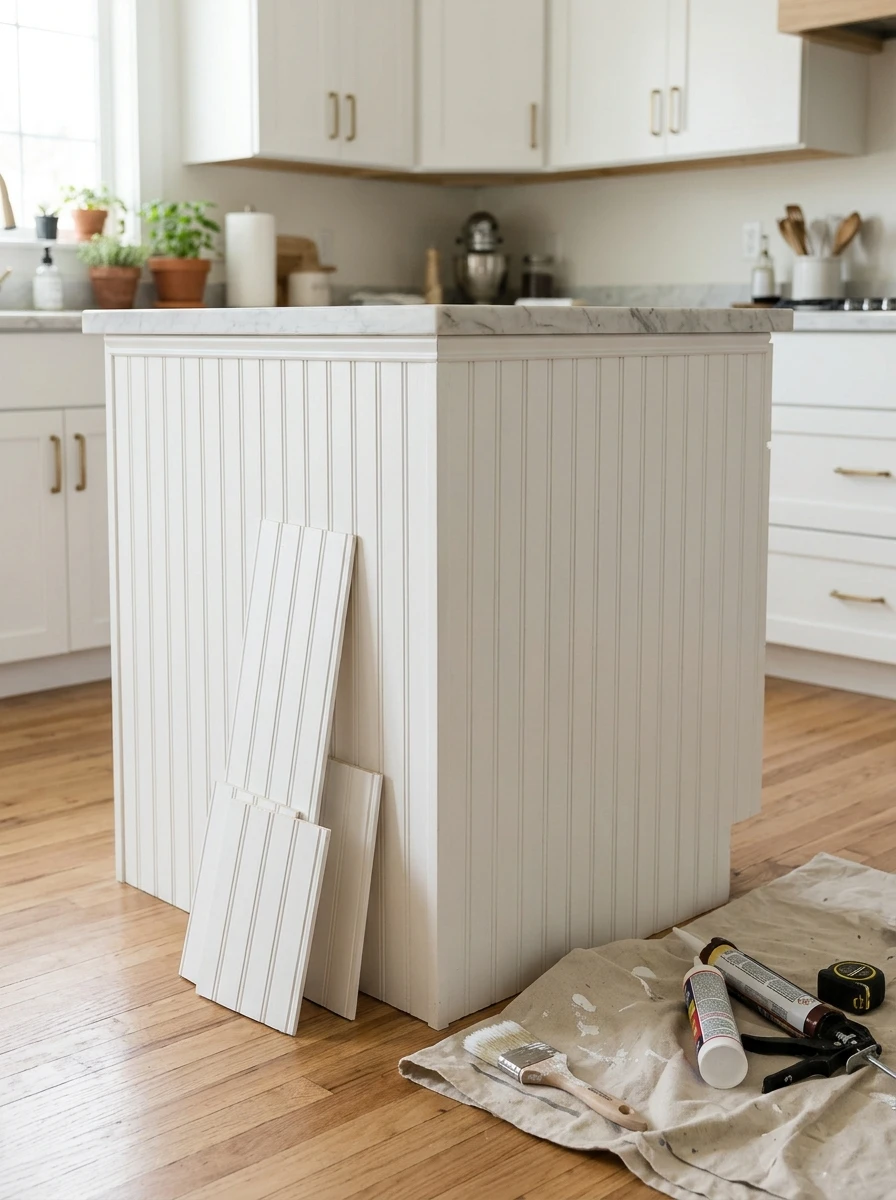
A plain island base looks like a box in the room, and a new island is out of reach. Stick-on beadboard panelling gives it a fitted, carpenter made look for the price of a few panels and a tube of adhesive.
Measure the front and sides of the island, cut the panels to fit, and glue them on with a grab adhesive. Paint the panelling the same colour as the cabinets, and add a thin trim to hide the join. These IKEA kitchen hacks prove a flat surface is only a panel away from looking custom made.
Keep the pattern straight, and the island will look like it was built into the room. The change costs less than one takeaway a week, and it anchors the whole kitchen.
- ▸Measure the front and sides of the island base.
- ▸Cut the beadboard panels to fit each side.
- ▸Glue the panels on, paint to match, and trim the top edge.
11. Matching Switch Plates and Outlet Covers That Tidy Up the Walls

Switch plates and outlet covers are the smallest detail in a kitchen, and the grubby plastic ones that came with the house quietly drag the walls down. Matching plates in brushed metal or painted wood cost a few pounds each, and they tie the whole room together.
Turn off the power at the fuse box first, then unscrew each plate and swap it for the new one. Match the finish to the taps or the cabinet handles, so the small details repeat across the room.
Do the whole kitchen in one go, since a single new plate next to old yellowed ones only shows up the difference. Ten minutes and a screwdriver later, the walls look finished.
12. The Kitchen Door Painted a Bold Colour That Anchors the Whole Room

The door into the kitchen is the first thing you touch every morning, yet it is usually the same white as every other door in the house. One bold colour on that single door turns it into a feature, and a tester pot or a small tin is all you need.
Sand the door lightly, wipe off the dust, and paint it in a deep green, navy, or warm terracotta. Keep the frame white, so the colour reads as a deliberate choice rather than a mistake.
Match the door to a small detail in the room, like the stool seats or a plant pot, so the colour repeats. The hallway gets a lift too, and the kitchen gains a front door of its own.
Before you paint the door
13. Mismatched Thrifted Chairs Painted One Colour That Make the Table Look Planned
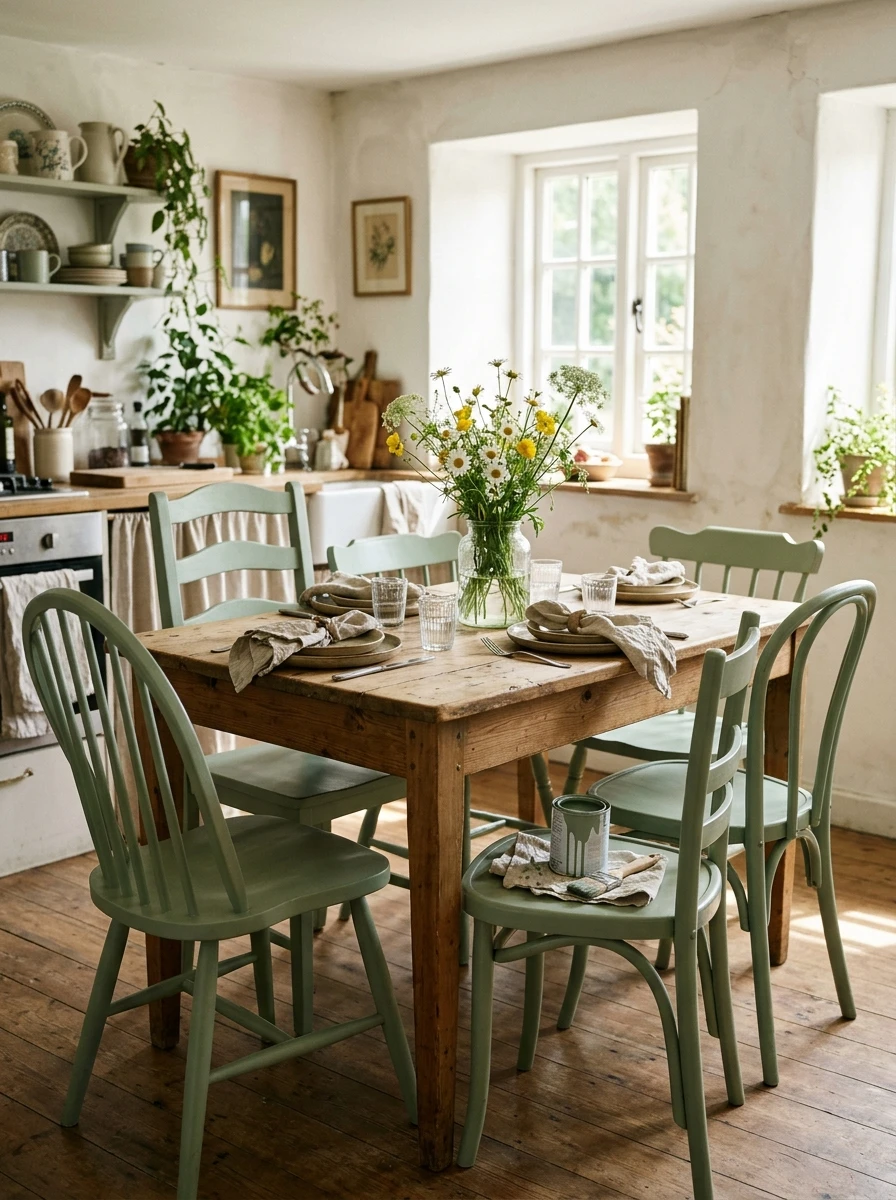
Mismatched dining chairs look like a jumble sale, and a new matching set costs more than the table. A set of thrifted chairs painted one colour looks planned instead of accidental, and each chair costs less than a takeaway.
Hunt charity shops and online listings for solid wooden chairs with good bones, and ignore the finish. Sand them lightly, prime the bare wood, and paint every chair the same colour, even if the shapes are different.
Keep the seats in a wipe-clean fabric or a matching paint, and the set will survive family dinners. The table suddenly looks styled, and nobody will guess the chairs came from four different homes.
A Kitchen That Feels New, One Small Swap at a Time
A makeover does not need a skip in the driveway or a month of dust. A cane door front, a painted ceiling, and a shade swapped on the pendant change what the room feels like, and each one costs less than a weekly shop.
That is the secret of a budget makeover: spend where the eye lands first, and leave the rest alone. The cabinets can stay, the layout can stay, and the kitchen still feels new every morning.
Start with the idea that made you smile, then add one more next weekend. Save this list for the next payday, and these IKEA kitchen hacks will be waiting when the next small swap is due.
Before You Start
- ✅ A roll of cane webbing or a pane of fluted glass for the door fronts
- ✅ A roll of marble effect contact paper and a craft knife for the counter
- ✅ A tin of paint and a roller for the ceiling and the kitchen door
- ✅ A new pendant shade and a warm bulb for the table
- ✅ A staple gun and wipe-clean vinyl for the stool seats